In this post, you’ll learn the best video settings for the Canon 80D.
Think the Canon 80D is too old? Think again! The Canon 80D in 2023 is still a very powerful system for photos AND video! You might not use it to film the next Netflix Original, but it’s still an amazing camera!
The Manual
The online Canon 80D manual is the reference for this post. Download it as a PDF so you can refer to it later as needed.
Before you begin
- Power on your Canon 80D
- Switch to Video mode
- Rotate the mode dial to “M” (manual mode)
- Make sure the Lock switch is unlocked

The menus change depending on what mode you’re in. You need to be in Video and Manual modes to see ALL the menu items.
Press the [Menu] button.
Tap to select the first tab in the red menu, and go to the 1st page.
CAMERA MENU (Red)
Lens aberration correction
Best Setting: Enable both options.
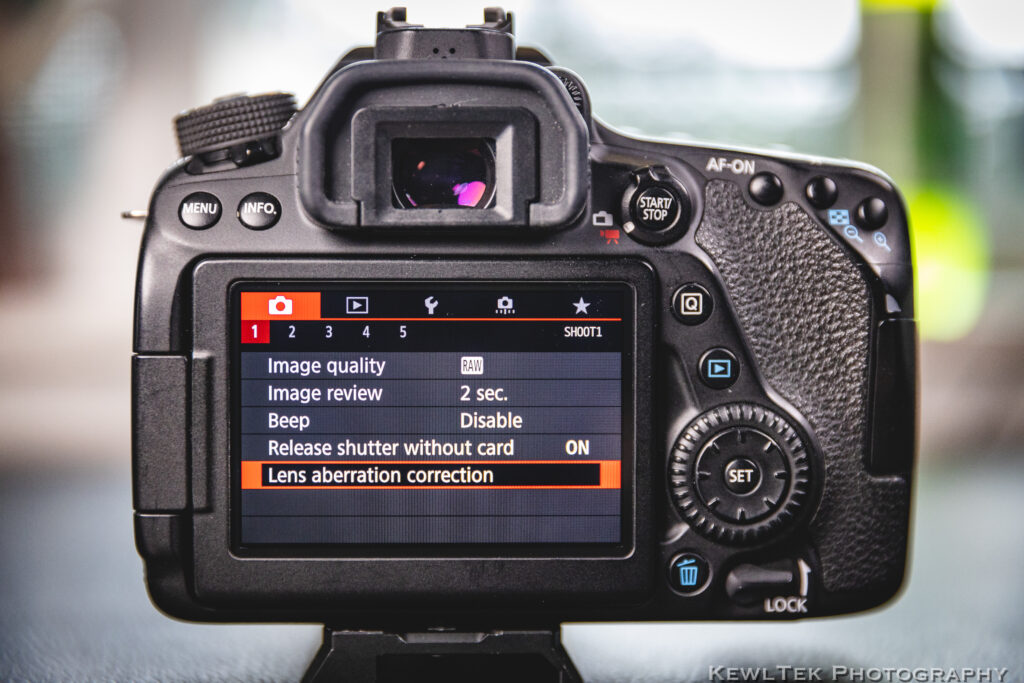
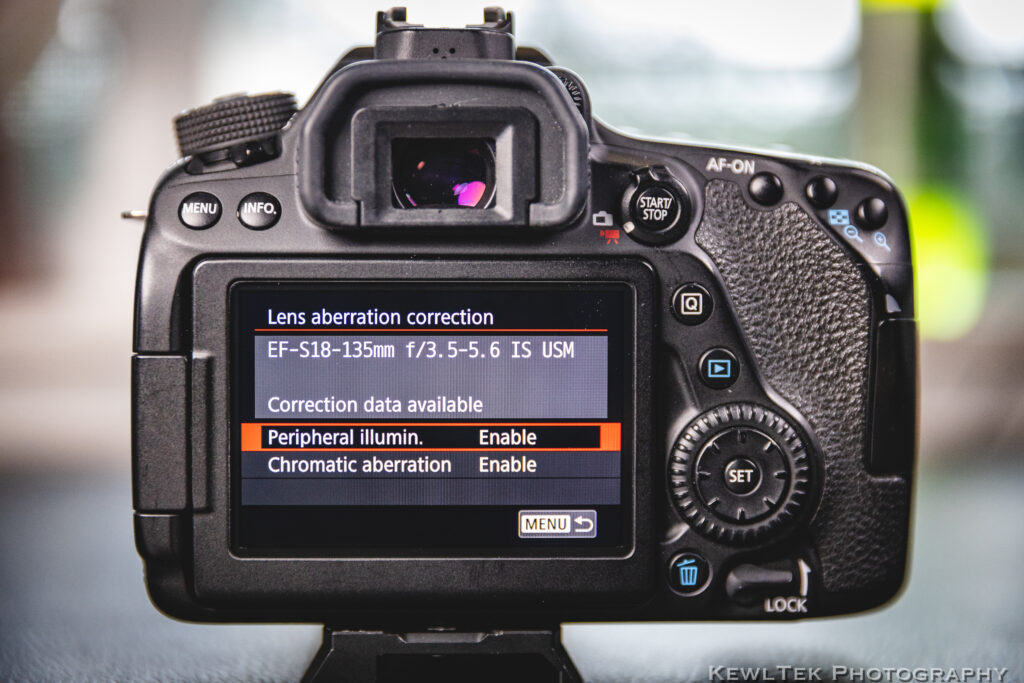
When you attach a Canon lens, your camera controls peripheral illumination and chromatic aberration, which is helpful!
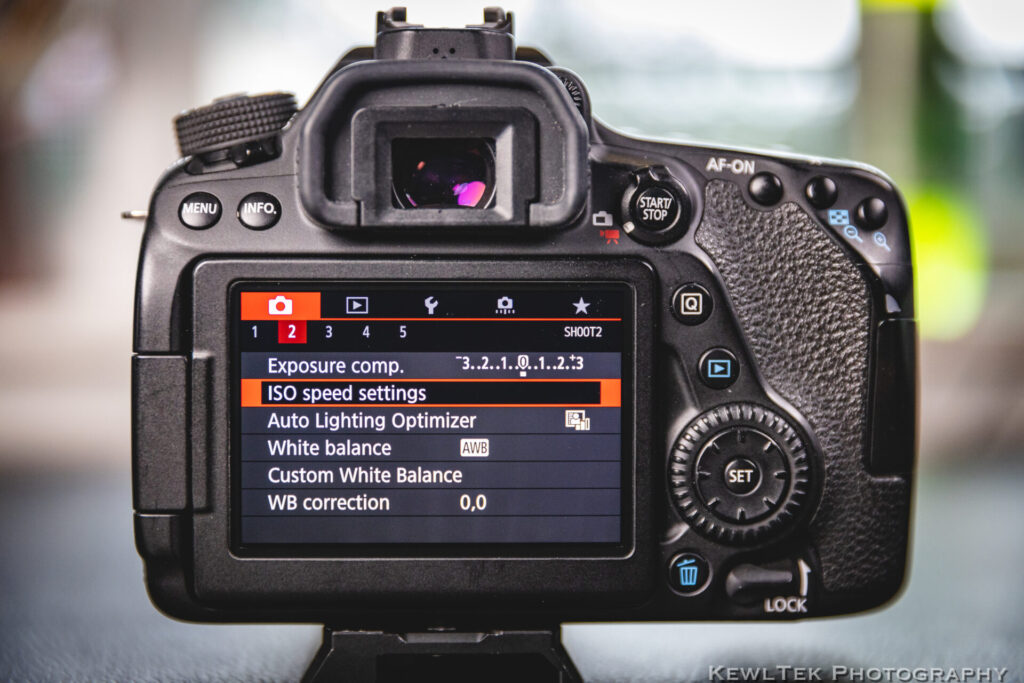
ISO speed settings
Best Setting: Select “Range for movies”, and set your ISO to 100 on the minimum side, and H(25600) on the maximum side. That way, you’ll have the full ISO range available when recording.
Auto Lighting Optimizer
Best Setting: “Standard” (Disabled in Manual Mode)
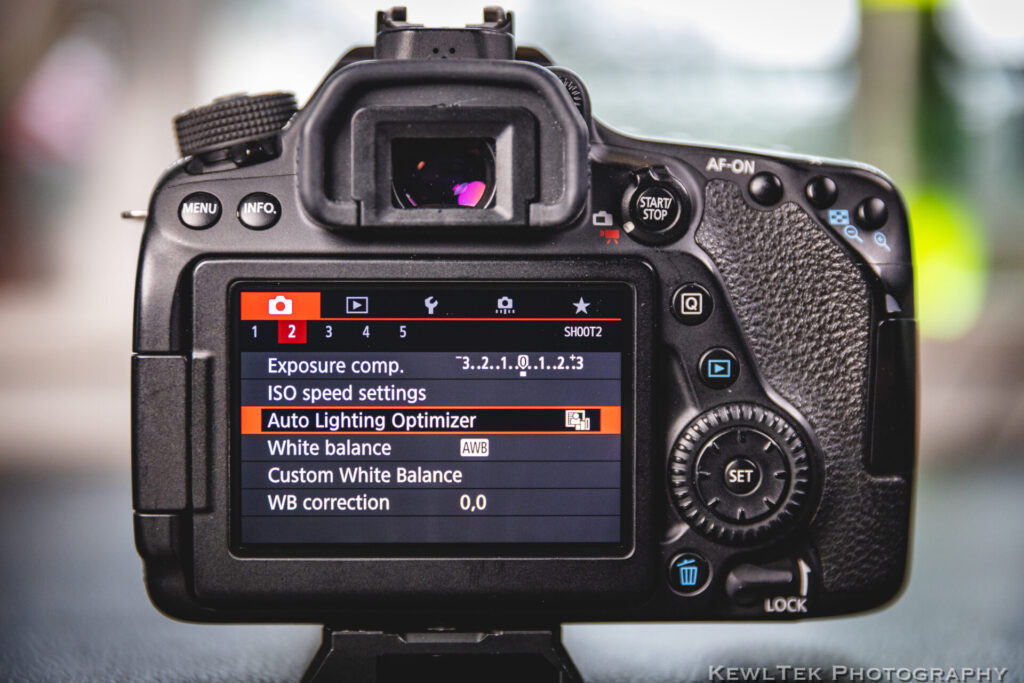
In Manual Mode, this setting is disabled—which is what we want.
When you’re filming something, you don’t want the camera to automatically adjust exposure. Ever seen videos where the footage shifts brightness all by itself? It’s distracting, and a hallmark of an amateur videographer. Leave this setting disabled!
White Balance
Best Setting: [AWB]

White balance lets you control how “warm” or “cool” your video looks.
You can control white balance 3 ways:
- Automatically [AWB]
- With some built-in presets (7 different little icons)
- Manually (K)
To prevent “green” video when filming under fluorescent lights, select the icon that looks like a fluorescent light, and BOOM—your footage looks much less like a scene from “The Matrix”, and more like real life.
Automatic white balance [AWB] works really well. If you need ultimate control and want to ensure your white balance doesn’t shift all by itself, then use manual (K) to dial in the exact setting you need. Experiment with other settings—but generally speaking, leave your camera set to [AWB].
Picture Style
Best Setting: “Standard”
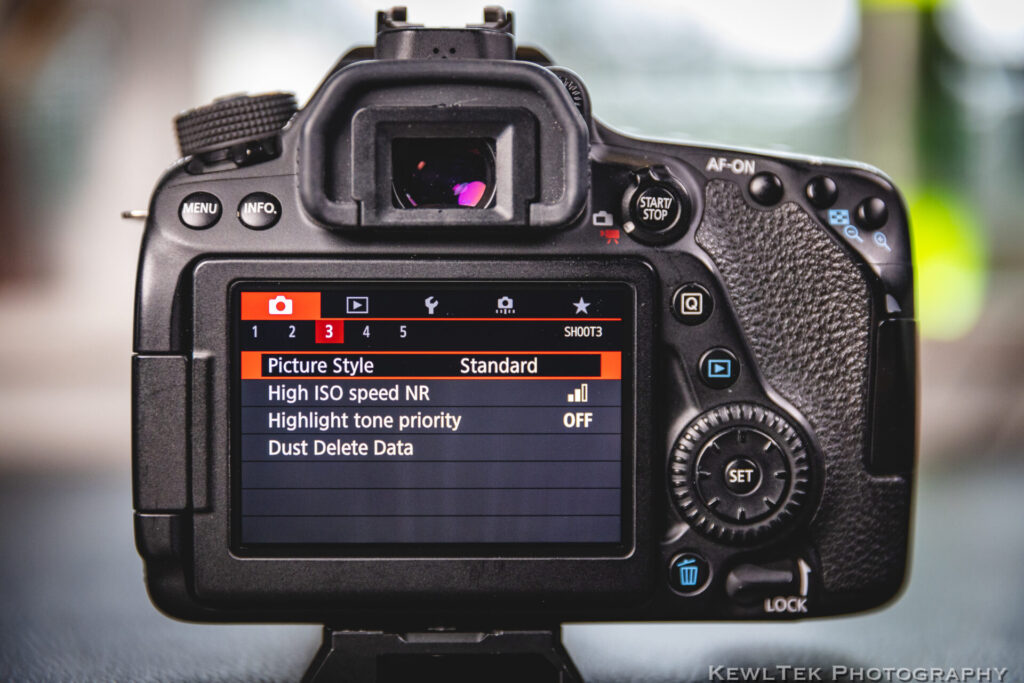
Picture Style controls settings that affect the “look” and “feel” of your video:
- Sharpness/Strength
- Contrast
- Saturation
- Color Tone
Ever heard someone praising “Canon Color Science”? That’s because Canon engineers did a great job programming their cameras to take photos and video with true-to-life colors. Some may prefer a “Neutral” setting, then color grade the footage in post production using software such as Premiere Pro. Experiment with the other profiles, but for general use, “Standard” works great.
High ISO Speed NR
Best Setting: “Standard”
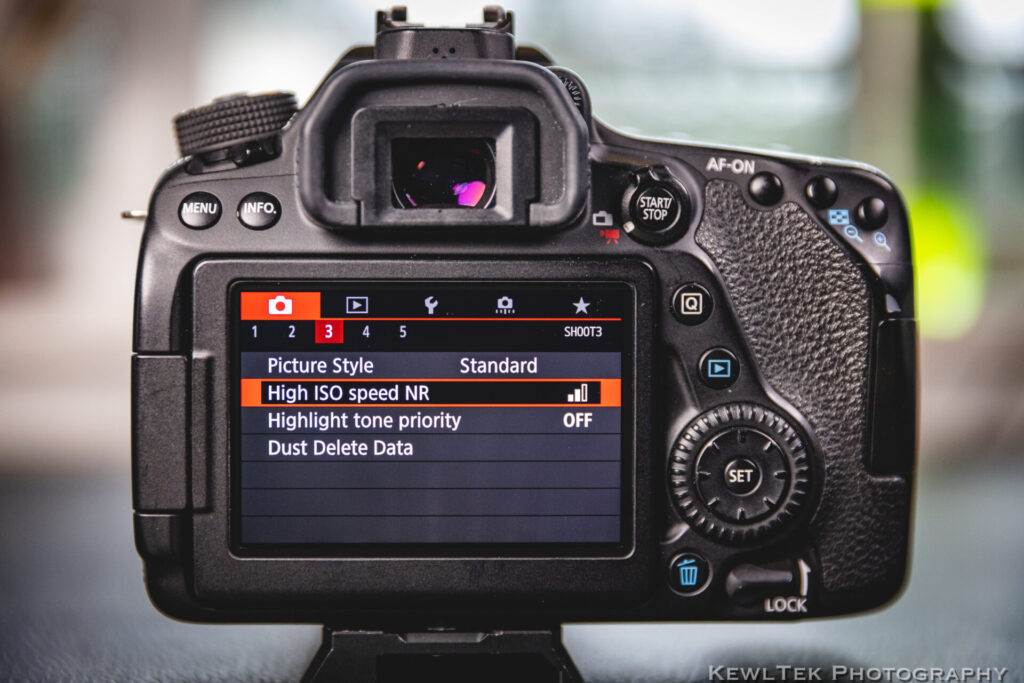
ISO refers to how sensitive your camera’s sensor is to light. You increase ISO to lighten dark scenes—but it has a side effect: digital noise. Digital noise has a “grainy” or “pixelated” look, and isn’t something we want in our video. The “High ISO Speed NR” setting automatically reduces digital noise, so leave it set to “Standard”.
Highlight Tone Priority
Best Setting: “OFF”
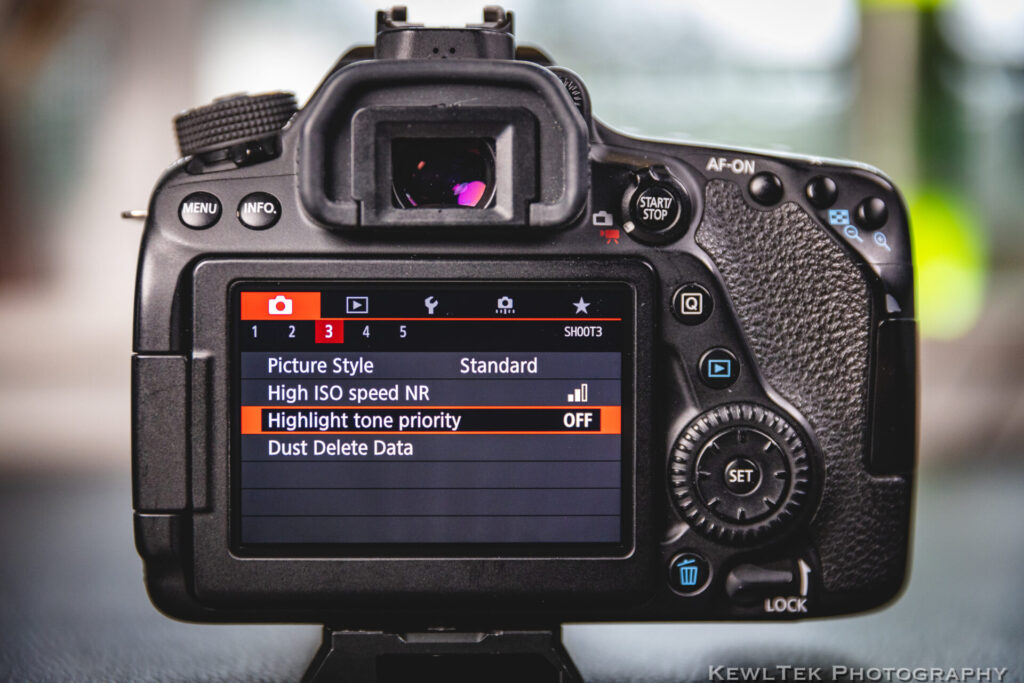
This setting improves gradation in bright image areas—or highlights. But doing so increases digital noise in shadow areas—which you don’t want.
Movie Servo AF
Best Setting: “Enabled”
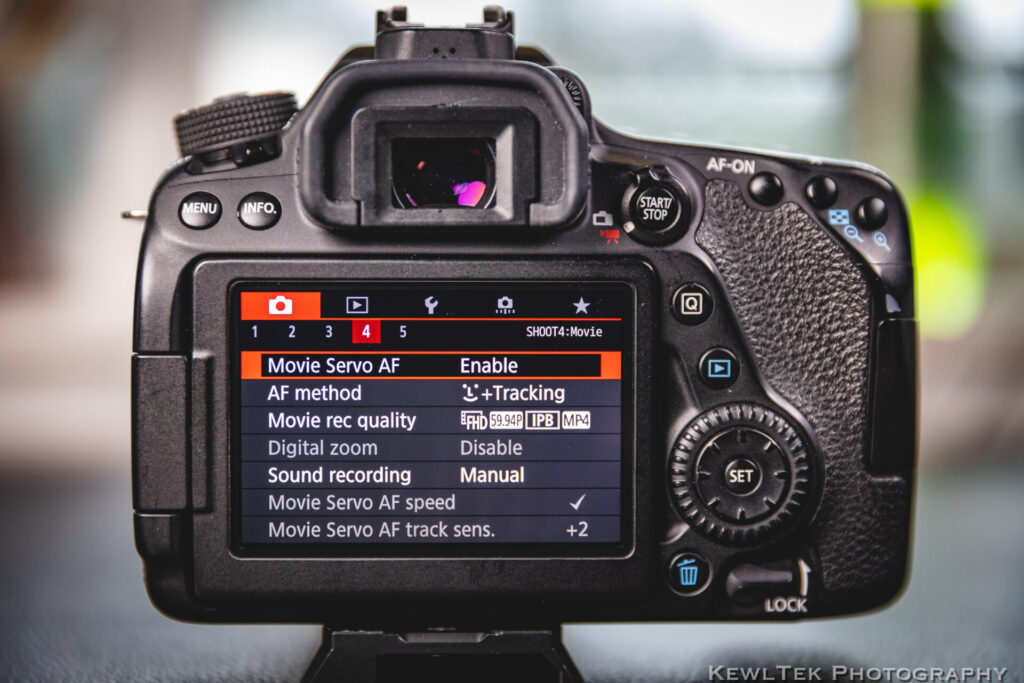
Movie Servo AF (auto focus) uses Dual Pixel Autofocus to automatically and continuously focus on the subjects during video recording.
AF Method
Best Setting: Depends on situation.

Face Tracking
This does just what it says. The 80D tracks a person’s face, no matter where it moves in the frame.
FlexiZone – Multi
This uses 35 auto focus points for wide area focusing. In “Live View”, it looks like a wide rectangular focus box. Tap the screen to shift focus into the right, middle, or left of the frame. To get the long rectangular box back, just press the “Set” button.
FlexiZone – Single
This mode puts a small focus box in the center of the frame. Use it when you want to focus on a particular subject. Manually touch and drag the focus box around the frame using the touch screen to stay focused on your subject. To re-center the box, either tap the middle of your screen, or press the “Set” button.
Which focus mode should you use? It depends on what you’re filming. FlexiZone – Multi with its wide rectangular focus box gives you maximum focus coverage over a large area. Face Tracking focuses on a person’s face. FlexiZone – Single, lets you do cool “focus pulls” by tapping to focus using the touch screen.
These next two options are only available when filming in FlexiZone – Single.
Movie Servo AF Speed
Best Setting: Depends on situation.
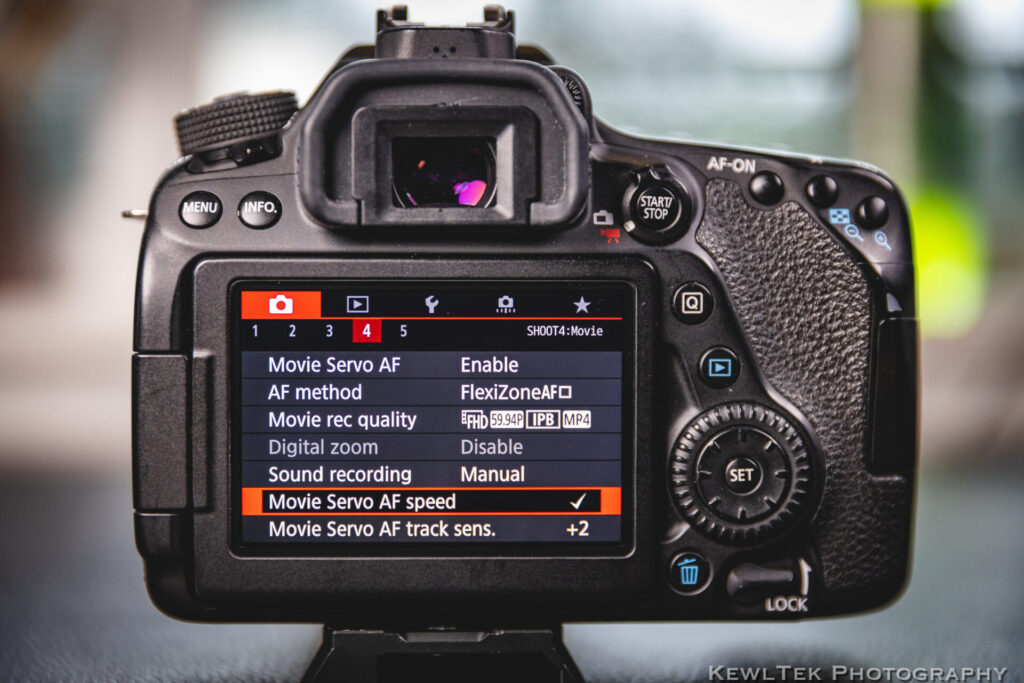
You control how fast the focus shifts between near and far subjects. If you set the Movie Servo AF Speed to a few tick marks slower than the default, you’ll get a slow, cinematic focus pull. Adjust it up a few ticks, and you’ll snap focus very quickly. Experiment and find what works best for you.
Movie Servo AF Track Sens
Best Setting: “0” (default)
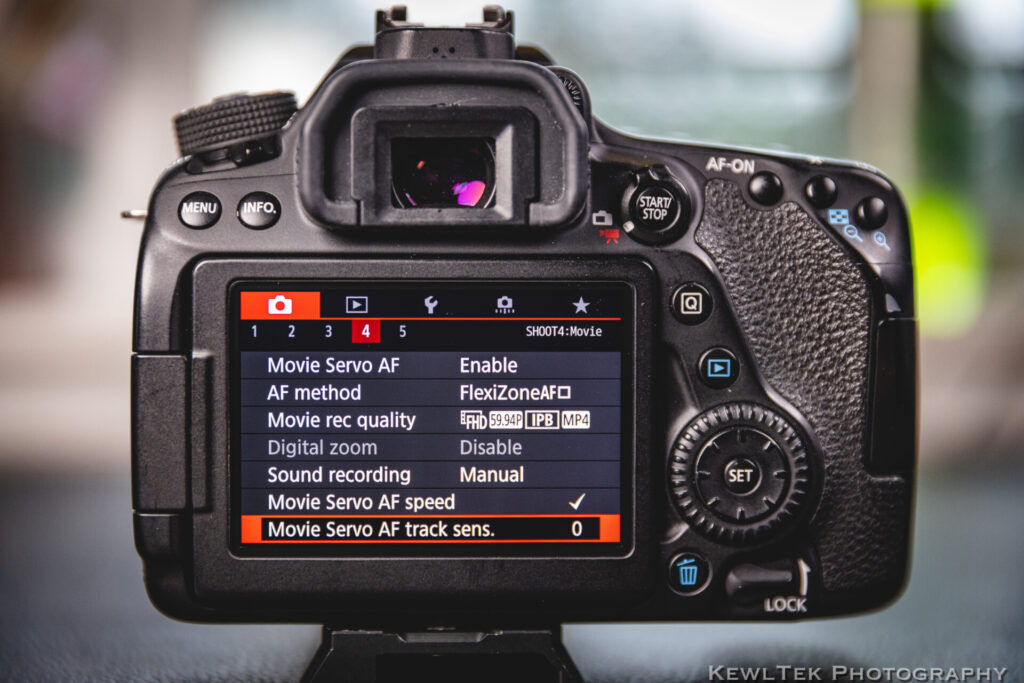
Adjust how sensitive the camera is to re-focus when something gets in front of your main subject. When you crank this setting up, it’s really sensitive—meaning it will quickly shift focus to whatever passes in front of the camera. Dial it down, and it’s less sensitive. The default setting of “0” works well, but there could be cases you might want to adjust it.
Let’s say you’re filming a person on a busy sidewalk. There’s lots of other people around–and sometimes they pass between the camera and your subject. Do you want your camera to stay locked on to your main subject? Then dial down the sensitivity. Do you want your focus constantly shifting to whatever or whoever just moved in front of your camera? Then crank it up.
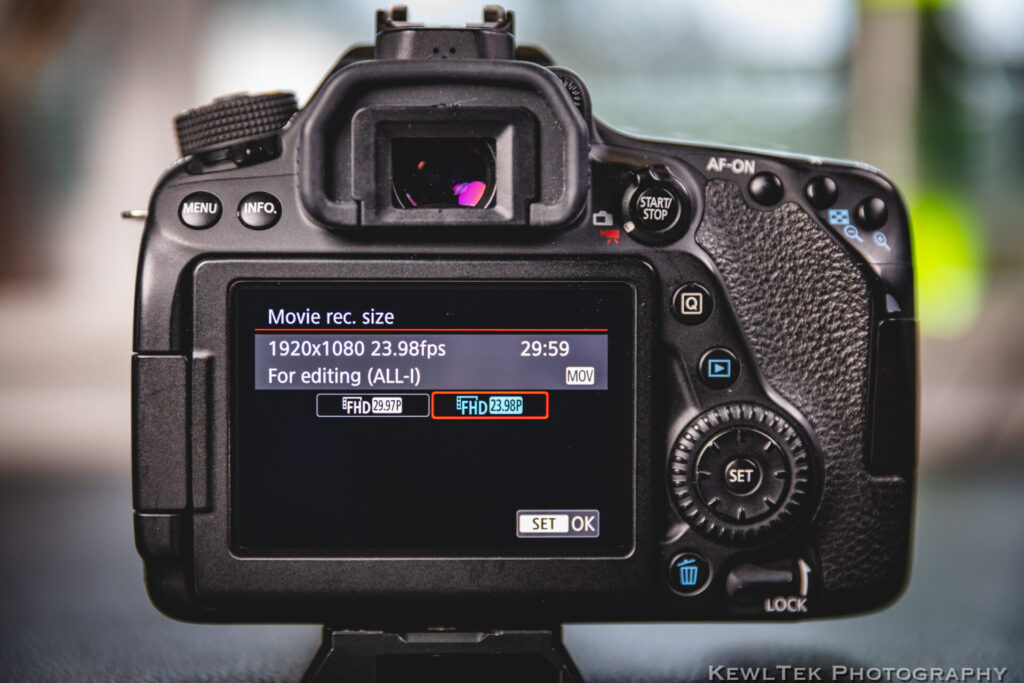
Movie rec quality
Best Setting:
- MOV, FHD 1080p at 24fps — General (non-action) recording
- MP4, FHD 1080p at 60fps — High-speed action that you plan to slow down in post production
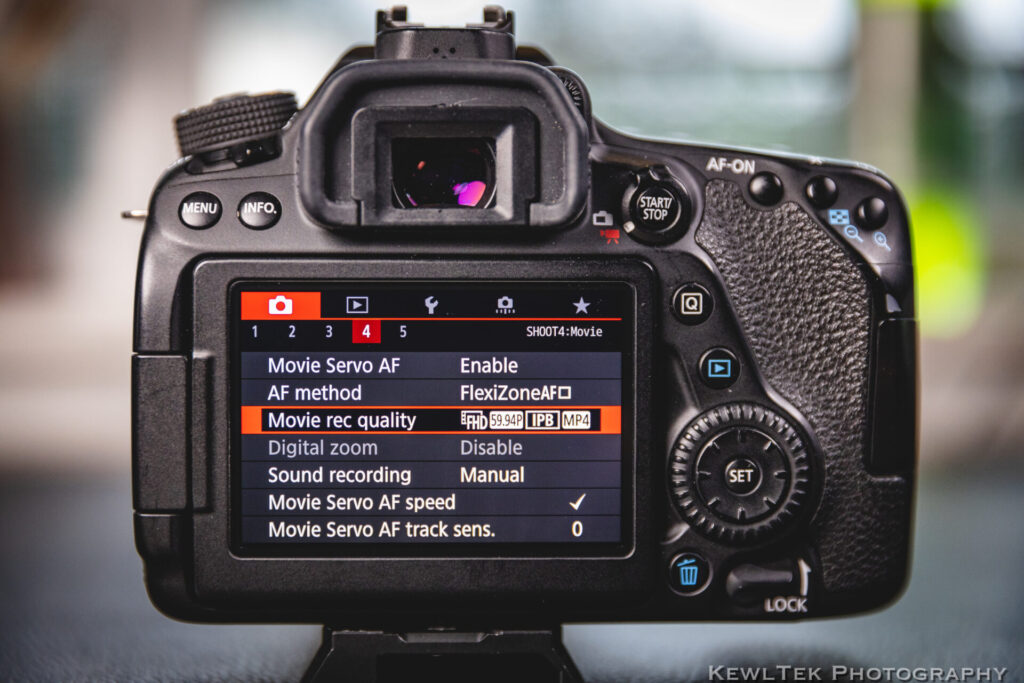
The “Movie Recording Quality” menu has two important modes: MOV and MP4. Each mode has different options.
A quick note on fps
Frames per second (or “fps”) options for the Canon 80D are 23.98, 29.97 and 59.94. Most people just say, “24”, “30”, and “60”, so I will too.
MOV
Use MOV for general purpose non-action video. MOV uses the camera’s highest-quality ALL-I compression and gives you the best Full HD (FHD) 1080p video recording power the Canon 80D offers.
ALL-I captures 24 individual frames per second–the most data when filming, and looks great.
MOV makes large video files, meaning your memory card fills up faster. You’re also limited to either 24fps or 30fps. There’s no 60fps in MOV mode.
MP4
MP4 takes up less space, because it uses the IPB recording format.
IPB captures a unique image every 3rd frame, and uses fancy software algorithms to fill in the blanks so it looks like 24 individual frames. Some video snobs complain that IPB isn’t as high quality as ALL-I, but most people don’t see the difference in the footage. MP4 gives you a few extras as well:
| FHD 59.94P (60fps at 1080p) | HD 59.94P (60fps at 720p) |
| FHD 23.98P (24fps at 1080p) | FHD 29.97P (30fps at 1080p, “Light”) |
| FHD 29.97P (30fps at 1080p) | HD 29.97P (30fps at 720p, “Light”) |
24fps? Or 60fps? Which Framerate is Best?
Many videographers film at 60fps to create smooth, buttery, delicious slow-motion clips. When you film sports, or fast-moving wildlife like animals, birds, and kids, 60fps lets you slow things down in post production to create a cool slo-mo effect. If you film slow moving things (like interviews), then use 24fps. You’ll get the cinematic “look” we generally associate with Hollywood movies.
FHD, HD, and IPB “Light”
FHD (or “Full HD”), is 1080p–which is the highest resolution the 80D can record. HD (or “High Definition”) is only 720p–and lower resolution than 1080p.
IPB “Light” modes record movies at a lower bit rate than standard IPB, giving you an even smaller file size compatible with a large range of playback systems.
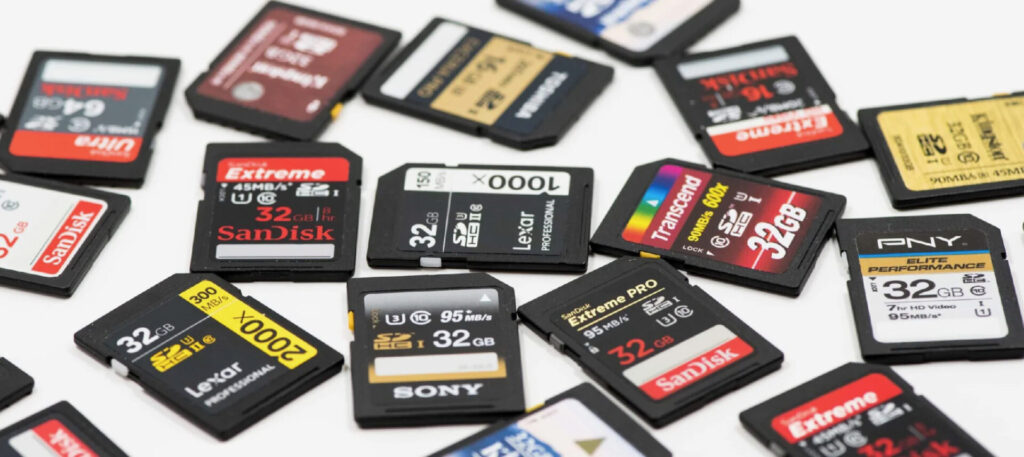
A Note on Memory Cards
For the 80D, Canon recommends high-speed memory cards for both MOV and MP4 FHD 1080p modes:
- UHS Speed Class 3 — For MOV recording
- SD Speed Class 10 — For MP4 FHD 1080p
Using slower cards results in glitchy video footage, because they can’t keep up with the amount of data the camera produces.
Photography Tip: When shooting still photos on burst mode, the Canon 80D can capture 7 frames per second. If you think you’re getting less than 7 fps, use a faster card.
I recommend getting a SanDisk Extreme with gold label: SDXC UHS-I Card – C10, U3, V30. They’re relatively inexpensive, and meet all Canon’s requirements to get the most out of your Canon 80D.
Digital Zoom
Best Setting: Don’t use it.
When recording in FHD 24fps or 30fps, you can use a feature called “Movie Digital Zoom”. Use the D-Pad (just press up and down) to zoom in and out from 3x to 10x…digitally. I personally use zoom lenses, not the in-camera digital zoom feature.
Experiment with it. Maybe it’s something that can help you.
Sound Recording
Best Setting: “Manual”
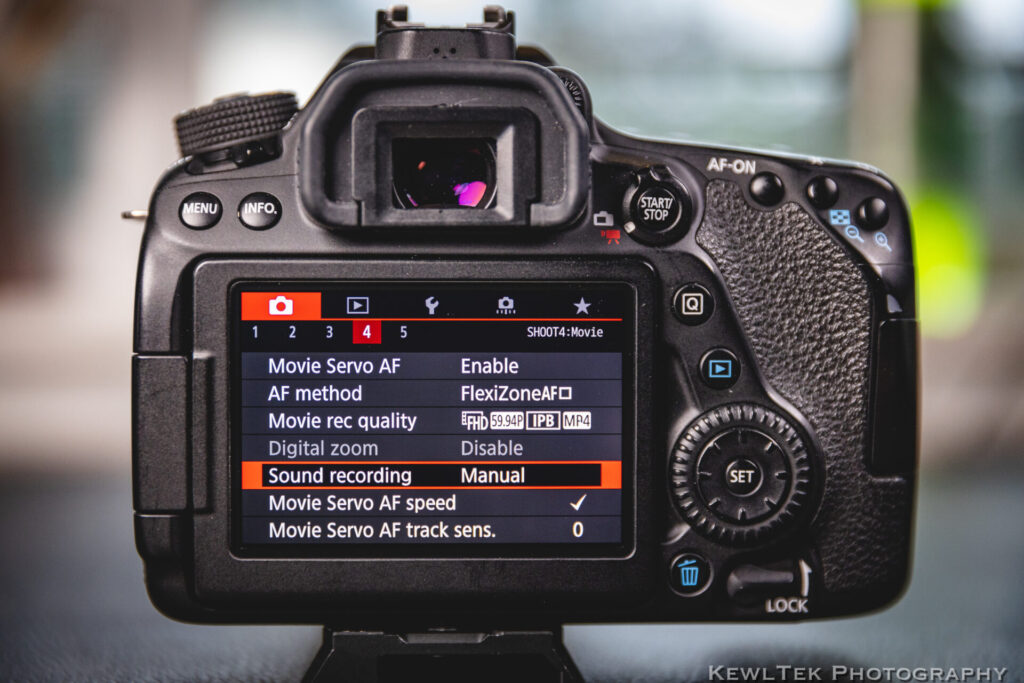
If you’re in control of your environment and subject, then set to “manual”, and drop the recording level down a couple of ticks. Remember, you can “turn up the volume” in post production, but you can’t recover screechy, blown out audio.
In “auto”, the camera constantly raises the noise floor as it hunts for sound during quiet moments in your recording. The sound in your video will be inconsistent, loud and soft, and generally be pretty crappy. Use “Auto” only if you’re in an environment where you can’t really control your subject, or the sounds around you.
Grid Display
Best Setting: “3×3”
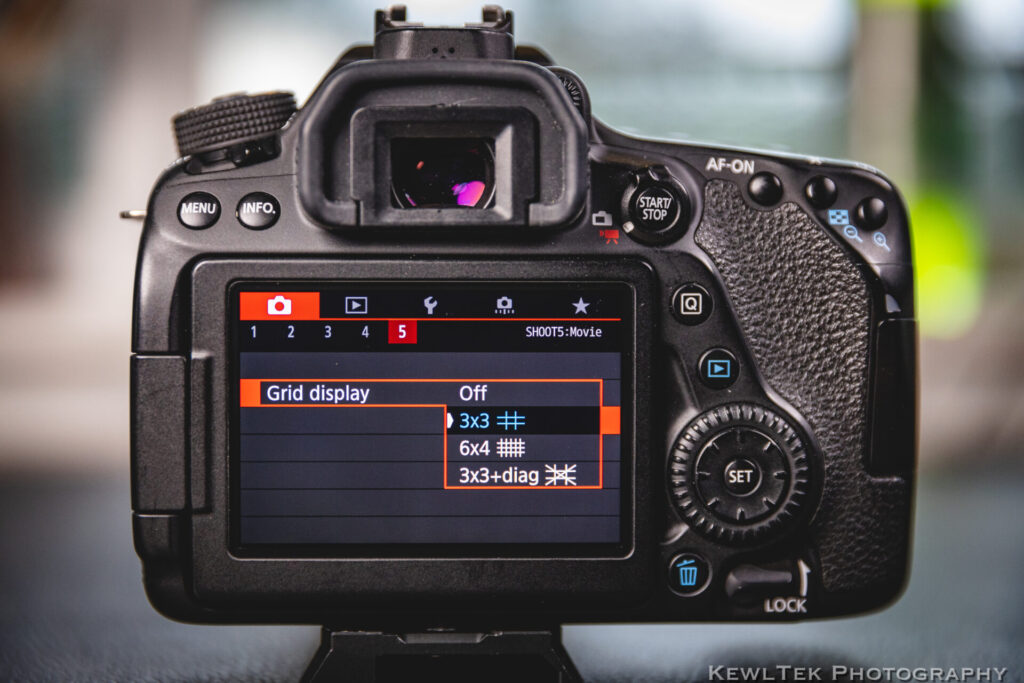
The grid display menu has four options:
| Off | Grid is disabled |
| 3×3 | Two vertical lines, and two horizontal lines like a tic-tac-toe |
| 6×4 | Bunch of messy lines and looks like graph paper |
| 3×3+diag | Hot mess of lines: 3×3 with a big X drawn through the middle |
The 3×3 isn’t “messy”, won’t get in your way, and helps you compose and align your scene, ensure horizons are level, and straighten verticals. Put your subjects on intersections of the 3rd lines, and BOOM! You’re following the “rule of thirds”!
Btn Function
Best Setting: Personal preference
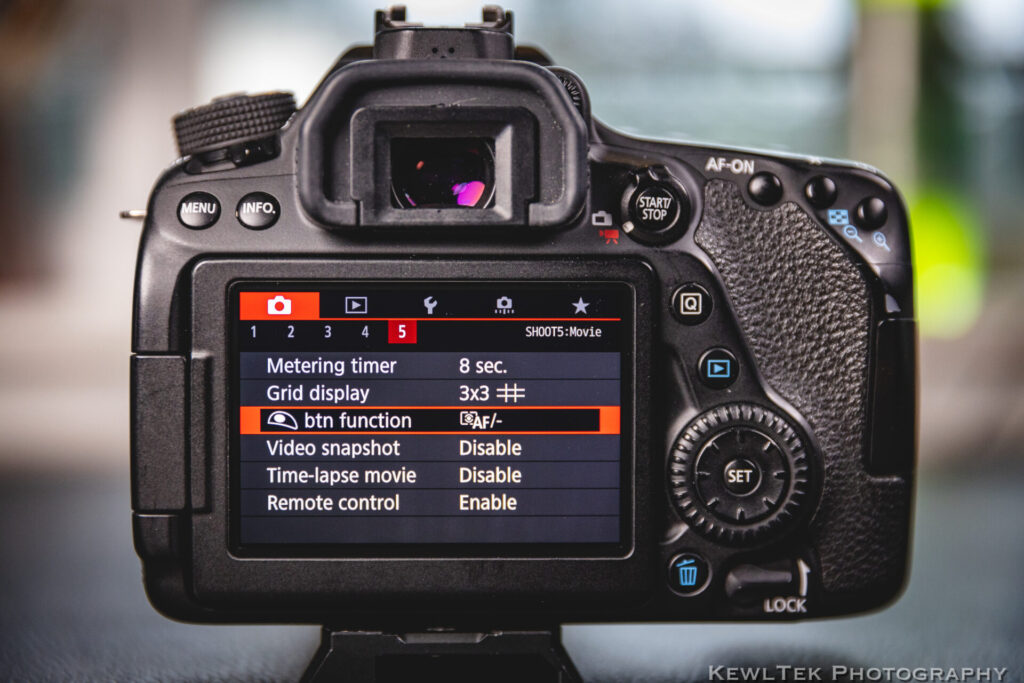
You can configure the Canon 80D’s shutter button to start and stop your video recordings. I like the video recording button on the back of the camera, but if it’s your dream to use the shutter button to start/stop video recording, then by all means enable it!
Time-lapse Movie
This option is always disabled—and when you enable it, it only stays enabled during your time-lapse. When the time-lapse finishes, it disables itself. Want to know how to create a time-lapse movie on your Canon 80D? Check out this “How To”.
PLAYBACK MENU (Blue)
Highlight Alert
Best Setting: “Enabled”
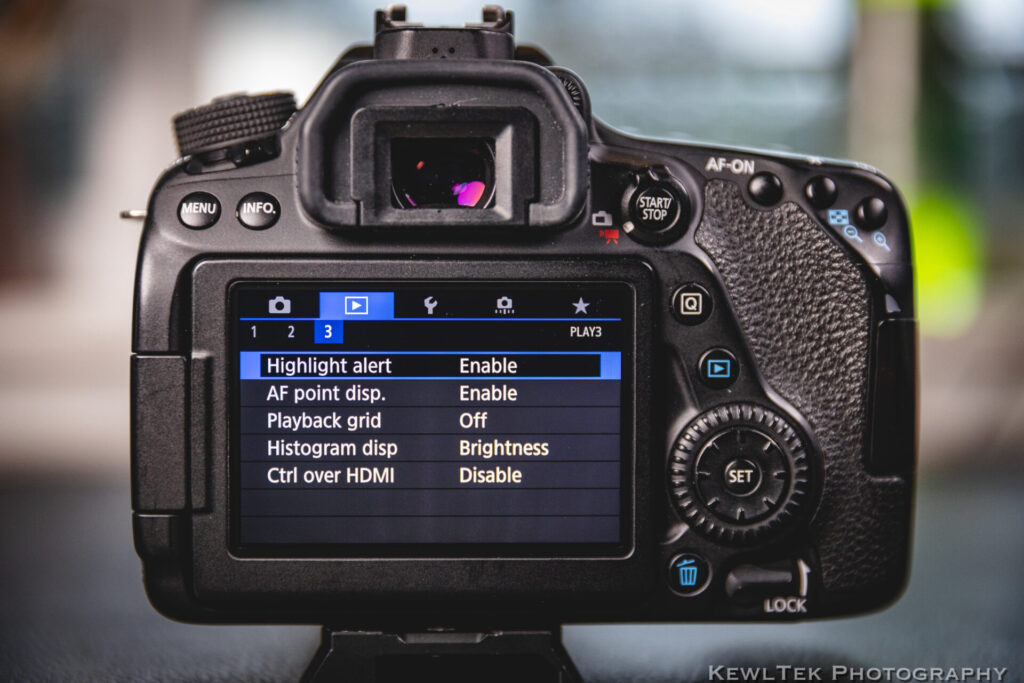
This is the option that pros refer to as “the blinkies”. When reviewing a clip in playback mode, you’ll see over-exposed areas of your footage literally “blink” on and off. This is helpful if you’re not sure if your exposure is properly dialed in. When you see “blinkies”, you know you need to adjust exposure. Very helpful.
Histogram Display
Best Setting: “Brightness”
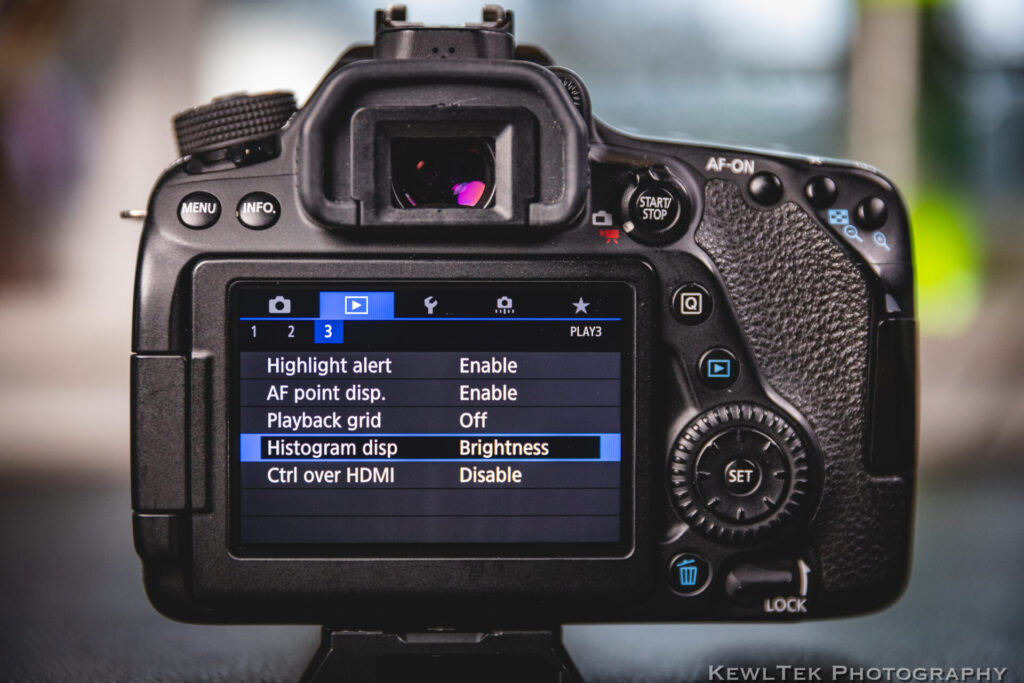
You can set this to either “brightness” or “RGB” (red, green, blue) depending on your preference.
Ctrl over HDMI
Best Setting: “Disabled”
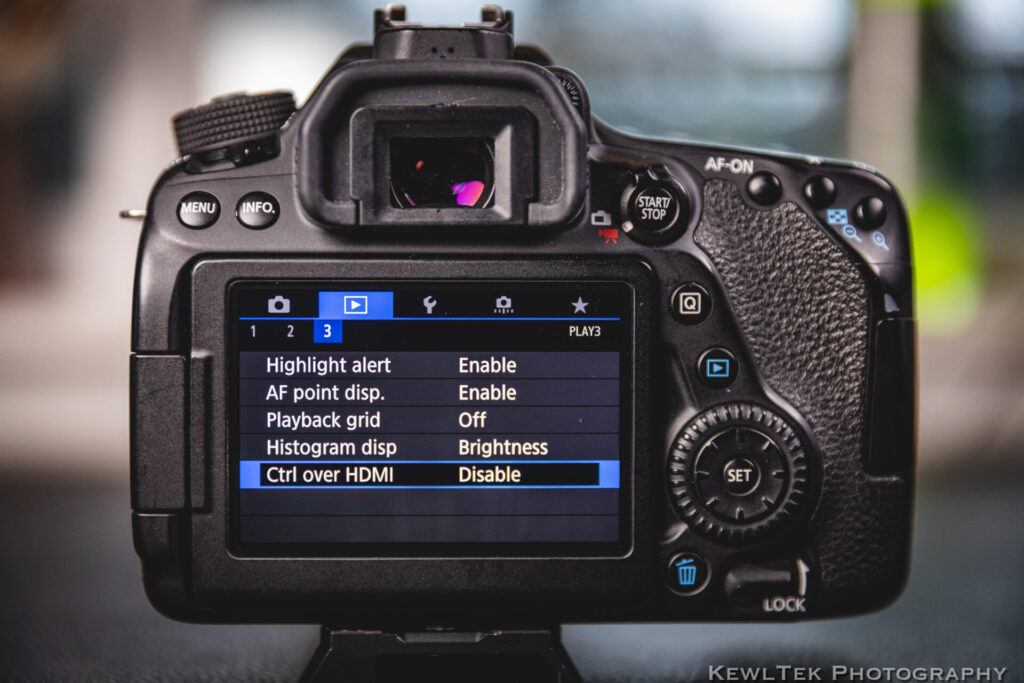
Leave it disabled unless you’re using an external video recording monitor like the Atomos Ninja. If you’re using a monitor like that, then enable it.
WRENCH MENU (Yellow)
Format Card
Best Setting: Use only when needed
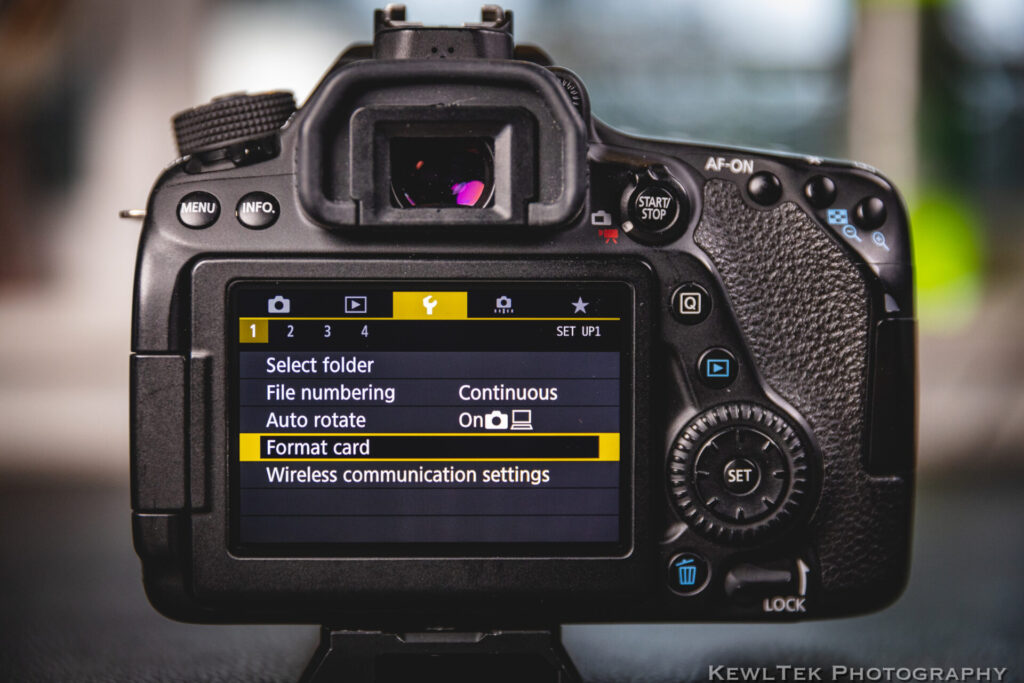
If your camera mysteriously stops recording after only a few minutes, your memory card might be full. If it is, save your photos and videos to your computer, then format your card to keep recording.
Wireless Communication Settings
Best Setting: “Disabled” — Until you need it
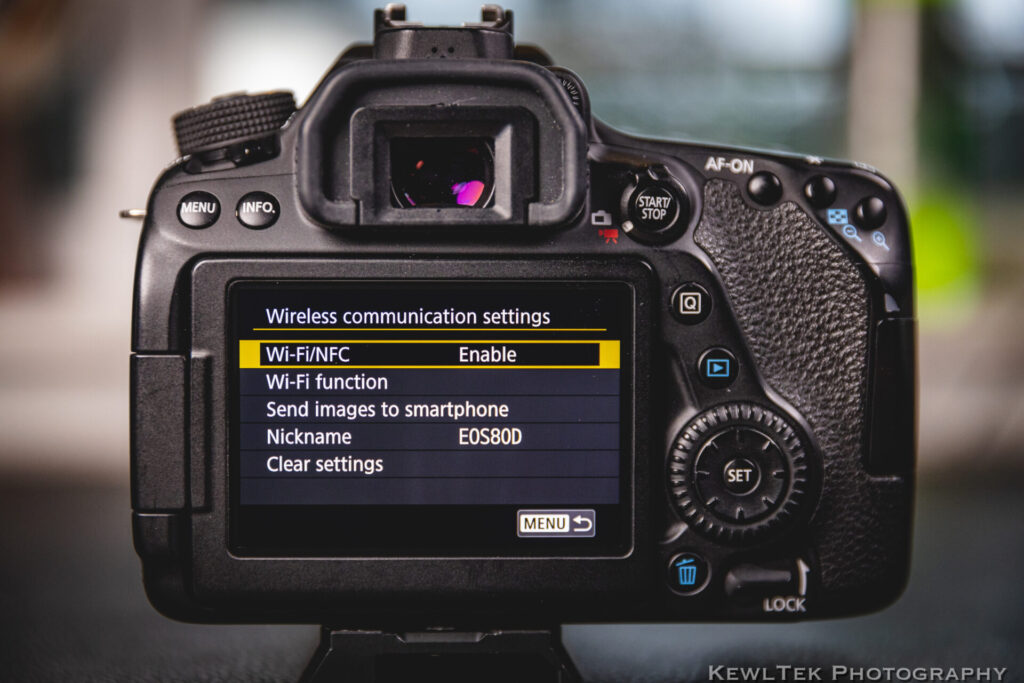
This one I leave “off” to preserve battery. If you want to control your camera remotely using the Canon “CameraConnect” app on your smartphone, then enable it. To get it set up, follow the instructions in the “Wireless Function Instruction Manual“, which is separate from the main camera manual.
LCD Brightness
Best Setting: Default
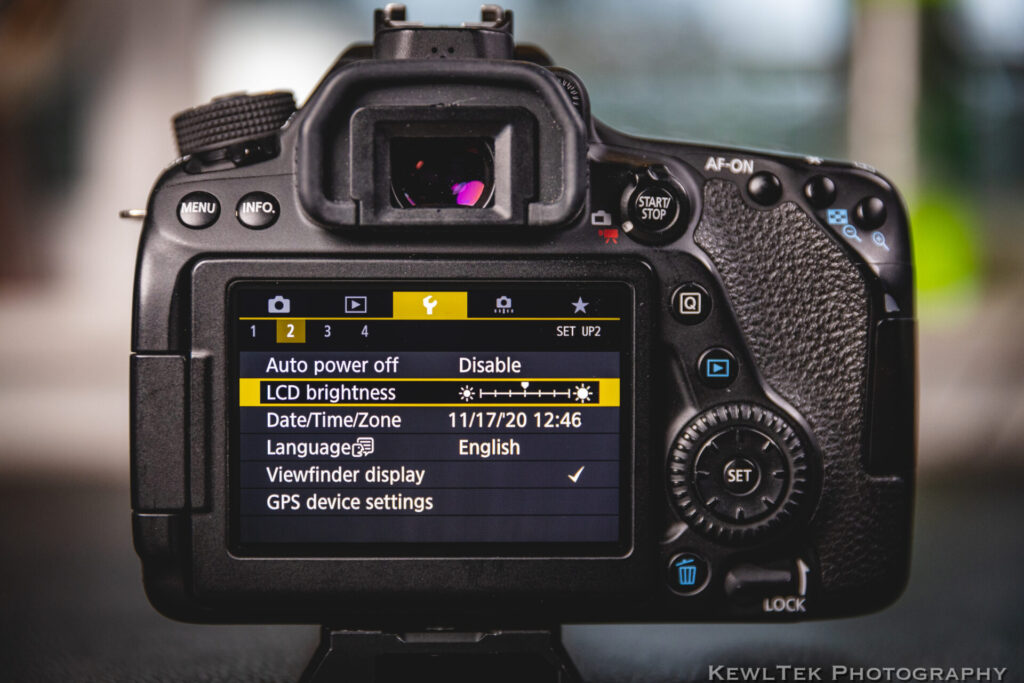
The default setting is usually bright enough—even outdoors. It’s not blindingly bright in low-light conditions either.
If you turn down the LCD brightness and forget to turn it back up—the next time you record a video, you might think your scene is under-exposed. You might accidentally increase your ISO and aperture to compensate, and blow out your footage. Don’t ask me how I know that…
Video System
Best Setting: Depends on country
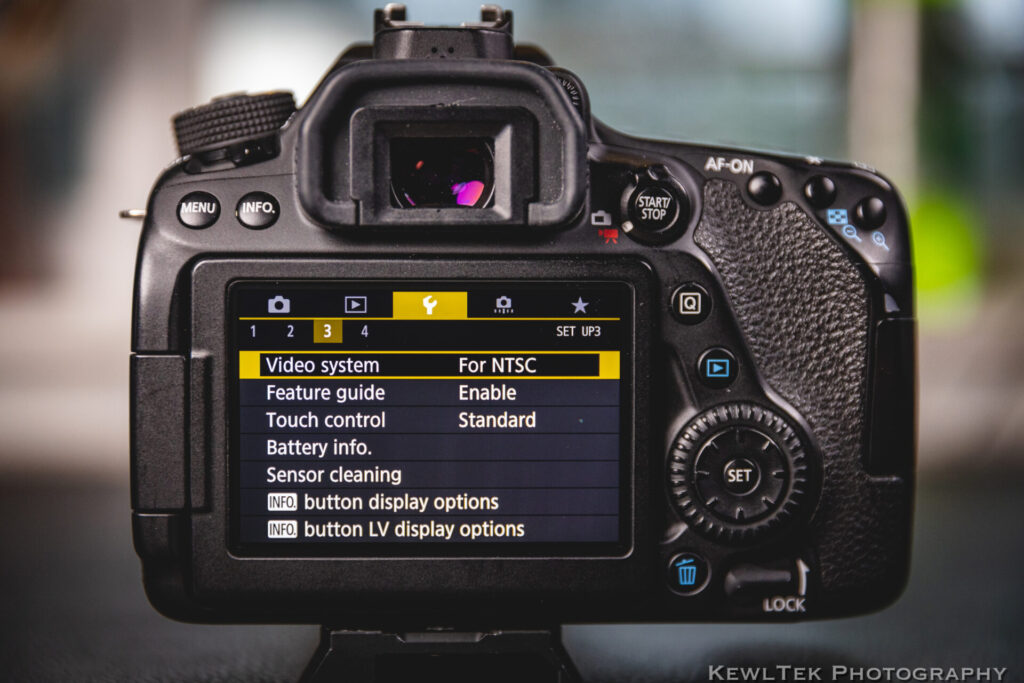
If you’re in the United States, use NTSC. If you’re in a country that uses PAL—then set it to PAL.
Feature Guide
Best Setting: “Enabled”
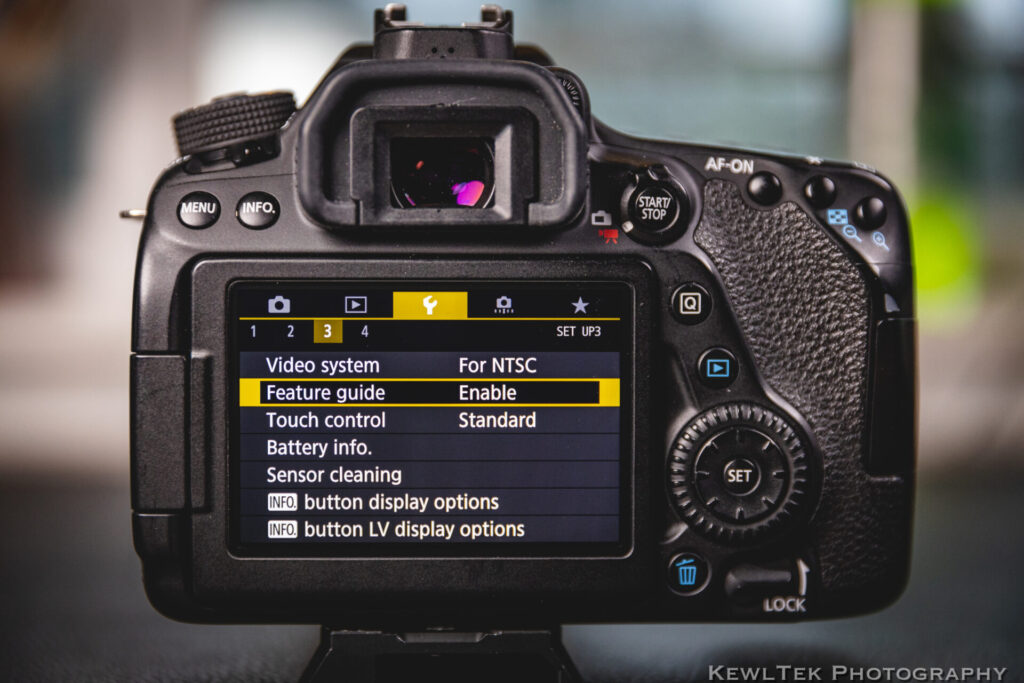
When you’re in the [Q] menu, the feature guide adds a sentence or two that tells you what specific features do. VERY helpful when learning the camera.
Touch Control
Best Setting: “Standard”
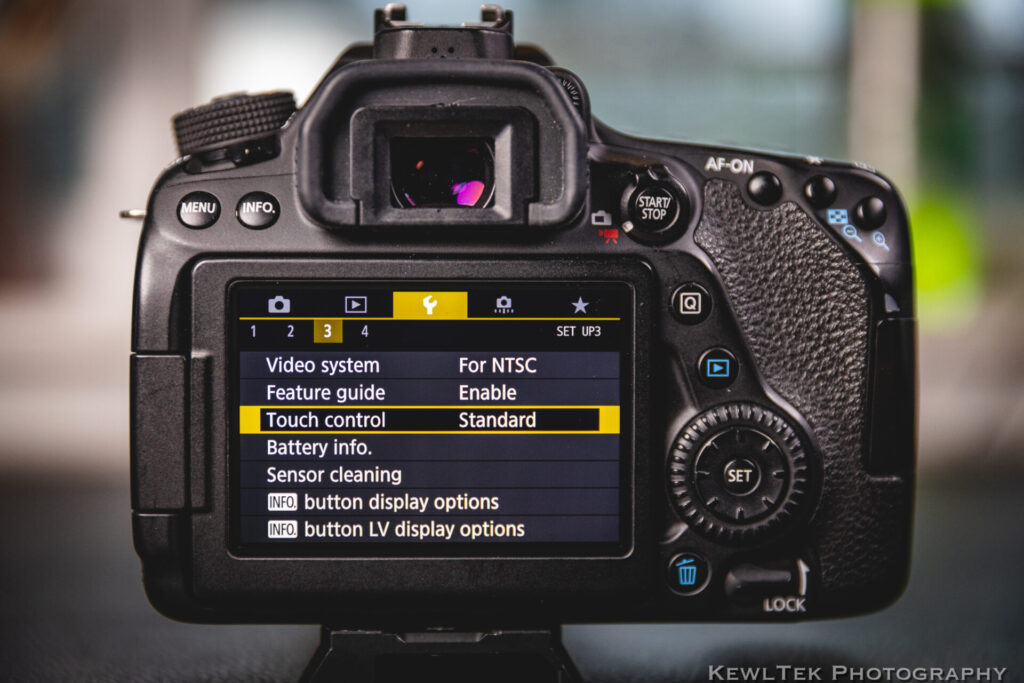
This controls how sensitive the touch screen is. “Standard” is the default, but you can experiment with “sensitive” or “disabled”.
Sensor Cleaning
Best Setting: “Enabled”
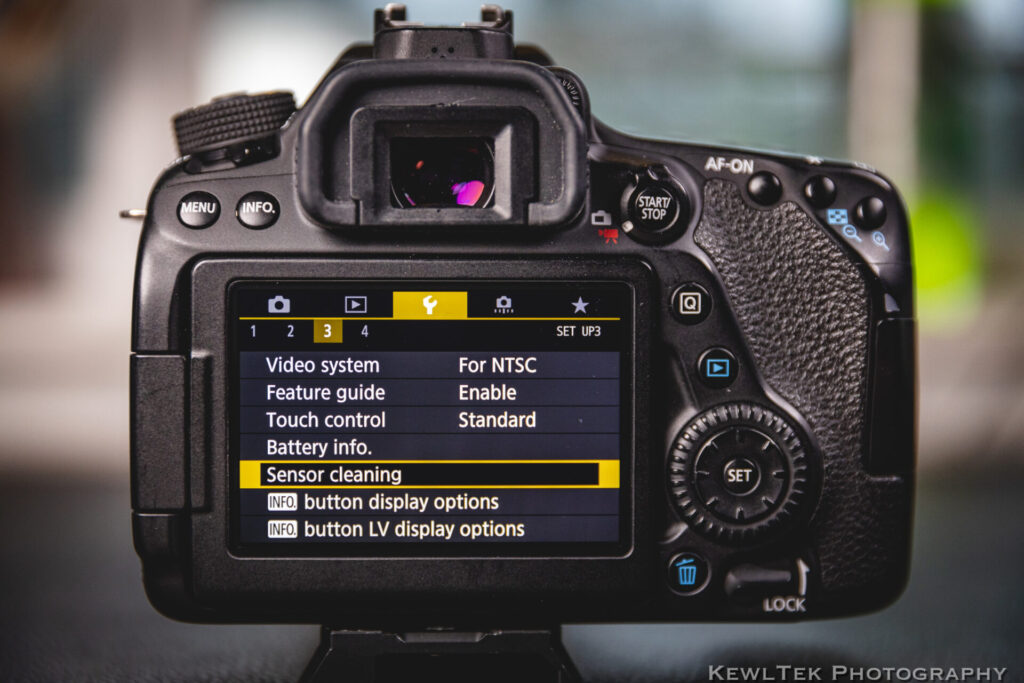
The Canon 80D is equipped with a self-cleaning sensor that automatically shakes dust from the low pass filter in front of the sensor. This “cleaning” happens each time the camera is turned on and off.
CUSTOM FUNCTIONS (Orange)
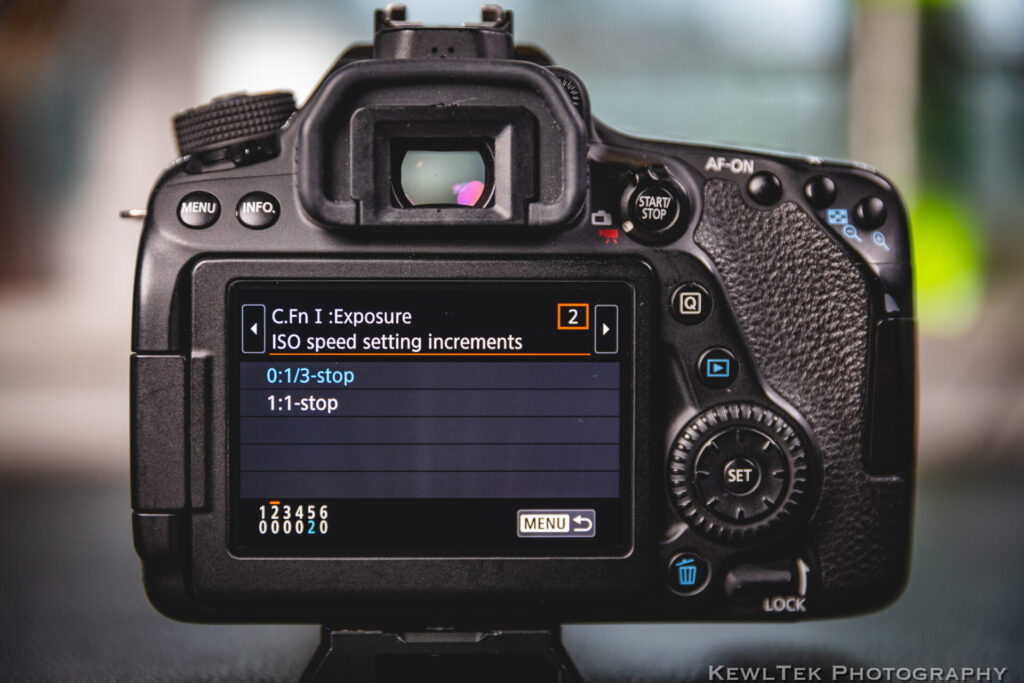
C.Fn I :Exposure, (2nd Menu)
Best Setting: “0:1/3-stop”
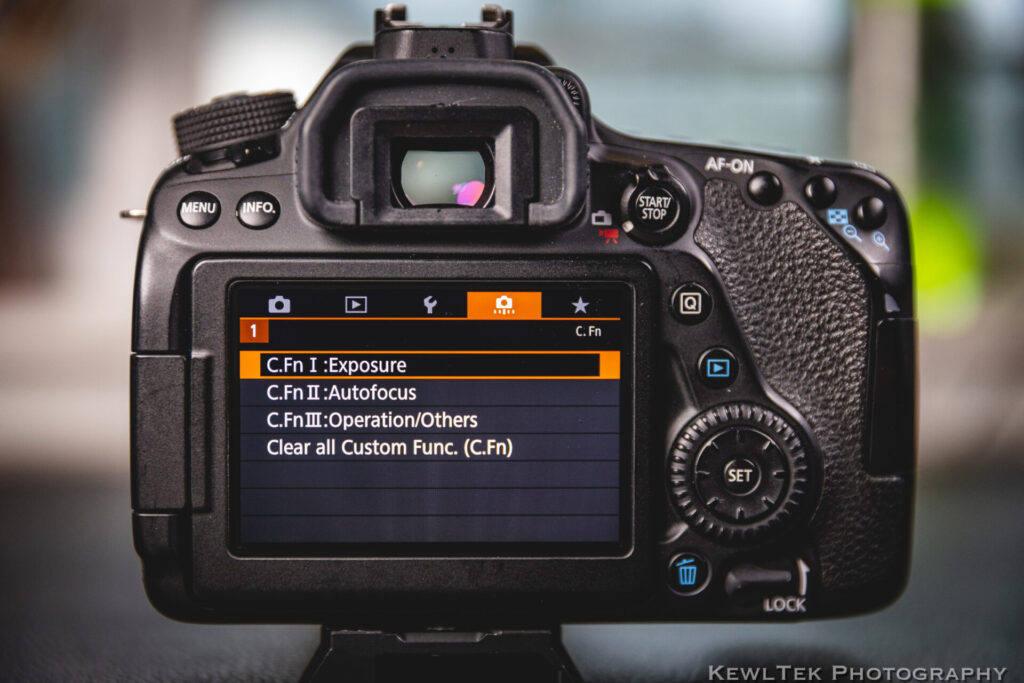
The “C.Fn I :Exposure” menu has 6 sub-menus. Sub-menu number 2 is called “ISO speed setting increments“. Set it to “0:1/3-stop” for maximum control when adjusting your ISO.
Conclusion
Alright! You know the best video settings for the Canon 80D!
Now, it’s your turn. Drop a comment and let us know what kinds of awesome videos you create with your DSLR or mirrorless camera! Leave a link to your social media so we can check it out!
If you enjoy creating video, then check out my reviews of this Benro tripod, and Canon 50mm lens–both of which will help take your video productions to the next level!
Now get out and shoot! And remember to have fun!!!


16 Comments
Jill Nowak · June 25, 2021 at 6:30 pm
Just wanted to thank you for this very thorough list. It will really help me get my high school kids all on the same page (and build a bit of confidence for them!).
Russell Robinson · June 28, 2021 at 7:49 pm
You’re very welcome Jill! I’m glad the list is helpful for you and your high schoolers!
Lyssa · August 7, 2021 at 1:32 pm
Whew! What a big help! I am starting a video project using the 80D at Ninja V and I was lost until I found this post. Thanks so much.
Russell Robinson · August 7, 2021 at 7:47 pm
That’s awesome Lyssa! Best of luck on your video project! I bet it’s awesome!
Chris · May 20, 2022 at 8:37 pm
Great article! Many thanks 😊
Russell Robinson · May 26, 2022 at 3:54 pm
Thanks Chris! I’m glad the article helped!
Jodi · October 19, 2022 at 8:26 pm
This was so thorough and helpful. Thanks so much!
Russell Robinson · October 19, 2022 at 8:54 pm
Thanks Jodi! I’m happy it helped you!
Joshua Riley · November 29, 2022 at 3:40 pm
This was very helpfull, thank you !!!
Russell Robinson · November 30, 2022 at 5:47 pm
Thanks Joshua! I appreciate it!
nicole · March 2, 2023 at 10:23 pm
hi! under iso speed settings there are two things “iso speed” what do i put that one on? And then underneath that I set it to what you said- range for movies..
Also, I’m trying to use eos utility but that seems to override these settings?
Russell Robinson · March 14, 2023 at 4:32 pm
Hi Nicole! Under ISO speed, select “range for movies”, and set the ISO to 100 on the low side, and H(25600) on the high side. That way, you get the full ISO range while recording. The Canon EOS Utility lets you control some camera settings, but not all. For settings like “range for movies”, you’ll need to use the menu system on your Canon 80D.
Mo · September 27, 2023 at 7:39 am
Thank you for this guide. I’m wondering, I’m beginning to get into wedding videography and am hoping to use some of my own custom luts on the film, do you recommend shooting with a neutral look for those?
Russell Robinson · October 30, 2023 at 5:34 pm
I’m happy the guide was helpful for you! Generally speaking–yes–if you plan on applying LUTS, then shoot with a neutral profile. Neutral will capture a flat, unprocessed image which is useful if you plan to do post-processing color grading.
Bas Janssen · November 21, 2023 at 9:03 pm
Thank you so much, for this clear and thorough guide!!
Russell Robinson · December 4, 2023 at 6:36 pm
Thank you! I’m glad it was helpful for you!