How To Use Your Canon Camera as a Webcam (It’s Simpler Than You Think)

Do you want to improve your video presence in Zoom meetings? Got a Canon DSLR camera? In this post, I’ll show you how to use your Canon camera as a webcam using Canon’s EOS Webcam Utility. It’s simpler than you think!
The global pandemic changed how many of us work. More and more people work from home. To stay connected, we use video conferencing applications like Zoom.
If you have a supported Canon camera, and aren’t satisfied with your low-res webcam, then keep reading. You’ll learn how to use your Canon camera as a webcam, and drastically improve your look in Zoom meetings!
The Solution:

When you use the “EOS Webcam Utility” and your Canon camera, you’ll be blown away by how well it works, and how incredibly SIMPLE it is. Check out these “selfies” I took using my built-in webcam vs. my DSLR! I used the same lighting, same chair, same office–same everything. Just two different cameras. Camera quality aside, notice how much better things look compositionally when you aren’t looking down your nose at your laptop!


How to set it up
You’ll need these ingredients to get started:
- A supported Canon camera
- A USB cable (to connect your camera to your computer)
- The “EOS Webcam Utility” software installed on your computer
That’s the basic overview. Here’s what you need to do:
- You should already have Zoom (or your preferred meeting app) installed
- Download and install Canon’s EOS Webcam Utility
- Reboot
- Connect your Canon camera to your computer with its USB cable
- Open Zoom
- Click the gear icon (upper right)
- Click “Video”
- In the combo box labeled “Camera”, select “EOS Webcam Utility“
- That’s it! You’re done! You should see your smiling face in Zoom!
Tips, Tricks, and Troubleshooting
Here’s a few things to check in case something isn’t working:

- Make sure your camera is switched on
- Make sure your camera is in “video” mode
- Close the Canon EOS Utility
- On Windows: Find the EOS Utility icon next to the clock (in the lower right hand corner of your screen). Right click and close it.
- On Mac: Find the EOS Utility icon in the toolbar (along the top of your screen). Click it, and select “Quit”.
- “Wake Up” your camera
- Canon cameras go to “sleep” (standby mode) after a few minutes. If your camera is “asleep”, half-press the shutter button to wake it up.
To test, launch Zoom and open the video settings. Select “EOS Webcam Utility“. Your camera will spring to life, showing you in all your HD glory!
Next Steps:
The stuff in the following sections is optional, but if you can swing it, you’ll have an even better online video experience!
Lighting
If there’s a window right behind you, try to rearrange your space so the window is in front of you. What if you don’t have a window? Grab a light and place it in different spots in front of, or next to you–to see how it affects your “look”. You don’t need to convert your home office into a TV studio with a big key light, a hair light, and background LED light strips to add pops of color–but if that’s the look you’re after, then go for it!
If you don’t have fancy lights–that’s fine–just make sure your light source is in front of you and slightly above and off to one side, not behind you. When lit from behind, you’ll look like a dark silhouetted shadow.
Backdrop
Alright–now that you’ve got your lighting sorted, take a long hard look at what’s behind you. Is your space stuffed with gobs of random junk that you’ve accumulated over the years? Or are you situated in your bedroom? Got an unmade bed behind you, with socks and underwear strewn about? Stop and think–whatever is behind you is going to be on center stage in your Zoom meetings. You definitely don’t want your boss seeing a disaster zone! People are easily distracted by their co-workers’ messy environments during in meetings–so take some time, and tidy up.
Fortunately, you don’t have to remodel your house to create a pleasant looking backdrop. Give Zoom’s virtual background feature a try. The software actually does a pretty good job! Download some generic office images and experiment with them. If you don’t have a green screen, you might look like a dark blob is attacking your head during meetings. That can also be distracting–so if virtual backdrops don’t “do it” for you, try the next tip.
Camera Settings
Your mileage may vary with these settings–but try them out, and see if something works for you.
- Set your camera to “Manual” mode–so you can dial in the settings you need
- Next, open up your camera’s aperture as wide as it will go. This will keep your face in focus while everything else fades away into an unrecognizable blur of color and shape behind you
- With your camera in video recording mode, open the main menu, and select full HD at 23.98fps (frames per second)
- Set the shutter speed to ‘double the frame rate’–(if you’re at 23.98fps, set your shutter to 1/50).
- Set the white balance to “automatic”
- Finally, set the ISO to 100. This one depends on the amount of light you have in your space. If you don’t have a window, and your only light is from your computer monitors, you’ll need to dial this up a bit. Experiment, and find what works best for you.

Lenses
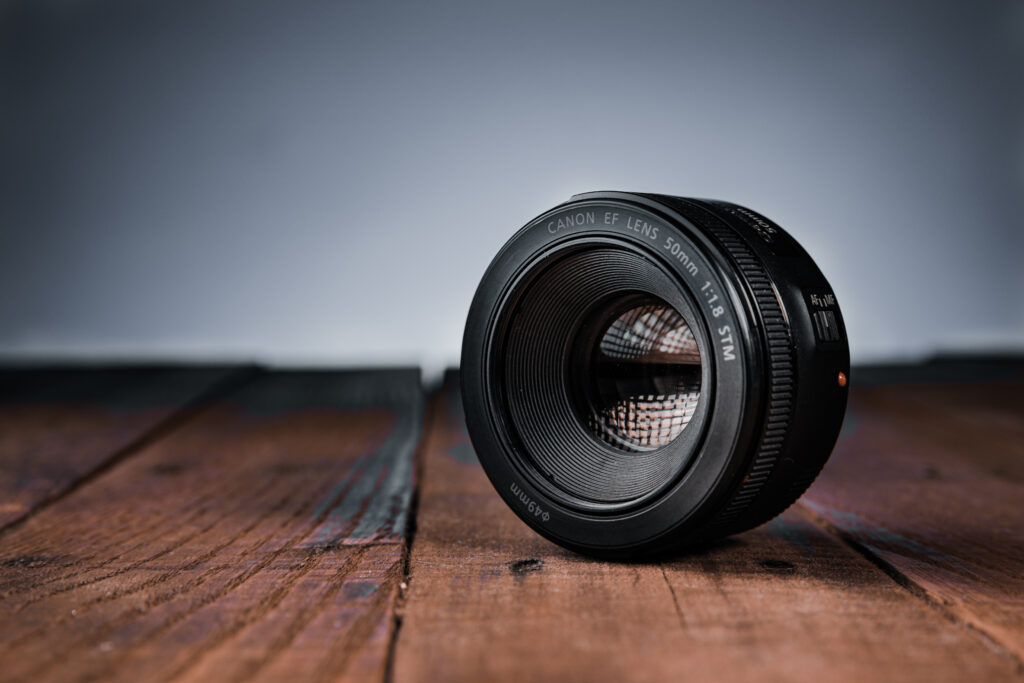
A lens with a wide aperture gives you great background blur, like Canon’s 50mm f/1.8. With that lens and the right lighting, you’ll look like you’re on TV. It makes everything look “cinematic”. If you don’t own a 50mm f/1.8, don’t stress–it’s Canon’s least expensive lens–so it won’t break the bank to get one.
If all you have is the 18-55mm lens that came with your camera, make sure to open the aperture as wide as it will go.
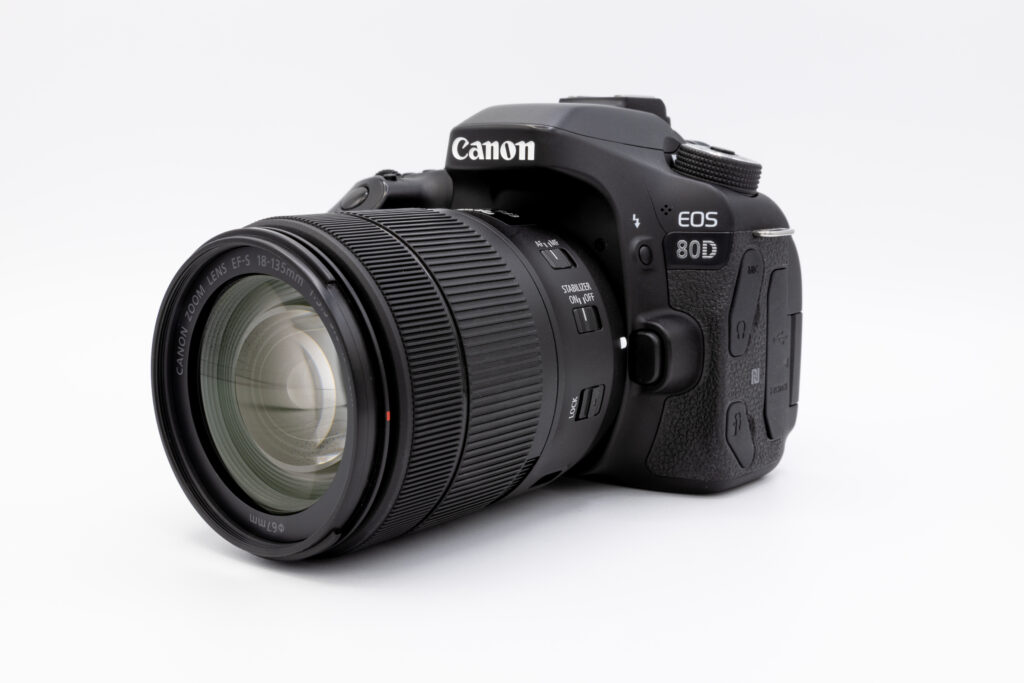
Camera
I own the Canon 80D. It’s not Canon’s “latest” model, but it’s still a VERY powerful camera that takes “webcam” to a whole new level!
If you don’t have the “latest” camera, don’t worry!
Any of Canon’s supported cameras will measurably step up your Zoom meeting video quality!
Camera Placement
Position your camera slightly above eye level. Your head tilts upward a little, prevents double chins, and gives you a more flattering jaw line. You normally don’t want your camera below eye level–although it can help you appear more authoritative and powerful. I set mine up so it’s peeking out over the top of my computer monitors.
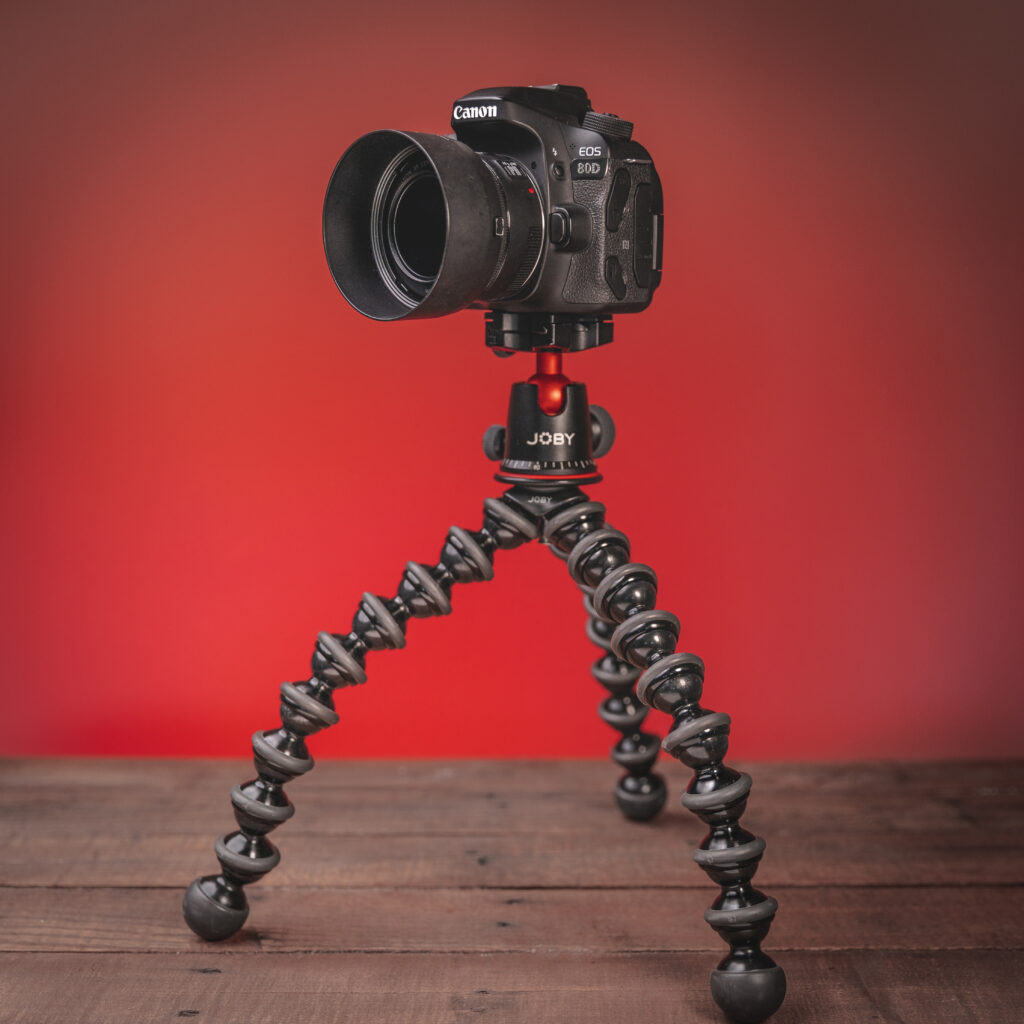
It doesn’t matter if you use a tripod or a stack of books to support your camera. As long as it’s stable, you’re good.
If you have limited space, consider picking up a Joby Gorillapod flexible tripod. It’s only about 12″ inches tall and can fit in tight spaces. It’s perfect for a desk.
Small desk and travel tripods may also work. Remember, your objective is to stabilize the camera, so you’ll look great in your meetings.
Framing and Composition
Now that you’ve got your lights, camera, and background all set up, it’s time to think about how you fit in the frame. You may need to zoom in, zoom out, or reposition your camera, depending on your setup. Here’s a few tips:

Don’t zoom in too close. In the example image, notice how the top of the frame cuts off the top of the lady’s head? We don’t want to cut off any heads. Zoom out a smidge, or pull your camera back a little.
Give yourself “headroom” at the top of the frame–that is, make sure there’s a little empty space just above your head.
Don’t zoom out too far either. You actually want people to see you in the meeting.

If you’re too far away from your camera, meeting attendees might have a hard time seeing you clearly.
Getting it right isn’t hard. Remember to give yourself some “headroom”, and position the bottom edge of the frame at roughly mid-chest.
One last tip is to use the “rule of thirds”. Imagine tic-tac-toe lines drawn over the frame, and position yourself with your eyes on the upper horizontal line.


Batteries and Power
When you use your Canon camera as a webcam, it sucks the life out of your battery–real quick. If you happen to have two (or more) batteries, it helps–because you can rotate fresh ones in, and charge the dead ones…
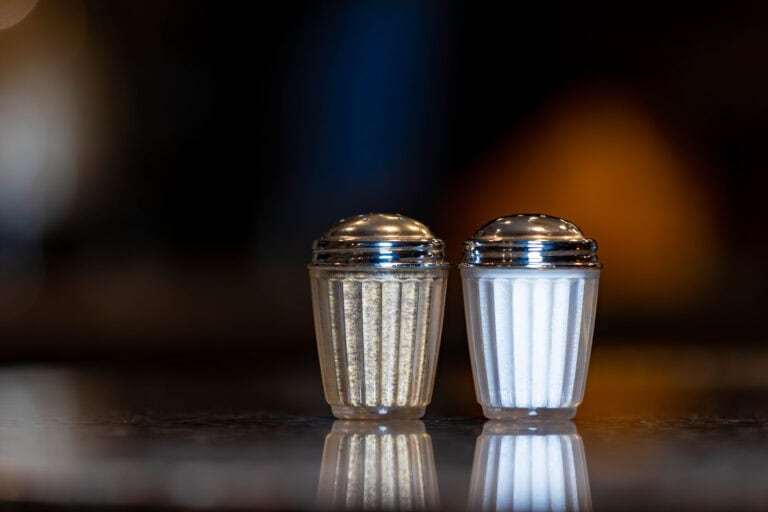
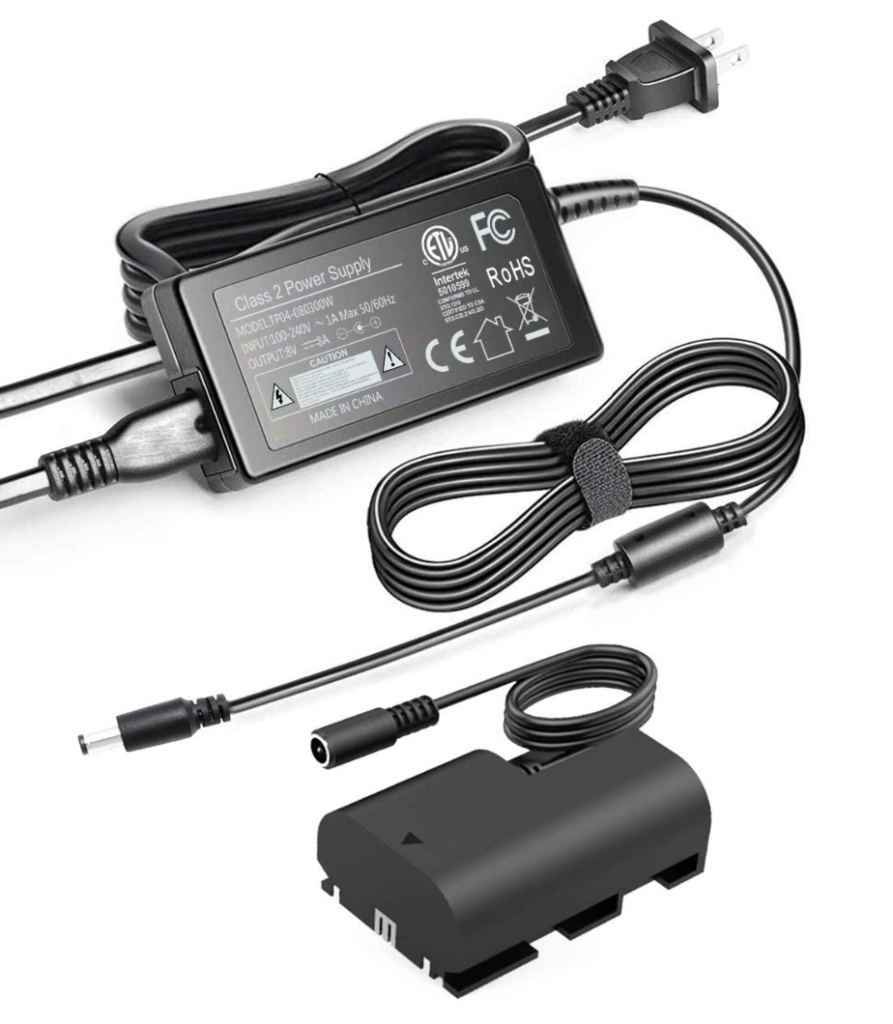
But rather than go through all that trouble, consider buying a dummy battery kit. A dummy battery lets you power your camera from a wall outlet–so you’ll roll from meeting to meeting without fear of battery failure.
Dummy battery kits cost around $20-$25 dollars, and are simple to use. The kit in the picture has 3 parts:
- The dummy battery with a wire dangling from it
- A middle wire
- The last wire that plugs into the wall
Canon cameras have a little rubbery opening for a wire to snake out from the battery compartment, with the battery door closed–made just for dummy batteries like this.
This is a no-brainer if you have an indoor setup with your camera in a semi-permanent location. They’re cheap, and you won’t stress about batteries anymore.
Don’t Do Zoom Meetings?
You might not do the whole Zoom meeting/webcam thing, but there are other ways to use your Canon camera when it’s tethered to your computer:
- YouTube live streams, talking head, unboxing, how to, (anything really) videos
- Facebook Live streams
- Online gamers who Twitch stream
A DSLR or mirrorless camera takes your online web presence to another level–even if you don’t use it for Zoom meetings!
Conclusion
The pandemic certainly changed the way many of us work. Maintaining a professional online appearance is just as important as looking sharp in the business office. One way to do that is to use your Canon camera as a webcam.
Now it’s your turn! What kind of camera and lighting setup works best for you in your online meetings? Be sure to share your tips and tricks with us in the comments!