
Shot List for Car Sales
Updated: November 2025
Do you need to snap a few photos of your car for an online auction site like Bring a Trailer, or Cars and Bids? If you need sales photos for your car, but don’t know what shots you need, then read on! In this post, you’ll learn the shot list for car sales that buyers want to “see”!
The Shot List
- Exterior
- Interior
- Engine Compartment & Trunk (Boot)
- Undercarriage
- Details
Exterior
Focal length: 50mm to 100mm. Avoid using wide lenses so you don’t distort the car.
Aperture: f/2.8 to f/5.6. Use a wide aperture to keep the car in focus, and blur the background a bit. It’ll help separate the car from the background.
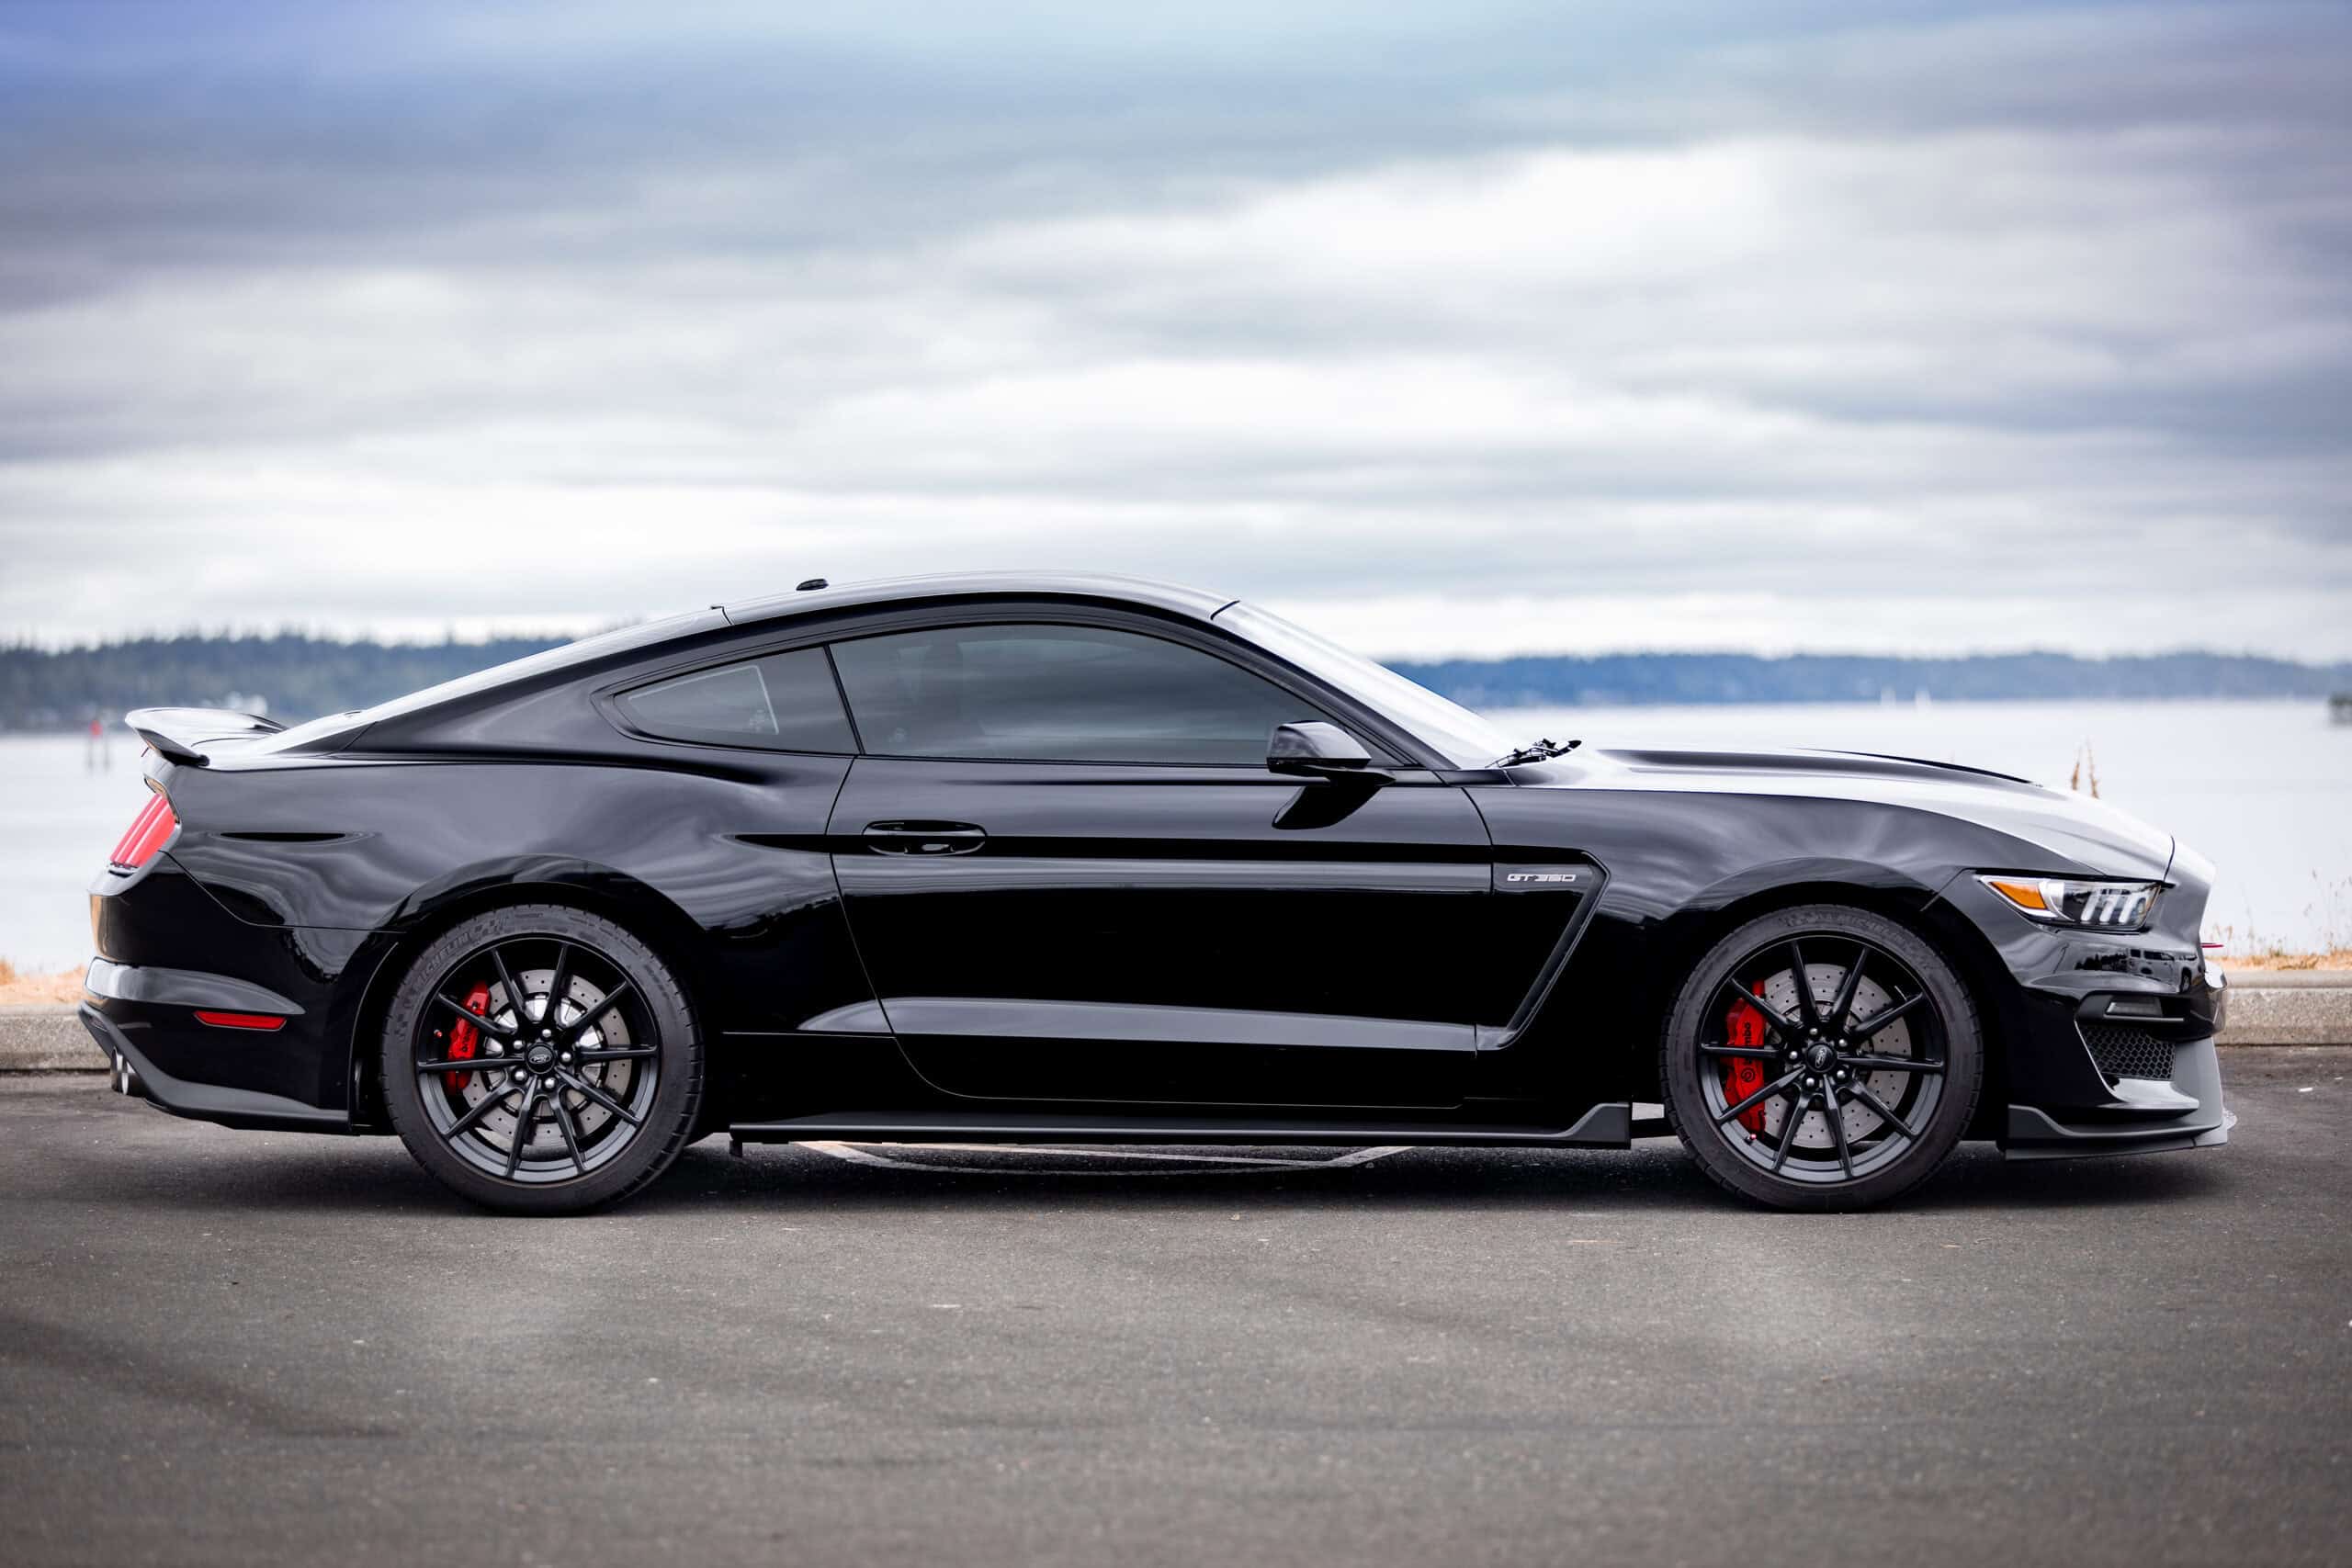
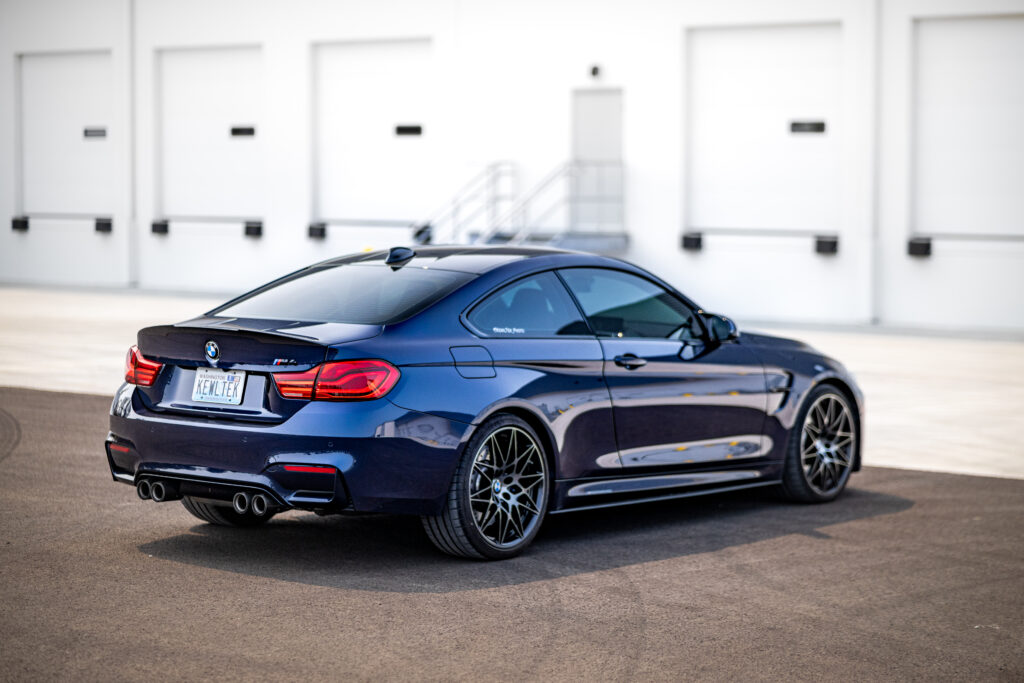
Camera height: 3′ or 4′ feet (a little over 1 meter) for primary 360 degree shots–as if you were seated in another vehicle. Position the vehicle so the front wheels are straight–not turned out.
If you need individual wheel photos, position your camera roughly 12″ inches off the ground, looking head on at the center of the wheel. Wheel shots should include some (or all) of fender, so viewers know which wheel they’re looking at.
Start at the front of the car, and move in a circle around the vehicle:
- Head on, front
- 3/4 shot, driver side, from front
- Driver side, profile
- 3/4 shot, driver side from rear
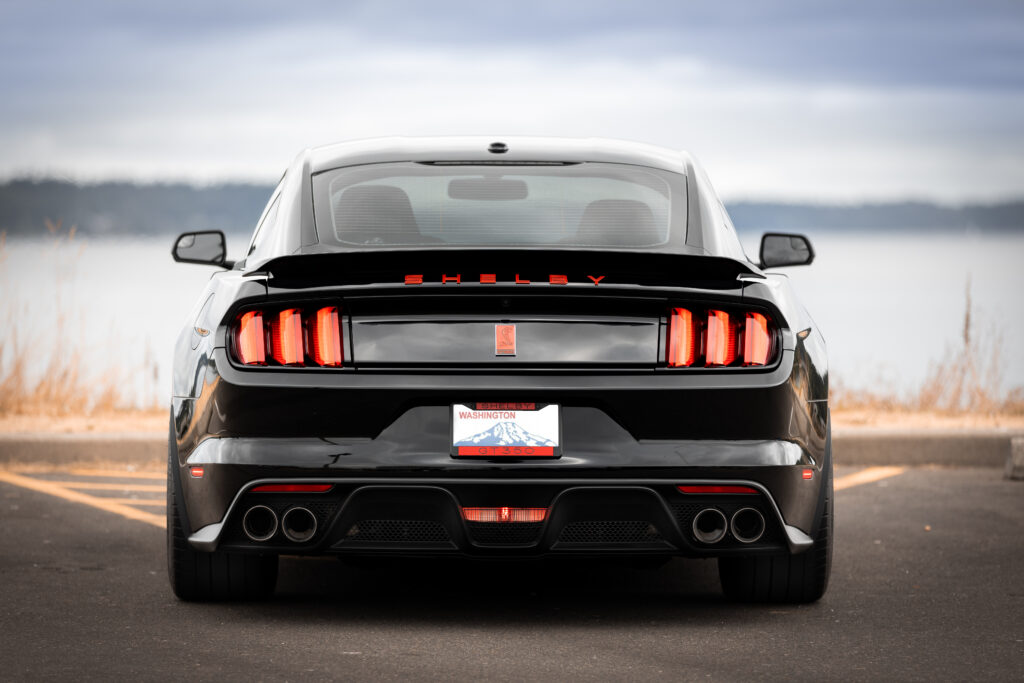
- Head on, rear
- 3/4 shot, passenger side, from rear
- Passenger side, profile
- 3/4 shot, passenger side, from front
- Full profile shot of each wheel and tire
- 3/4 front, driver side shot with the top down (for convertibles)
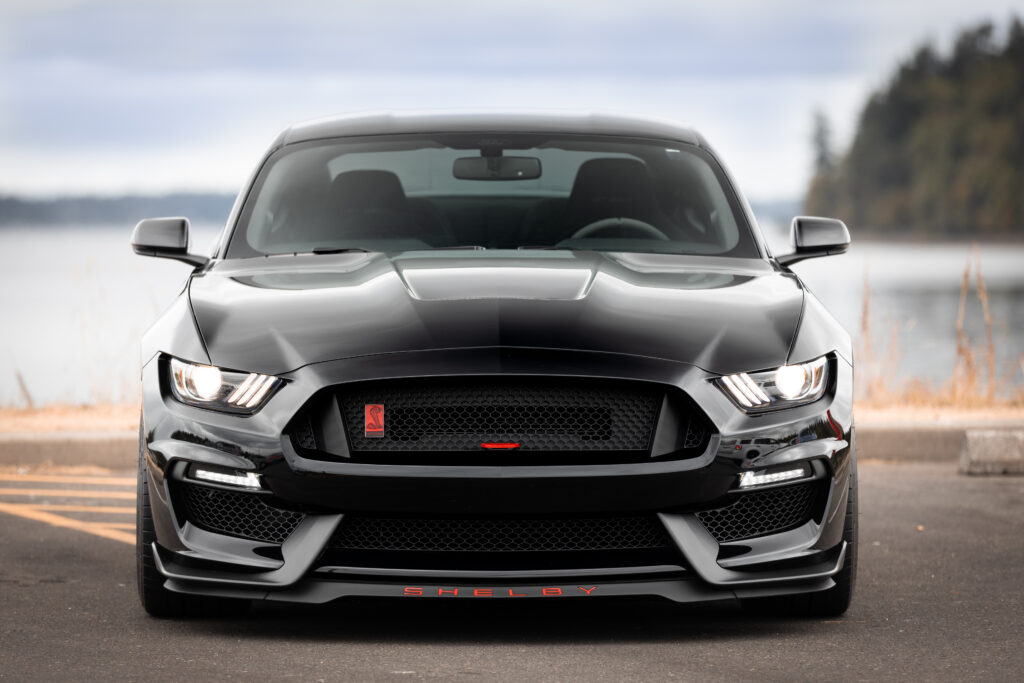
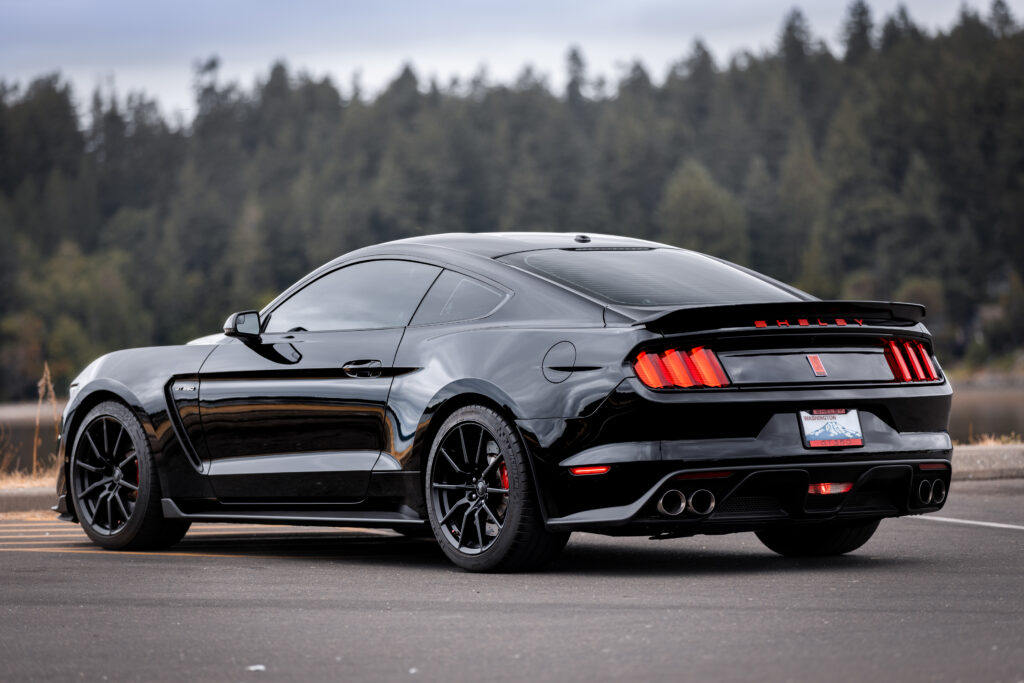
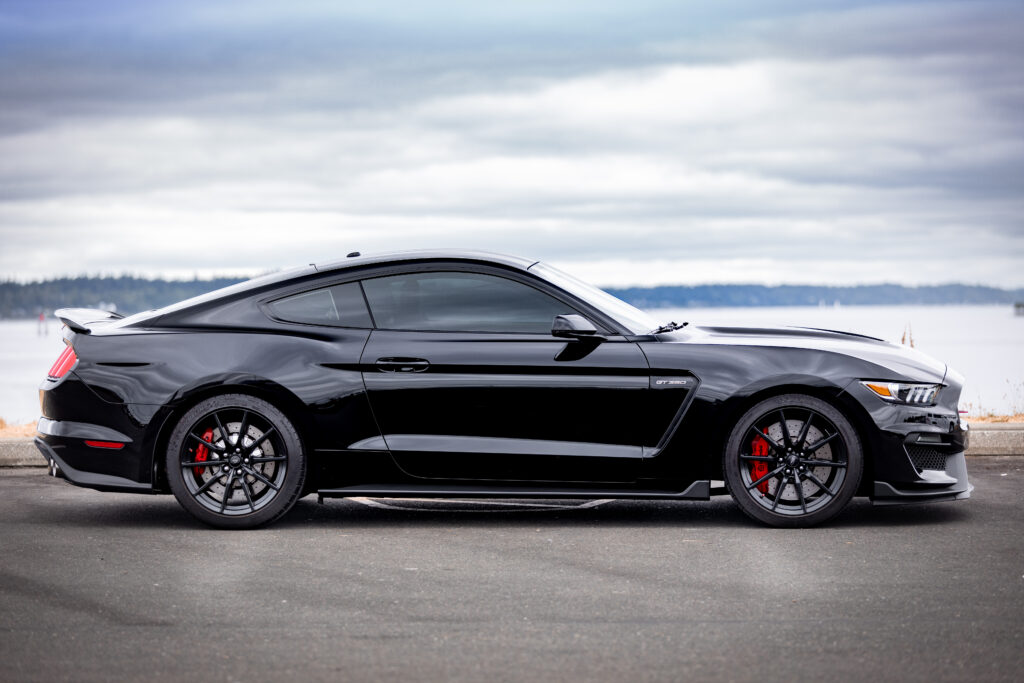
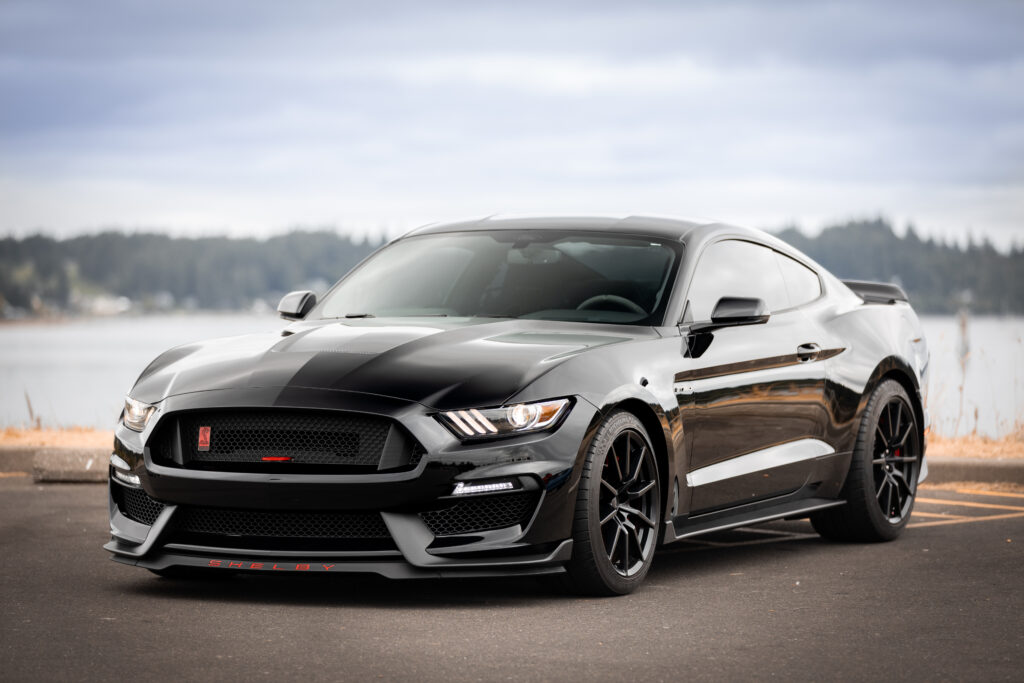
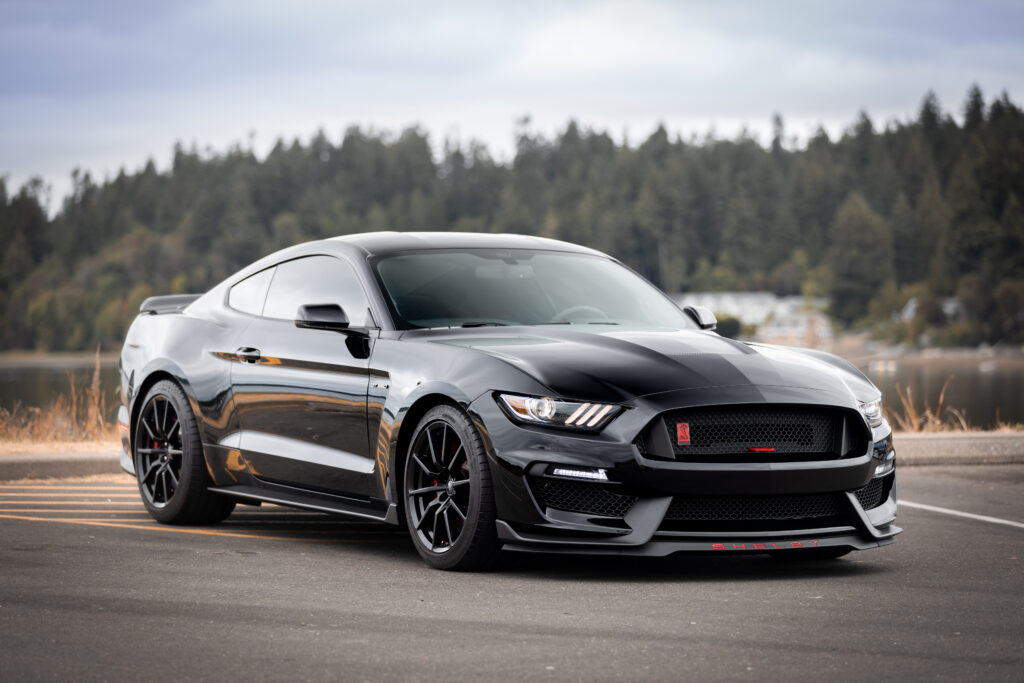

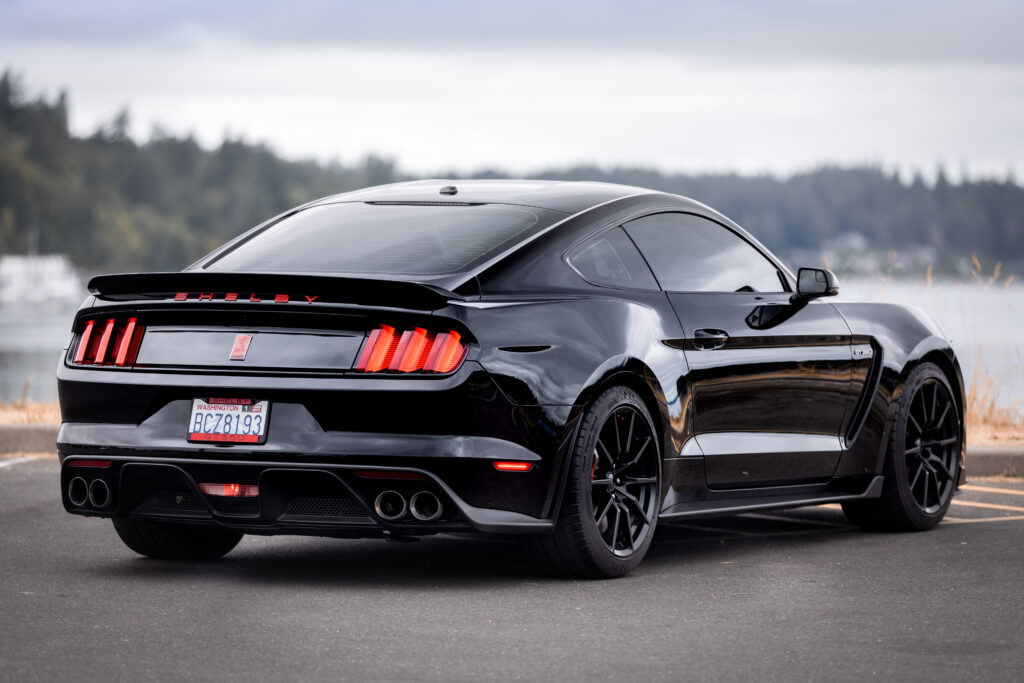
For the exterior shots of this fearsome Ford Mustang GT-350, I used a Canon EOS R with a 70-200mm f/2.8 L lens–zoomed in all the way to 200mm. I stepped back a bit from the car so it would fit in the frame, but the results were worth the extra effort.
When you combine the two techniques: “far distant background“, and “step back and zoom in“, you get a beautifully compressed and blurred background, and your car really pops!
Pro Tip: Always think about the background
- For best results, choose a location with a far distant background. If you can’t do that, then try to find a background that’s as plain and non-distracting as possible.
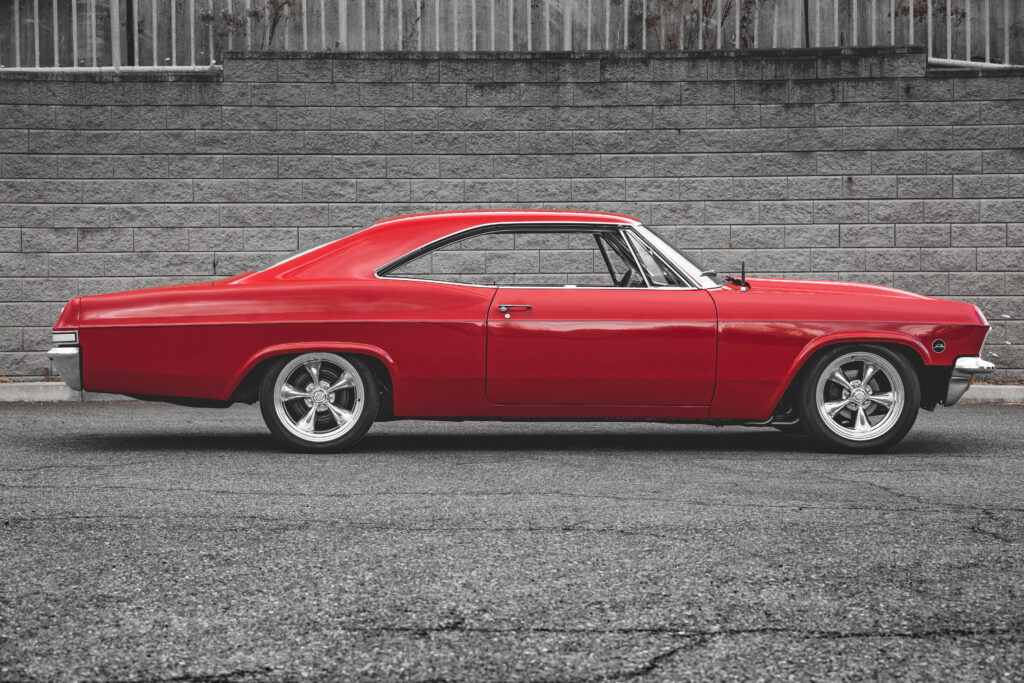
When you put distance between your subject (the car) and the background, it makes the background less distracting, and helps your car stand out. A “plain” background does the same thing. Remember–you want your car to be the star of the show–not billboards, trees, light poles, passing people, or other cars!
Interior
Focal length: 14mm to 50mm. Use a wider lens to capture small areas like the trunk, and other small spaces.
Aperture: f/4 to f/8. You want a deep depth of field (translation: more things in focus), to capture all the details.
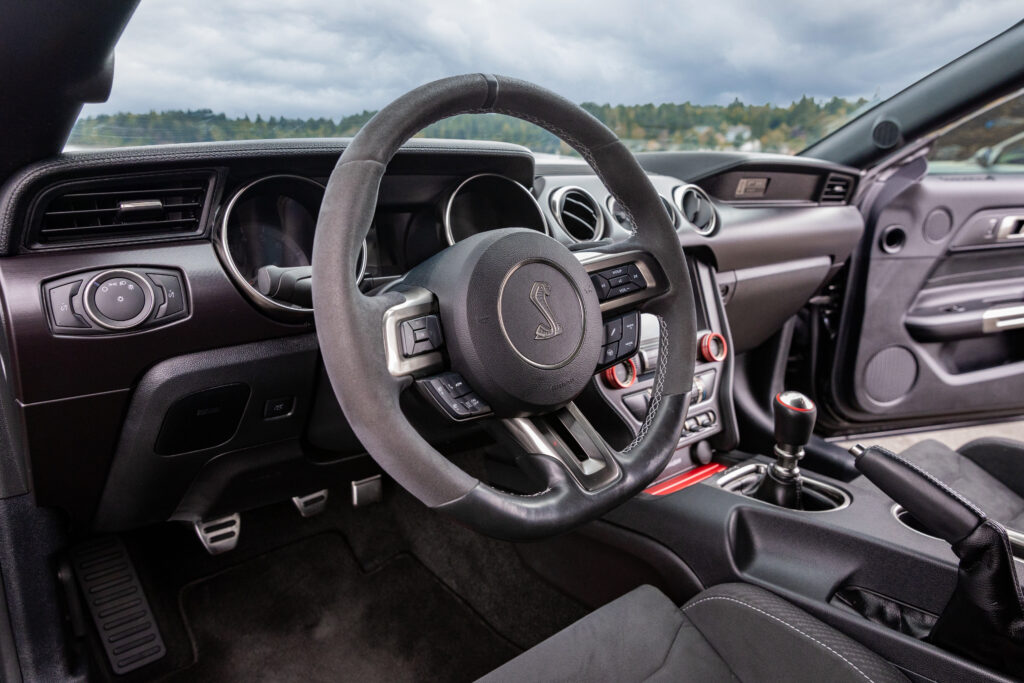
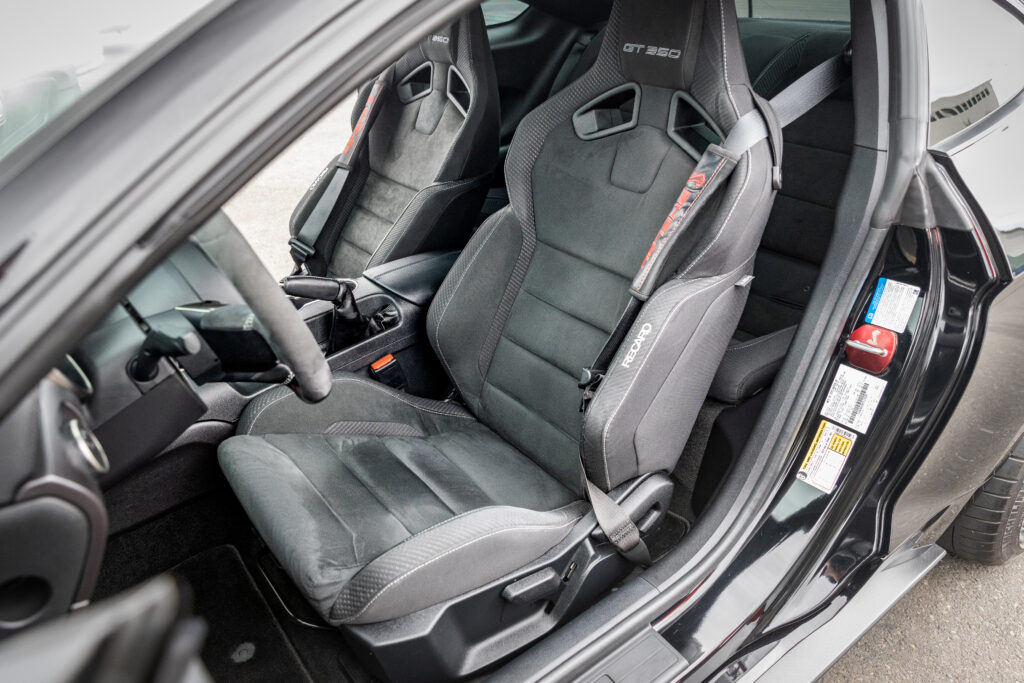
- Steering wheel, head on, with dash and gauges
- Wide shot of dash from driver’s side door
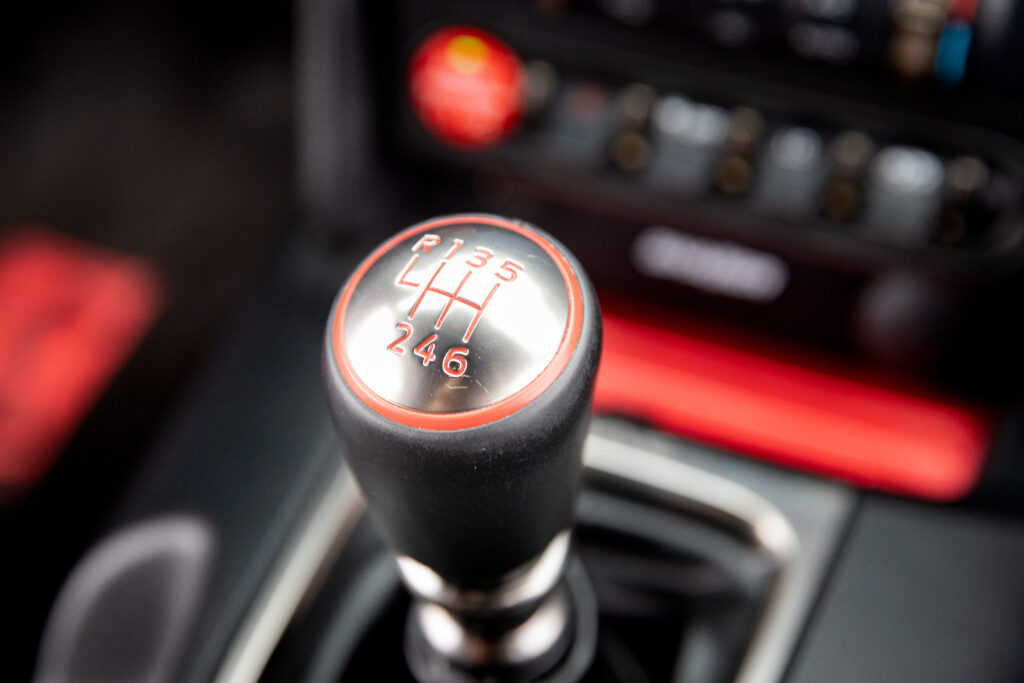
- Tight shot of gauge cluster, showing odometer with mileage
- Wide shot of dash from passenger side door
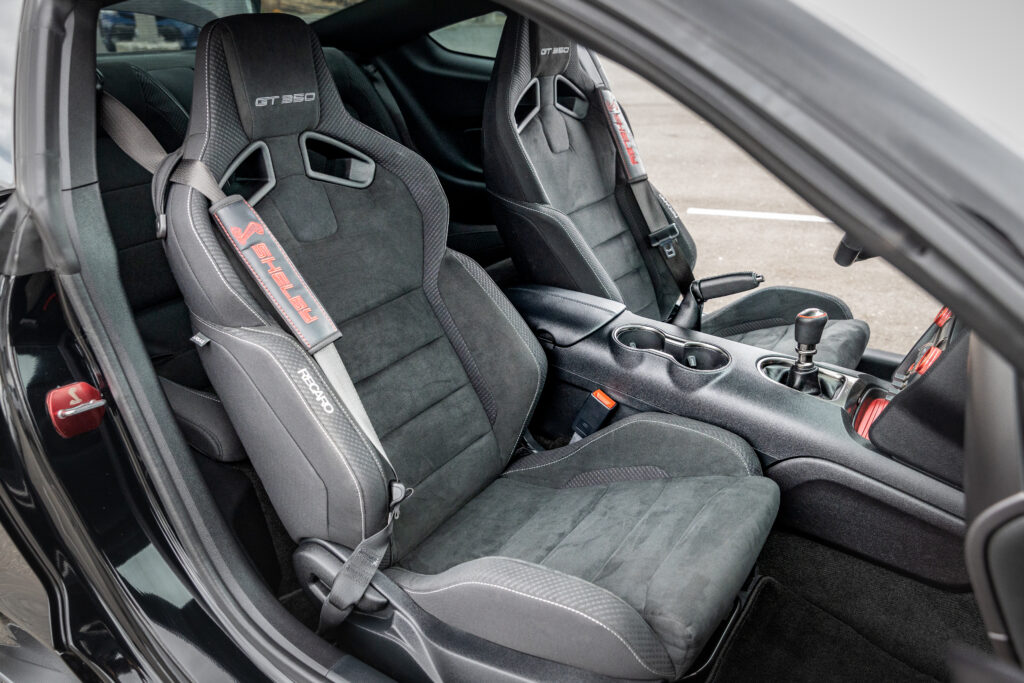
- Front seats from driver’s side
- Front seats from passenger side
- Back seats (if applicable)
- Area behind the front seats (both sides)
- Seat stitching and other details, including driver’s seat bolsters
- Driver’s side and passenger side door panels
- Glove box (open)
- Glove box (closed)
- Dash mount cup holders open and closed (if applicable)
- Driver’s side carpets, mats, or exposed floor
- Head on shot of pedals in footwell (gas, brake, clutch, parking brake, dead pedal/foot rest (if applicable))
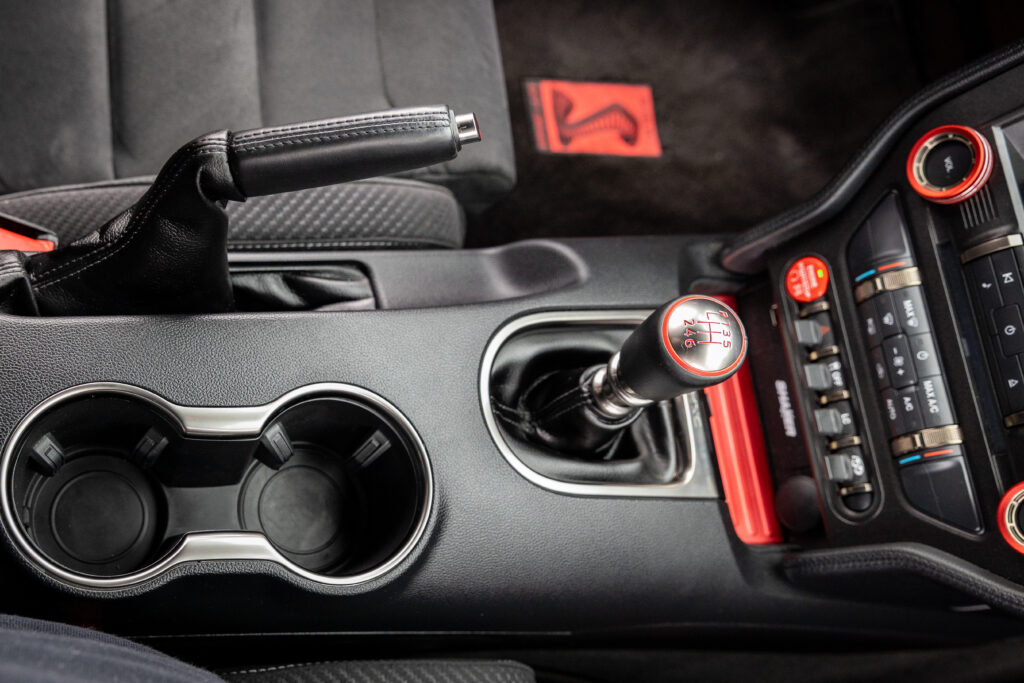
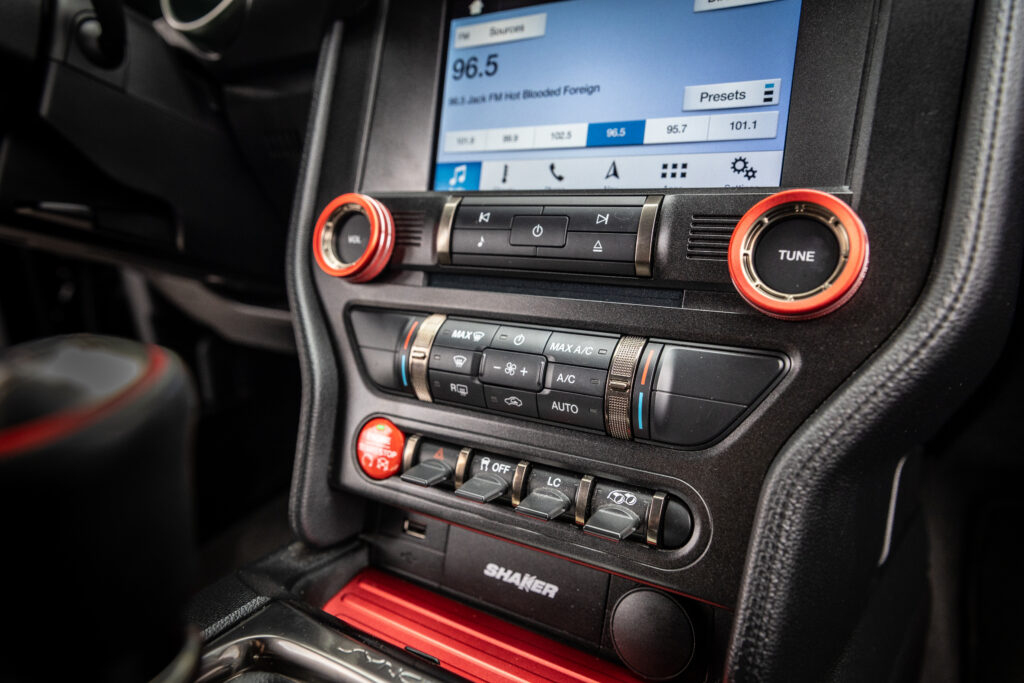
- Center console with lids/covers open, and closed (if applicable)
- Center armrest storage area open and closed (if applicable)
- Interior flaws (dash cracks, upholstery rips and tears, scuffs and scratches, broken pieces, etc.) if applicable
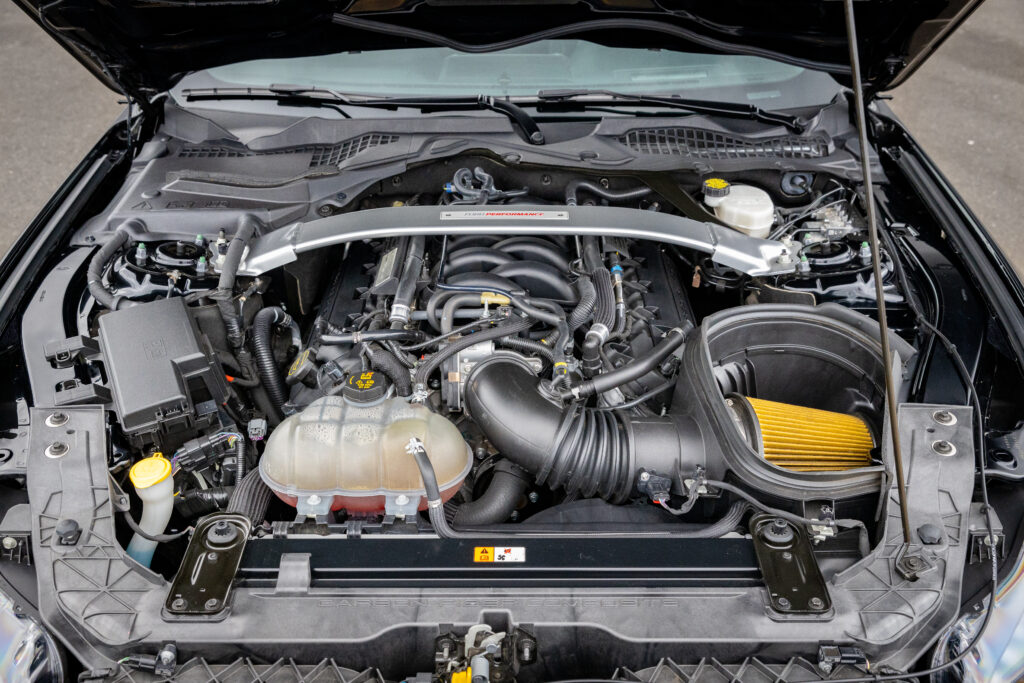
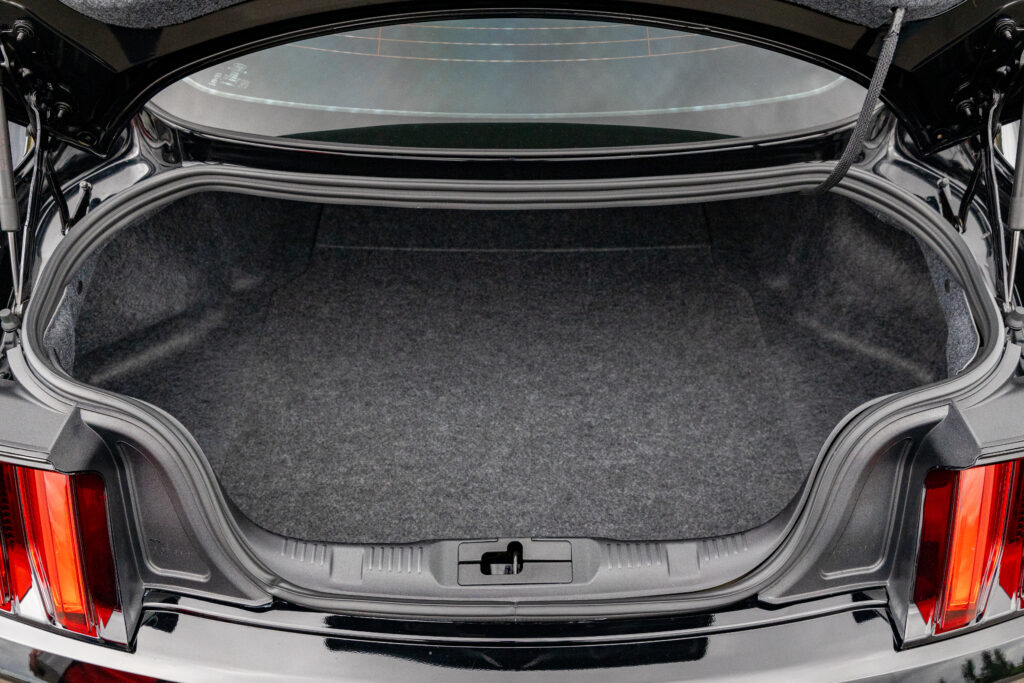
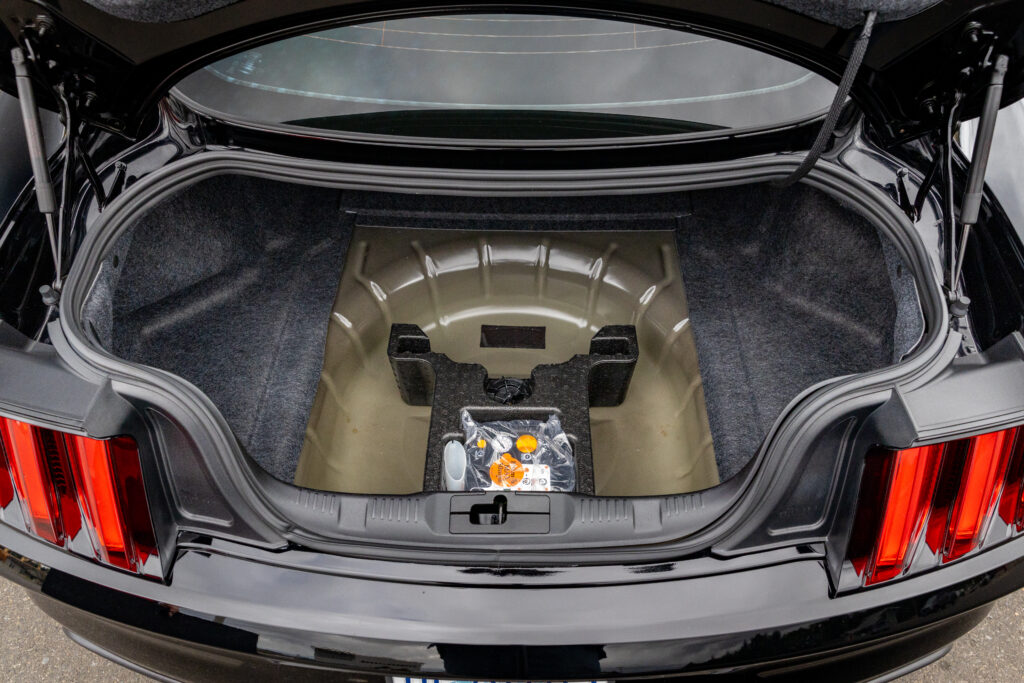
Engine & Trunk (Boot) Shot List
Focal length: 14mm to 50mm. Use a wider lens to capture the engine bay.
Aperture: f/4 to f/8. A deep depth of field helps capture details in focus.
- 3/4 angle, driver’s side
- Head on
- 3/4 angle, passenger side
In addition, capture unique details as needed.
The same three shots apply for the trunk (boot). If there’s a spare tire compartment under the floor, you need to lift the panel, and get a shot of what’s in there as well.
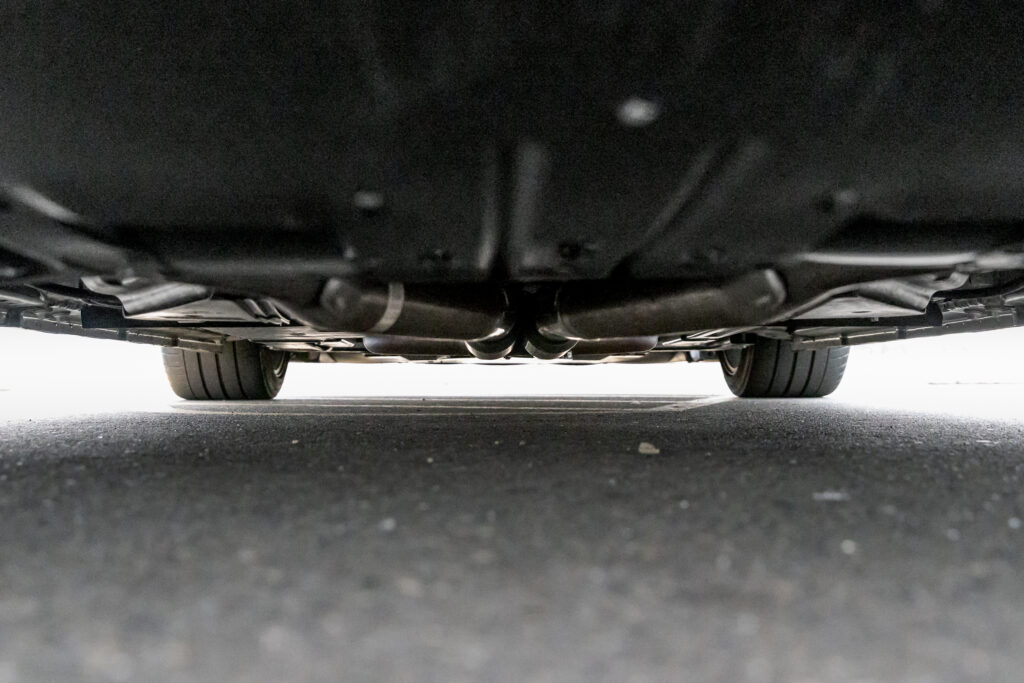
Undercarriage
In rare cases, you may need to photograph the undercarriage. People in coastal areas may want to show buyers that there’s no rust or corrosion on the chassis. Buyers might want to see images of an upgraded exhaust system, or carbon fiber drive shaft.
If you need undercarriage photos, and you don’t have access to a lift, position your camera near the ground and point it slightly up to see underneath the car. You may need to increase the ISO in order to correctly expose the shot. Bring a mat to lay on if you have to do ground work.
Details
Focal Length: As needed in order to capture details.
Aperture: f/4 or higher. A deep depth of field helps capture details in focus.
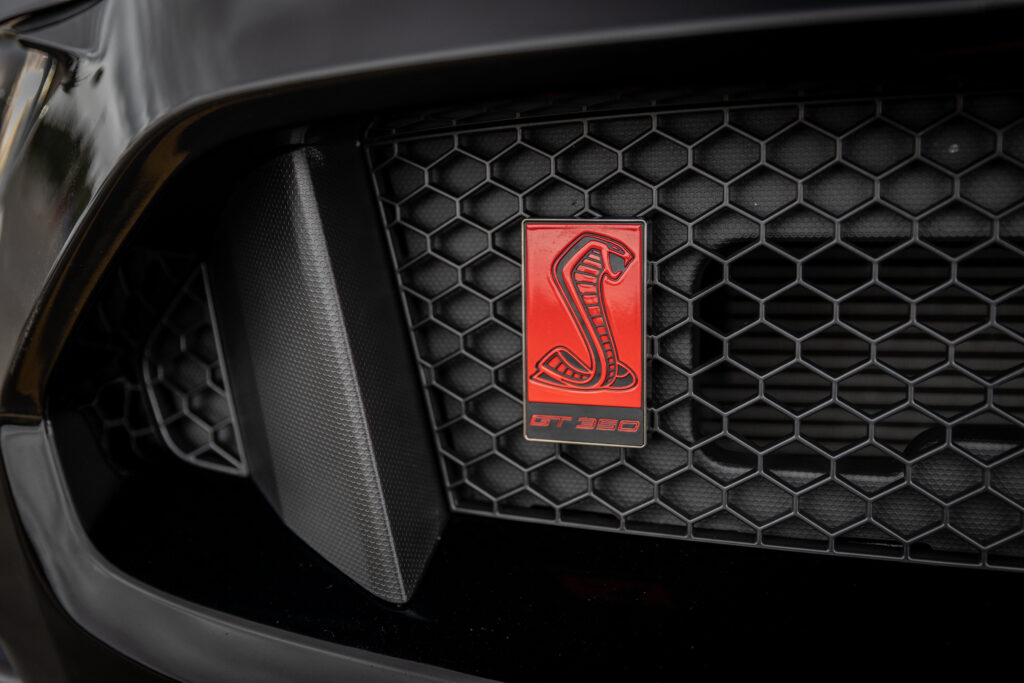
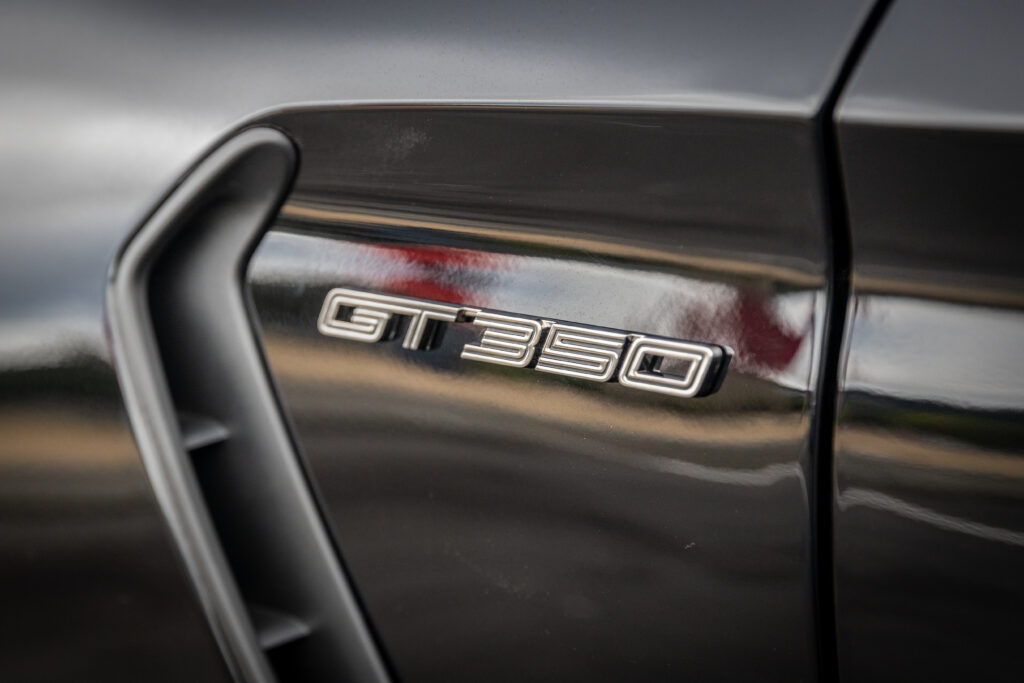
- Close up of plaques, badges, or VIN plates in engine bay and door jambs
- Factory stickers, decals, etc.
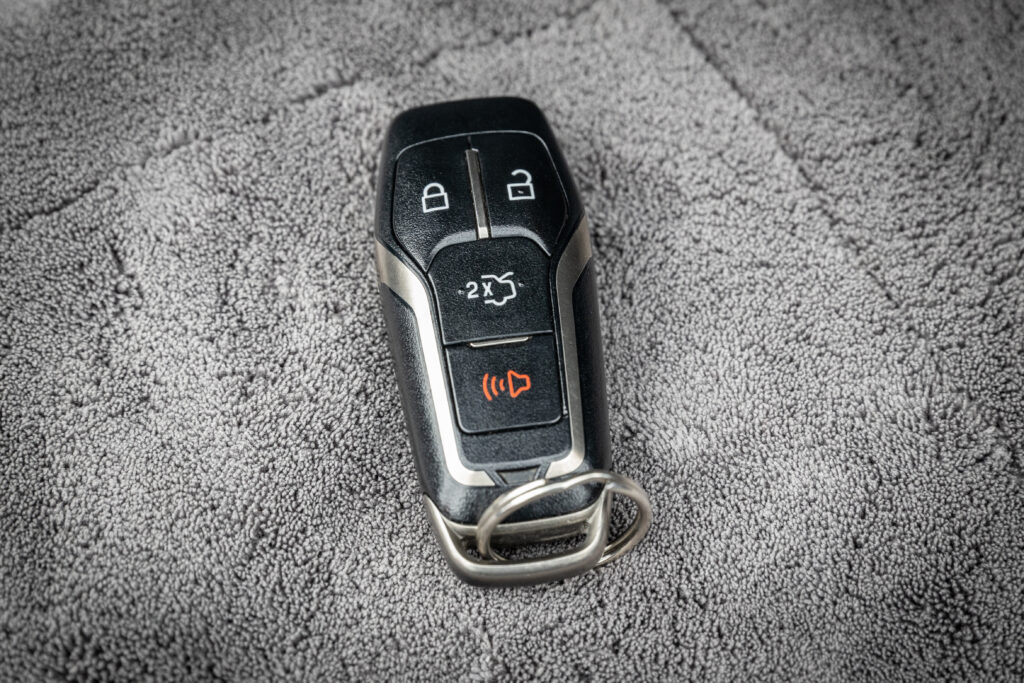
- Owner’s manual, books, and keys
- Records/paperwork fanned out
The TL;DR Section
The rest of this post is filled with tips to help you take better automotive shots. It’s the “fluff” most writers put up front that you have to scroll through to get to the content you really want. I put this stuff at the end to save you the trouble of having to scroll. 😉
Get your car detailed
This might sound obvious, but it’s important that your car is clean and shiny on the day you capture the photos.
If you think cleaning your car means spending an entire weekend using Q-Tips to dig dirt out of nooks and crannies, that’s fine. Or… you could just hire a professional car detailer.
You want your car to look its best, and attract as many potential buyers as possible, so a professional detail might be just the thing you need.
This isn’t a car show
If you’re into cars and photography, you’ve probably seen hundreds of car photos on social media that are heavily stylized, and edited to beautify the vehicle. You may have even created shots like that yourself. One or two “beauty shots” will help draw a viewer in, and entice them to click to see more, but they’re NOT what the whole photo set should consist of. So unless you’re doing a brochure session for BMW, just stick with this basic shot list for car sales and you’ll be fine.
Photography basics still matter
Your photos are the first thing potential buyers will use to decide if they want to part with their hard-earned money. Buyers appreciate quality images that follow basic photography rules. Vehicles sell faster and for more money when images aren’t dark, blurry, grainy, crooked, or blown out (overly bright). Take your time, and follow basic photography principles when photographing a car. When you do, everyone wins.
Use Proper Framing
- Use landscape orientation–not portrait orientation
- Fill the frame with the vehicle–try not to have too much dead space
- Avoid wide, fisheye lenses–distorted images won’t provide buyers with realistic views of your car
- Keep your horizons level

Think about lighting
- Avoid harsh sunlight and dark shadows
- Try to schedule sessions early in the morning (around sunrise), or later in the evening (around sunset) if possible
- If the sun is beating down, try to position your car in a shaded area to avoid harsh light/dark contrasts
Use a low ISO value on your camera
- Your images should be crisp and sharp. High ISOs result in noisy or grainy images, so dial it down.
Use a tripod if possible
- For consistency: At a minimum, take 8 shots around the vehicle (see the exterior shot list above). A good quality tripod means your exterior photos will all be shot at the same height. Your viewers might not know exactly why, but they’ll “feel” like your photos are higher quality somehow. The consistency your tripod produces is the key.
- For stability: Depending on available light, you might need to reduce your shutter speed. You’ll get blurry images if you photograph handheld with a slow shutter due to camera shake. Keep your camera on a sturdy tripod to prevent that.
Avoid distracting backgrounds
- Position your car in an area where you’ll get great shots, no matter the angle
- If that’s not possible, photograph what you can, then reposition the car and finish capturing photos
- The vehicle is the focus of your photos–not nearby visual clutter such as other cars, poles, people, etc., so avoid environments like busy shopping center parking lots, or cramped back alleys
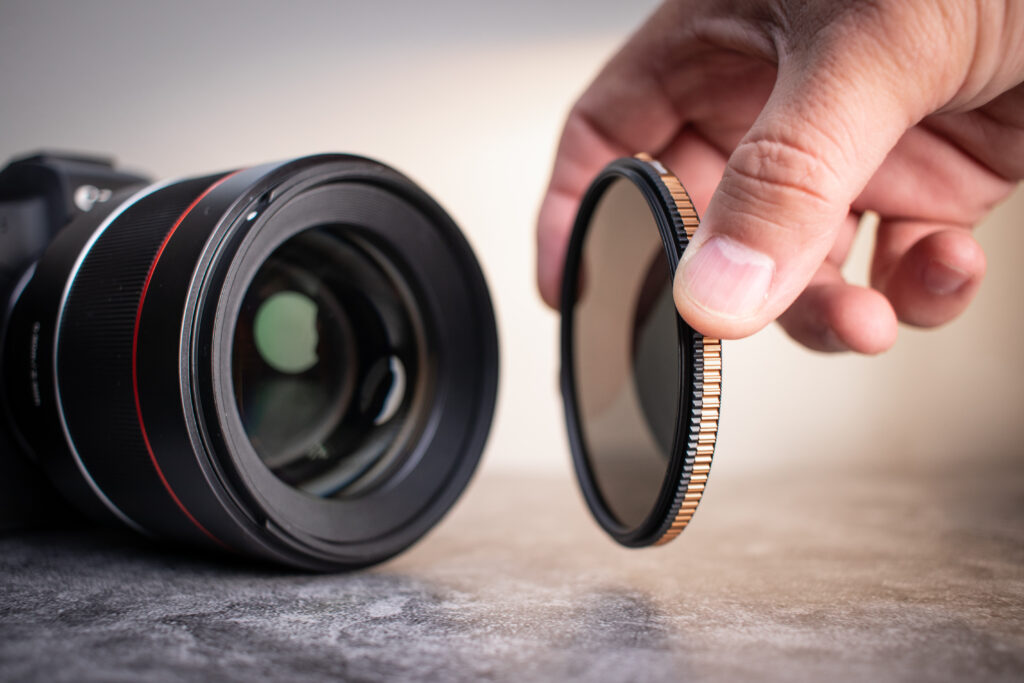
Use a circular polarizer
- These handy circular polarizer (CPL) lens filters remove unwanted glare from vehicle glass and surfaces
- They’re a “must have” for automotive photographers
- Not even Photoshop can remove reflections and glare like a CPL filter
Use the RAW file format
- Capturing RAW images gives you the latitude later on to make edits like boosting the shadows, or reducing unwanted highlights
Get things right in-camera
Don’t be tempted to rush and be sloppy, and say to yourself, “I’ll fix it in post.” Remember, you aren’t going to apply heavy edits to these photos. Customers want to see the vehicle for what it is–this isn’t Instagram. Therefore, it’s crucial to get as much right in-camera as you can.
Conclusion
Alright! Be sure to like the smash button, and drop a comment below! (That’s a joke for all you YouTube fans out there!).
But seriously, if you use a shot list for car sales, let us know! Drop a comment about your car photo sessions. Post up links to your social media pages so we can all give you some “likes” and “follows”!
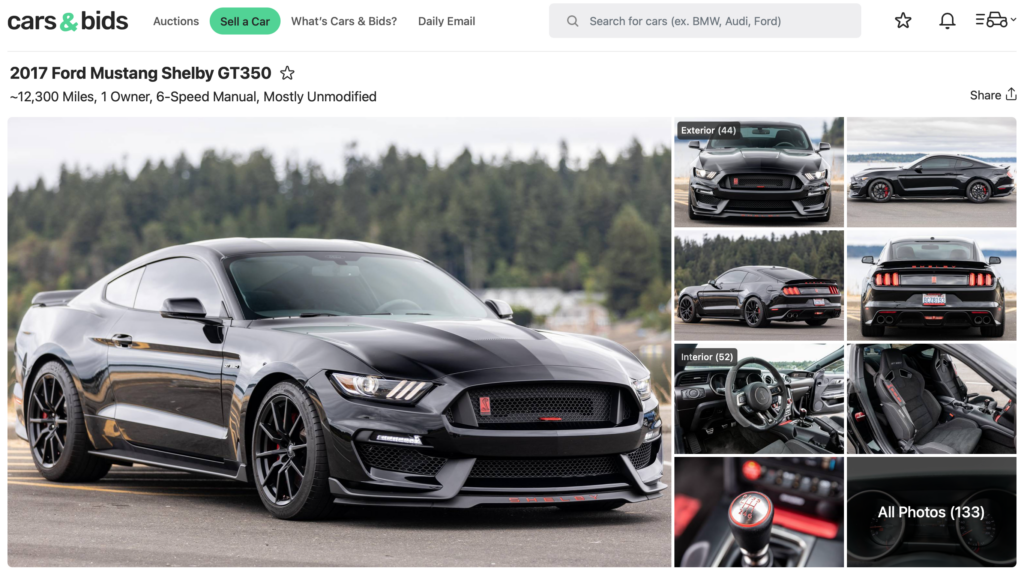
I photographed the phenomenal Ford Mustang GT350 you see in this post for the Cars and Bids online auction site.
Want to see how the auction went? Check it out at Cars and Bids!
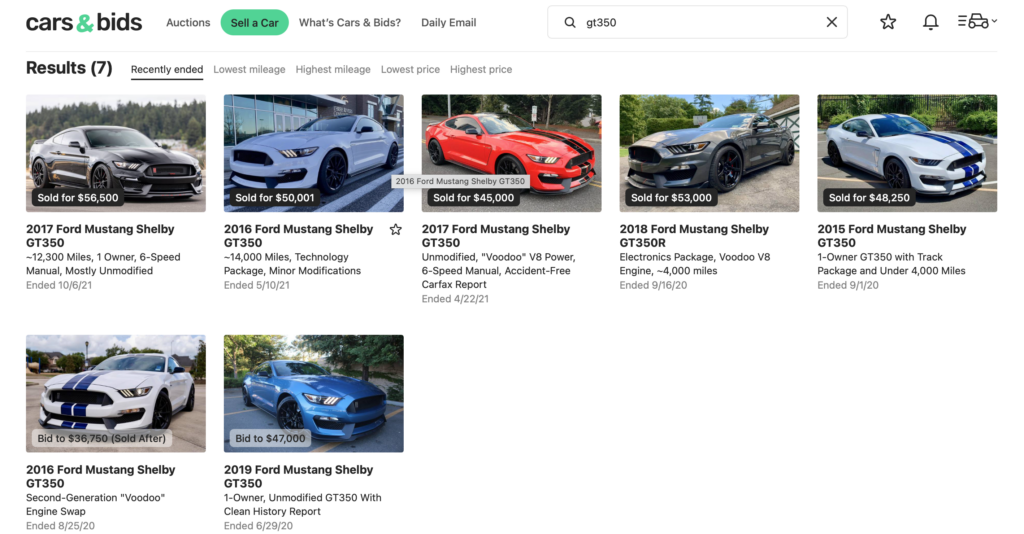
Here’s a spoiler: It sold for $56,500.00–a full $10,000.00 more than the average sale price for previous GT350s at that time. See photo below!
What was the difference? None of the other GT350s appeared to have professional photos.
If you live near the Olympia, WA area, and want me to professionally photograph your car, you can contact me through my commercial photography website: https://KewlTekPhotography.com


![How to Photograph Waterfalls [And Get That “Misty” Look]](https://kewltekphotography.net/wp-content/uploads/2020/04/IMG_0388-1-768x512.jpg)

This is the article every car photographer should read!
Then print.
Then use.
Brilliantly explained!
Now smash that like button!
Kevin
Drone & Automotive photographer
Insta – Vistavion_drone
Thanks Kevin! I’m glad this article helped you out!
Great article. One question I have is why you choose to shoot the exterior with wheels straight? I am a freelance photographer and do a lot of work for dealerships. They seem to always want the weeks turned to present a flat rim at the 3/4 shots. I think either can look good but I am wondering your reasoning for straight wheels. Personal preference? Thanks so much.
Hi Rob–that’s a great question! Wheels turned out are better looking from the 3/4 angles–no doubt. Just as subject posing “rules” exist for posing people, similar “rules” exist for cars. Turning out the wheels is one automotive photography “rule”. In fact, it’s usually considered a “rookie mistake” to photograph a car WITHOUT the wheels turned out. When snapping hero shots and beauty images of cars, I recommend turning out the wheels for the best look. Ok–so then why did I say to leave them straight in the post? My post is primarily targeted at people photographing vehicles for online auction sites. In the case of online auctions, some sites want as many as 80-120 perfectly exposed, distraction-free shots per vehicle. And they all want full profile shots of each wheel. It takes time (sometimes more than 2-hours) to complete those long shot lists, and we don’t want to stop the workflow to ask the vehicle owner to start the car, and turn the wheels this way and that way. Since we know that full profile wheel shots are required, keeping them straight guarantees the car will be “posed” for those shots. As for dealerships, stopping to turn the wheels for each car means more time to complete each shoot. If you’ve got a lot of cars to get through, and an inventory manager demanding that you finish quickly, you might want to keep those wheels straight just to save a few minutes per vehicle. But if your dealership wants the wheels turned out–then by all means turn them out! They’re your “customer” after all. If that’s their preference, then make ’em happy and turn those wheels out!