Canon Mode Dial Guide: What Every Shooting Mode Does (And Why It Matters)
Last updated: Nov 3, 2025
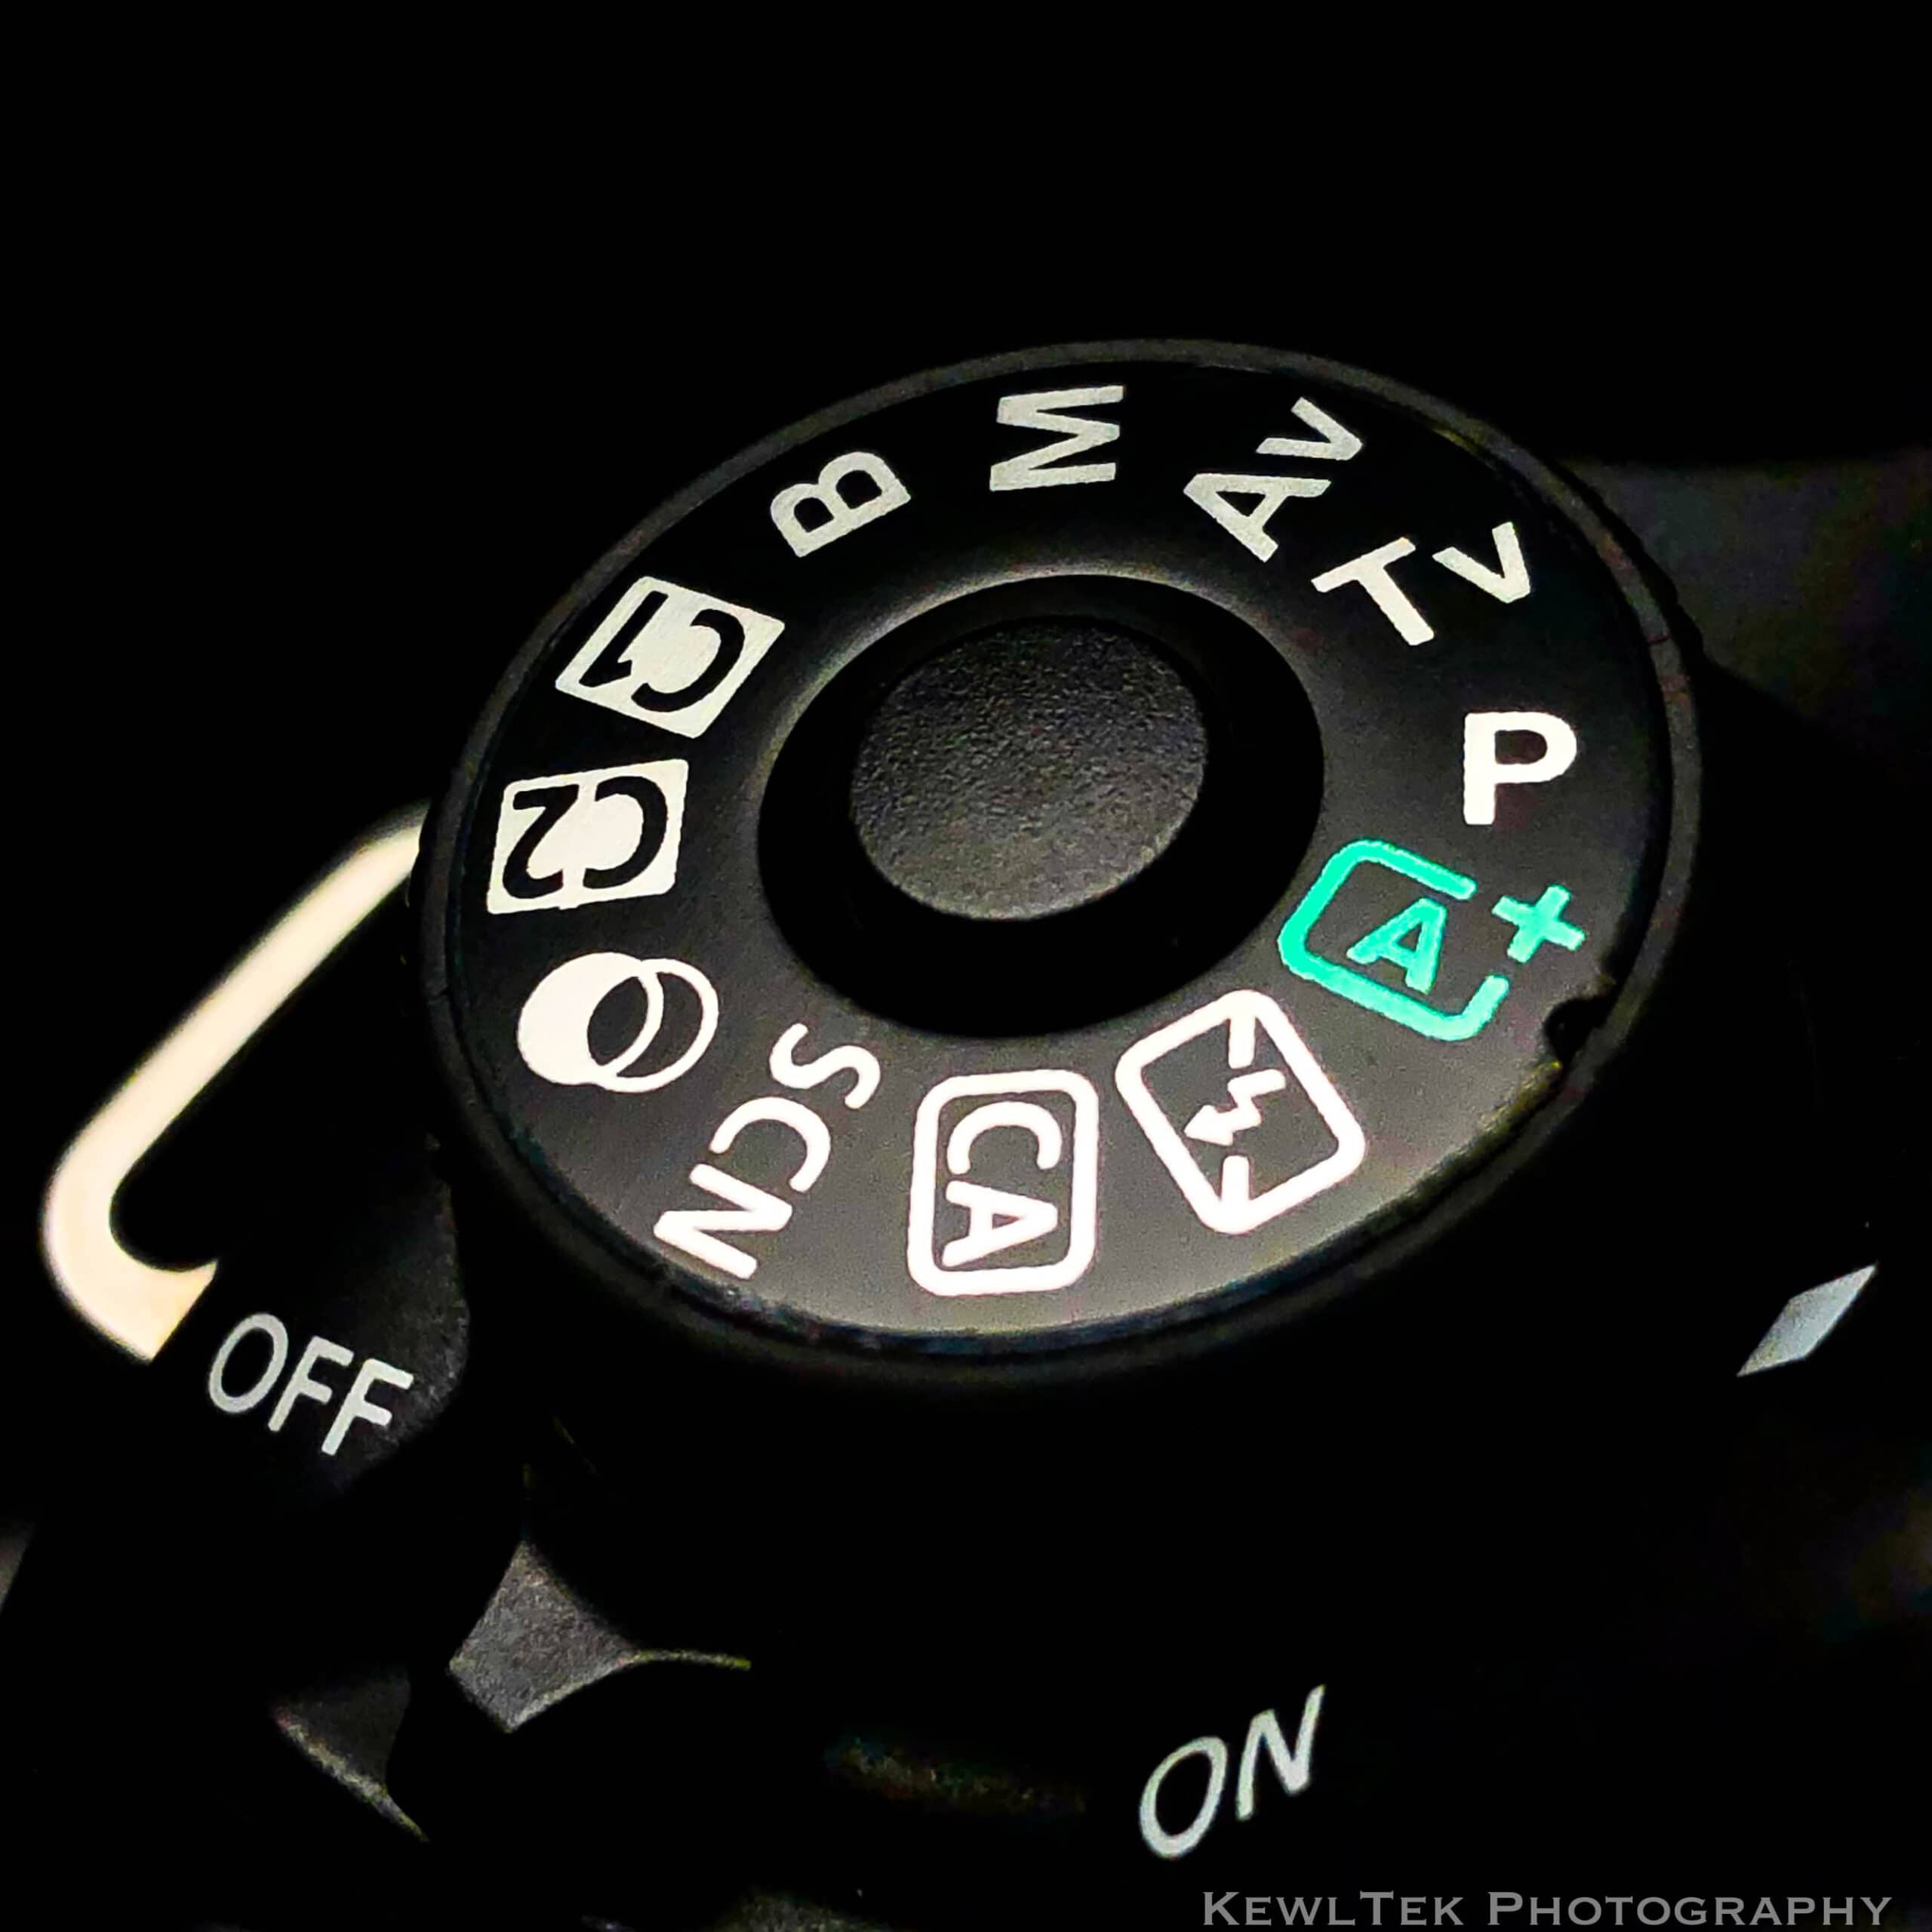
The Canon mode dial (also called the camera dial or shooting mode dial) controls how your camera behaves, whether you want everything done for you (automatic mode) or full manual control (manual mode). In this guide, I’ll explain every Canon camera mode on the dial, what each one does, and when you should use it.
10 Modes on your Canon Camera
Canon camera mode dials have two “zones”: Basic and Creative. The Basic Zone handles fully automatic modes designed for convenience, while the Creative Zone gives you full control over exposure, focus, and creative decisions. Let’s break down what each mode does — starting with how the mode dial is organized.
The Mode Dial
The mode dial is designed to make it easy to switch between automatic modes and manual or semi-manual modes. Understanding how these groups work will help you choose the right mode faster when you’re shooting.
The Basic Zone
- A+ Mode
- Flash Off Mode
- CA Mode
- SCN Mode
- Creative Filters Mode
The Creative Zone
- P Mode
- Tv Mode
- Av Mode
- Manual Mode
- Bulb Mode
“C1” and “C2” are places where you save your own custom configurations.

A+ Mode
Canon A+ Mode (“Scene Intelligent Auto”, commonly known as plain ‘ol “Auto”) is the fully automatic mode that analyzes the scene for you and chooses the best ISO, aperture, and shutter speed so you get a nice picture. It’s designed to give clean, bright photos with zero effort, making it perfect for beginners.
Flash Off Mode
Canon’s Flash Off Mode is the same as A+ Mode but forces the camera to shoot without the built-in flash, even in low light. It’s useful at indoor ceremonies, in museums, or anywhere flash is not allowed.
CA Mode
Canon Creative Auto (CA Mode) is basically the same as A+ Mode, but it allows you to modify some things such as background blur. Think of it as Auto Mode with training wheels; great for learning.
SCN Mode
Canon SCN Mode (“Special Scene Mode”) automatically selects the best settings for specific situations like Portrait, Landscape, Sports, and Close-Up. You just pick the scene, and the camera handles the exposure.
Creative Filters Mode
Creative Filters Mode lets you apply in-camera effects such as Grainy, B/W (black and white), Soft Focus, Fish Eye, and various HDR filters — no editing software required. This mode looks like two overlapping circles on the mode dial.
P Mode
Canon P Mode (“Program AE (Auto Exposure) Mode”) gives you Auto exposure with manual flexibility. The camera picks the settings, but you can override them any time. It’s the best “learning mode” before moving to Av or Tv.
Tv Mode
Tv Mode (Shutter Priority (Time Value) mode) gives you control over shutter speed so you can freeze action or create motion blur, while the camera automatically adjusts the aperture. Perfect for sports, waterfalls, and motion-based effects.
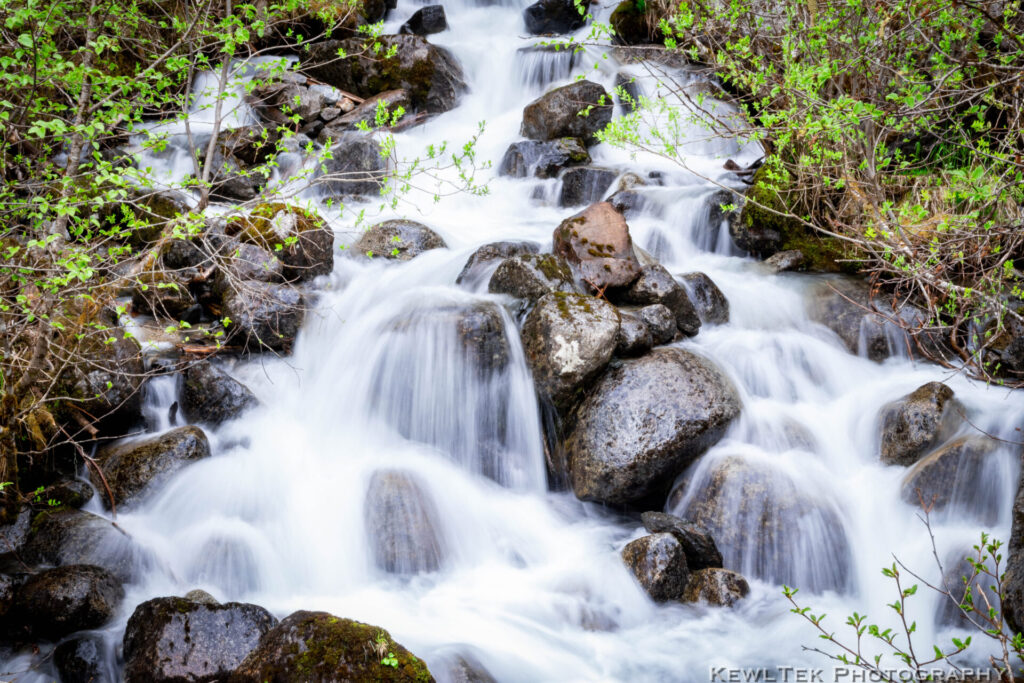
When you want to “freeze” the action (think wildlife, sports, and kids), use a fast shutter speed like 1/500, 1/1000, or faster. When you want artistic motion blur on waterfalls, streams, or passing cars, use a slow shutter speed (1/10, 1/4, or multi-second exposures) to create that smooth, silky, “misty” water effect. If you want a full guide to creating that look, check out my article: How to Photograph Waterfalls [And Get That “Misty” Look].
Bonus tip: When using slow shutter speeds (anything below 1/60), mount your camera on a stable tripod to prevent camera shake. Even slight movement will blur your image, especially in low light or long-exposure waterfall shots.
I recommend the K&F Concept tripod, because it’s lightweight and stable for long exposures.
Av Mode
Av Mode (Aperture Priority Value) lets you control the aperture to blur backgrounds or keep everything sharp, while the camera chooses the shutter speed for you. The aperture is an adjustable iris in your lens that opens and closes to control how much light reaches the sensor. Aperture is written as f-numbers (f/1.8, f/4, f/11, etc.).
Even though aperture size affects how much light hits the sensor, the effect you’ll notice most is the change in depth of field.
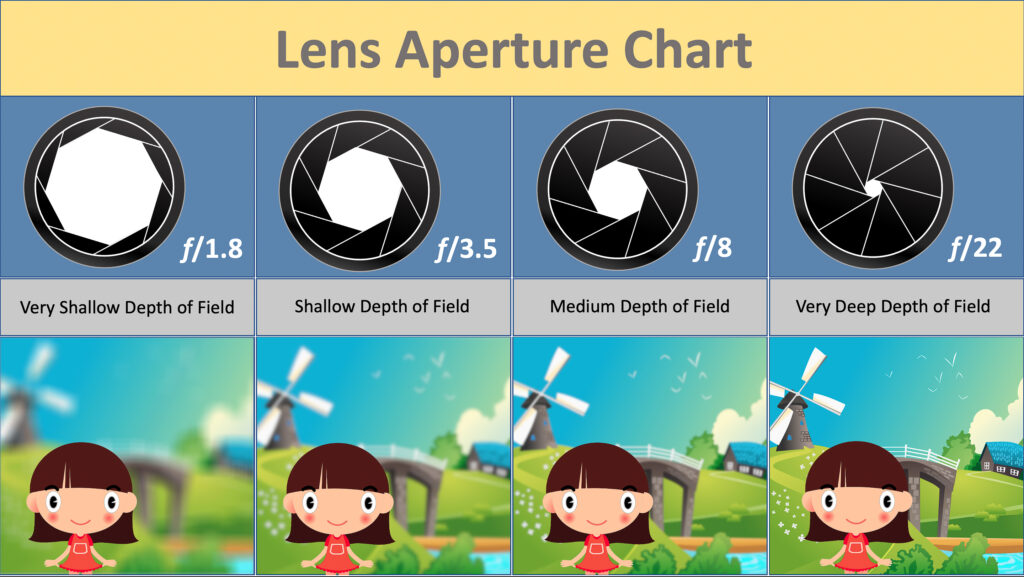
Wide apertures like f/1.8 or f/2.8 create a shallow depth of field, meaning only a small portion of your scene (your subject) is in focus, and everything else falls smoothly out of focus. This is what creates creamy background blur–an effect is called “bokeh”, and is something people really like. It’s perfect for portraits, detail shots, and for isolating subjects.
Narrow apertures like f/16 or f/22 create a deep depth of field, and keep the whole scene in sharp focus. This is useful for landscape photography, architecture, or scenes where everything needs to be crisp and in focus.
M Mode
Manual Mode is where you choose every setting: shutter speed, aperture, and ISO. If you’ve ever wanted full creative control, this is the mode that gives it to you.
What ISO Really Does
ISO controls how sensitive your camera’s sensor is to light.
- Low ISO (100-200): Less sensitivity for cleaner sharper images
- High ISO (1600+): More sensitivity; helps in low light, but adds grain/noise
How to Set ISO in Manual Mode
Start simple:
- Bright light (outdoors) → ISO 100
- Shade / Indoors with good light → ISO 400-800
- Low light / Indoors at night → ISO 1600-3200
- Very dark scenes → ISO 6400+ (only if needed)
The Canon 80D, for example, ranges from ISO 100 on the low end up to 16,000+ on the high end. Don’t be afraid to experiment — practice indoors, outdoors, and in different lighting. ISO is one of the easiest settings to learn by feel.
Why High ISO Causes Grain (and When It’s OK)
If you raise your ISO, your images get brighter — but you’ll also introduce digital noise. Noise looks like grain, speckles or “roughness” in your image. A little bit of noise can sometimes feel gritty or artistic, but most of the time photographers prefer images that are clean and sharp.
Rule of thumb: Use the lowest ISO you can get away with while still getting a properly exposed photo.
If you want to dive deeper into what “noise” actually is, here’s an excellent explainer: ➡️ PhotographyLife: What Is Noise in Photography?
B “Bulb” Mode
Bulb mode is used for night photography and long exposures. In this mode, the shutter stays open as long as you hold down the shutter button. That’s how photographers create those dramatic shots of car-light streaks, star trails, and “light painting” effects.
In Bulb Mode, you set the ISO and aperture yourself–then press and hold the shutter button to expose the image for several seconds (or minutes). Because even slight movement can blur your shot, Canon recommends using a remote shutter release in this mode to avoid camera shake. Your camera should also be mounted on a sturdy tripod for stability.
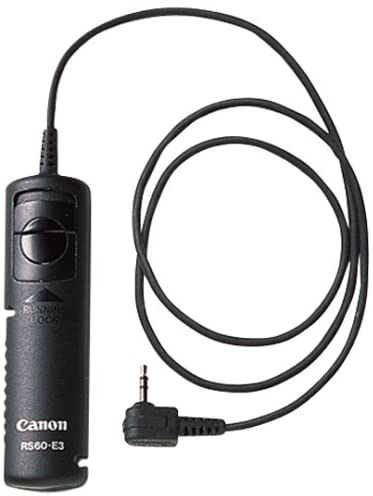
For cameras like the Canon 80D, the official manual specifically recommends the RS60-E3 remote for Bulb Mode shooting.
If you want a reliable (and inexpensive) remote for long exposures, the Canon RS60-E3 is a great pick. It’s the one Canon endorses for this mode.
Conclusion
You made it! Now you know how all 10 Canon camera modes work—and when to use them. These modes appear on many Canon DSLRs and mirrorless cameras, so everything you learned here applies no matter what model you’re shooting with.
Understanding your mode dial gives you creative control, sharper images, and the confidence to shoot in any situation. Now go practice, experiment, and enjoy making something awesome!
Your Turn!
Which camera mode do you use the most—and why?
Tell me in the comments below. I read every one.


![11 Basic Canon Camera Settings [and when to use them]](https://kewltekphotography.net/wp-content/uploads/2025/12/Canon-Camera-Settings-EOS-R-Top-Down-768x512.jpeg)


Thank you for the info, I normally use automatic, but I want to learn more. I need to photo a parked car but it was over exposed on automatic. It is an old black car. Time has always been an issue, but I have more time at the moment. Any advice would be appreciated. Thank you Dee
Thanks Dee– I suggest reading my post “11 Basic Camera Settings [and when to use them]“. It has a section on “Exposure Compensation”, which explains why your camera overexposes your shots when photographing a black car. I also wrote a post about photographing cars called “Shot List for Car Sales” that might also help you! Good luck!
I love all what you have explained in this post, I am happy to have stopped by and take a good look at it.. I will bliud my world and interest around this and learn more from you. I am learning about photography and videography, I am just 2month hold in this world of photography and I hope it will be a great adventure too me????????????????
Hi Eko! I’m sure you’ll have lots of fun as you learn and grow in your photography adventure!