
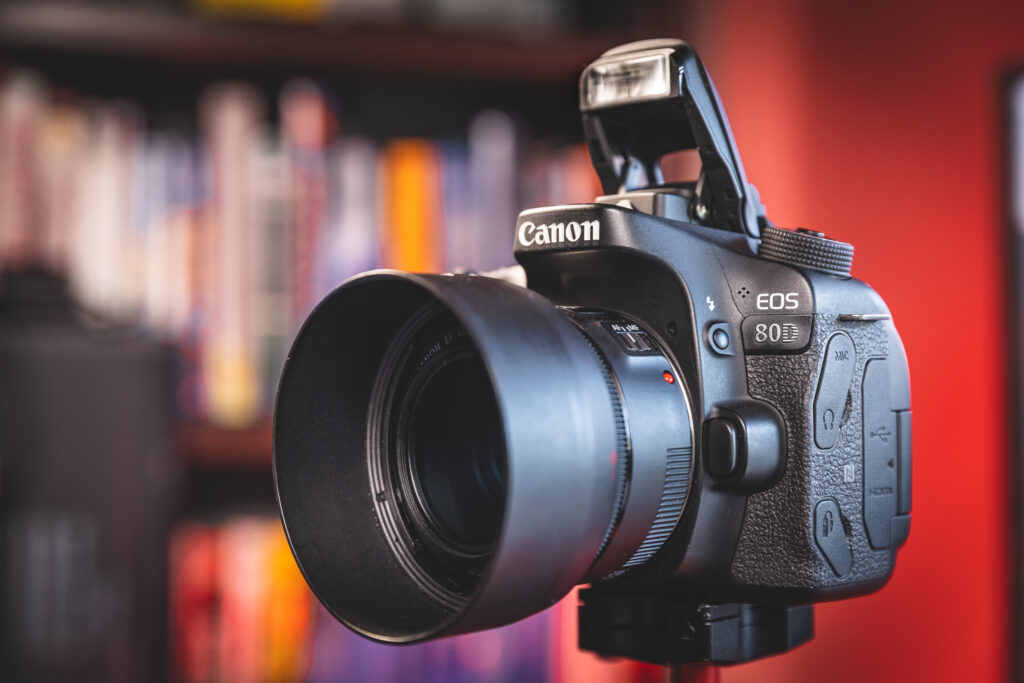
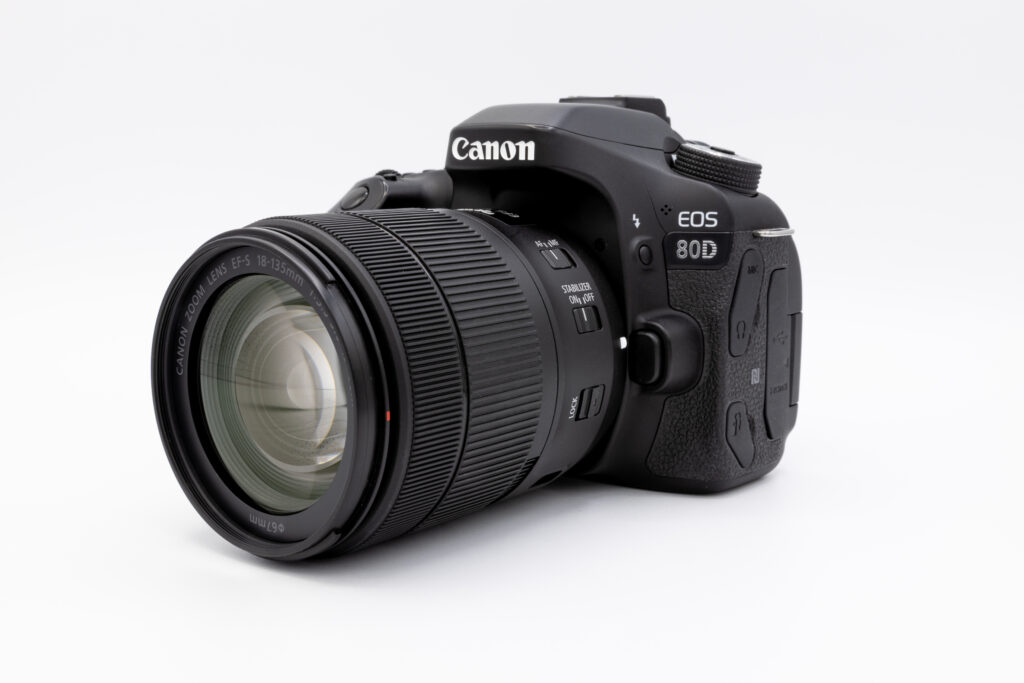
11 Essential Canon Camera Settings (With Examples and when to use them)

If your photos don’t look the way you expect — too dark, too bright, or just off — the problem usually isn’t your camera. It’s your settings.
Getting proper exposure isn’t about guessing or memorizing complicated rules. It comes down to understanding a small number of core camera settings and knowing when to use them.
In this guide, you’ll learn 11 essential Canon camera settings that directly affect exposure, image quality, and consistency — explained in plain language so you can start using them right away.
New To Your Camera? Start Here
If you’re brand new to your camera, some of the settings I mention in this post might be confusing if you don’t know which knobs or dials to use to make adjustments.
Before diving in, it can be really helpful to be familiar with your camera’s basic controls. I walk through them step by step in this article:
At the end of this post, there are 3 practice scenarios for you to set your camera’s settings for “Landscapes”, “Portraits”, and “Panning Shots”. Practice makes perfect better, so give them a try!
1. The Mode dial
Most cameras have several photographic modes. You can learn more about each mode in my Canon Mode Dial Guide. The mode you use depends on your preference, subject, and experience. A camera’s semi-automatic modes, (Aperture Priority (Av) and Shutter Priority (Tv)), let you control the settings that are most important based on your subject.
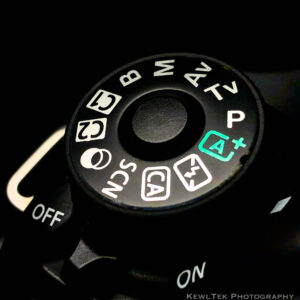
- Auto (a green square on the mode dial) takes care of your camera’s settings for you. All you need to do is point and shoot
- Program (P) mode controls your camera’s shutter speed and aperture, and lets you set options like ISO, metering modes, and white balance
- Aperture Priority (Av) lets you control the aperture, and the camera handles shutter speed
- Shutter Priority (Tv) lets you control the shutter speed, and the camera picks an aperture based on your selected shutter speed
- Manual mode (M) requires you to control all settings, including aperture and shutter speed. As a beginner, you’ll only need manual for a handful of advanced scenarios. As you progress, you’ll get much more comfortable with manual mode
What About Video?
If you shoot video on a Canon 80D and just want a clear menu-by-menu reference of every video setting (with recommended settings), I put together a visual walkthrough here: Best Canon 80D Video Settings.
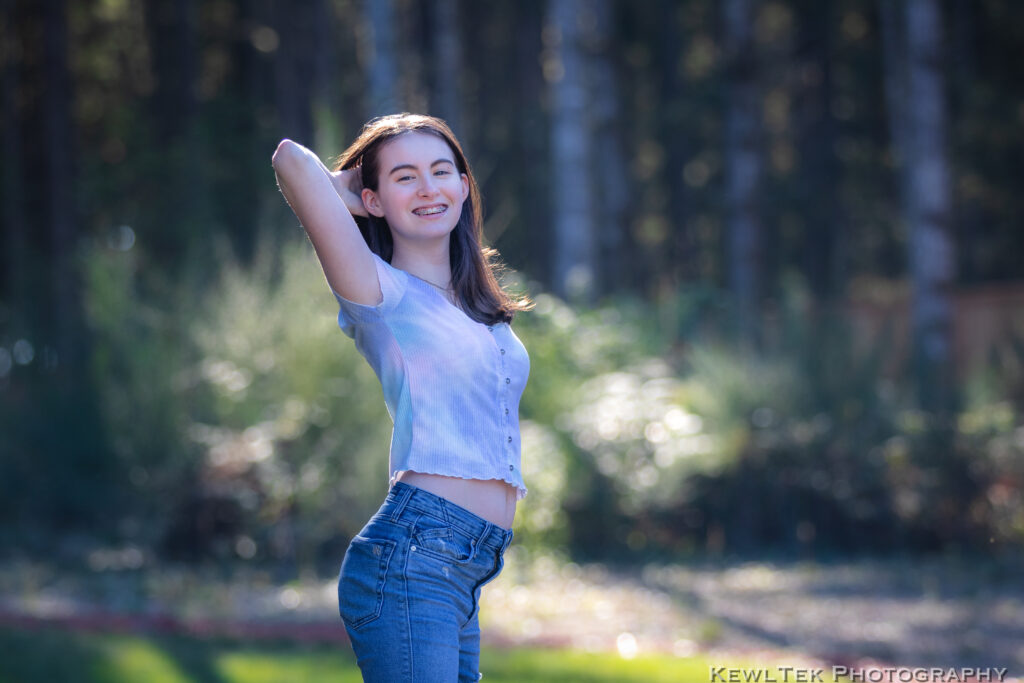
2. Aperture (Av) – Control the Depth of Field
Image “depth” consists of the foreground, subject, and background elements in your photo. “Depth of field” simply refers to how “in focus” each of those elements are.

Wide apertures like f/2.8, create an extremely shallow depth-of-field. Portrait photographers prefer a shallow depth of field to keep their subjects sharp and backgrounds blurred.

Landscape photographers want as much of the scene to be in focus as possible. They use apertures like f/16 (or smaller) for more front-to-back sharpness.
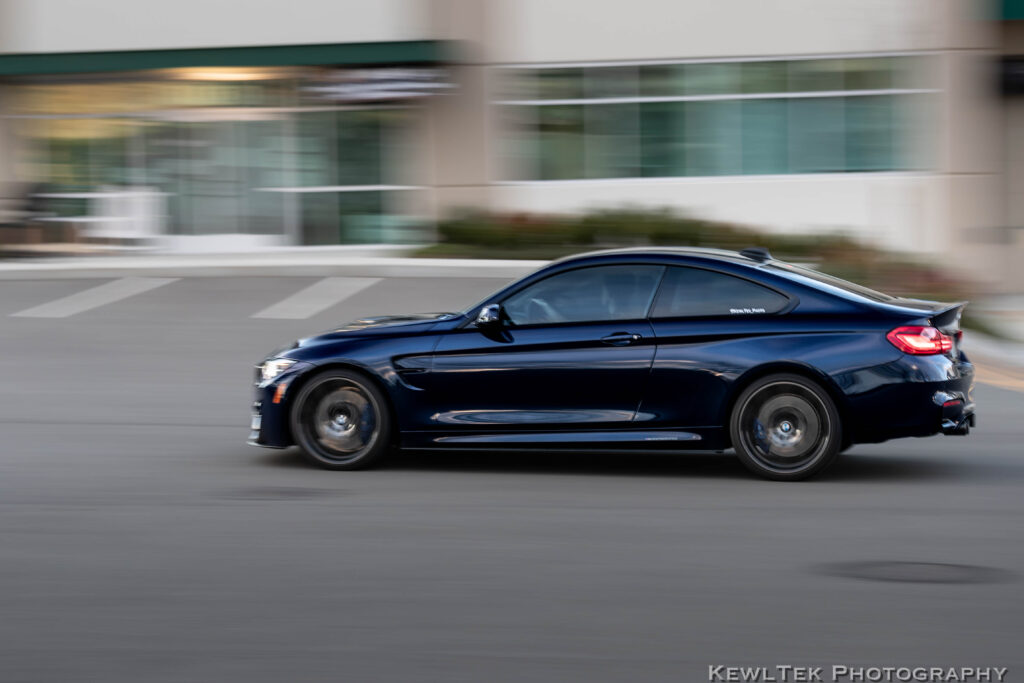
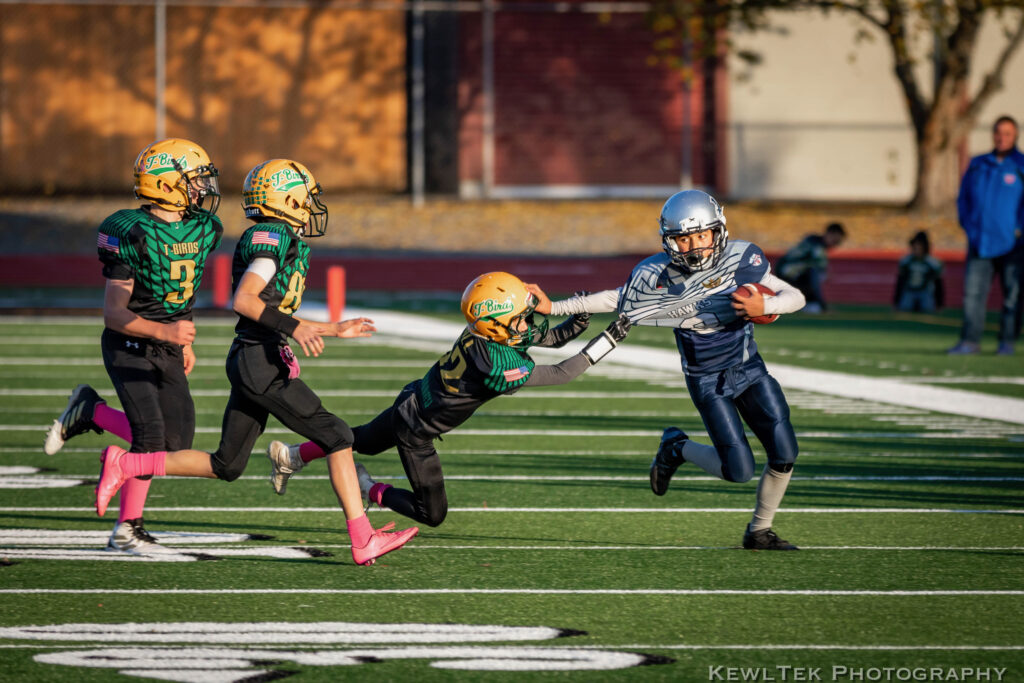
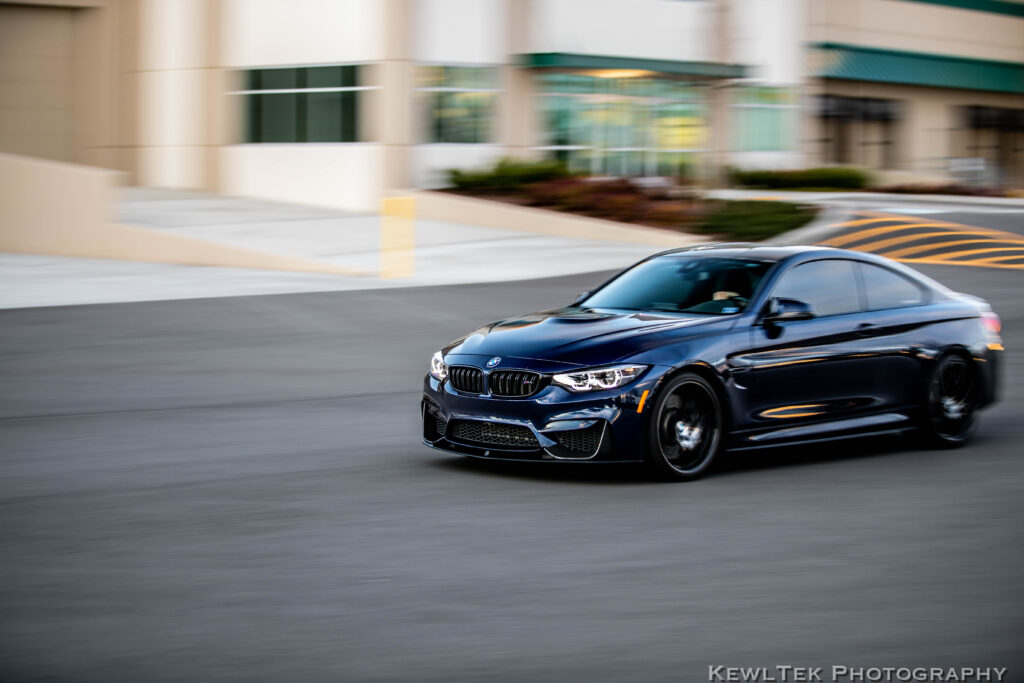
3. Shutter Speed (Tv) – Control Motion Blur

Controlling shutter speed gives you the incredible ability to freeze fast-moving subjects in space and time, or capture them with artistic blur. For action photos, the right shutter speed can enable many creative possibilities.
Panning or tracking shots of moving cars at 1/25 sec creates a sense of “movement” with dynamic background blur. Photographing the same car at 1/1000 sec ‘freezes’ it, making it look like it’s parked.
 Freeze Motion Starter Kit (Beginner-Friendly)
If you want sharp action photos today, this is the exact beginner setup that works.
- Tripod: SmallRig CT-10 Tripod
- Lens: Canon RF 50mm f/1.8
- Flash: Godox TT600 Speedlight with X2T-C Trigger
This is the same starter kit I recommend to beginners who want crisp motion without buying expensive pro gear.
4. Exposure Compensation
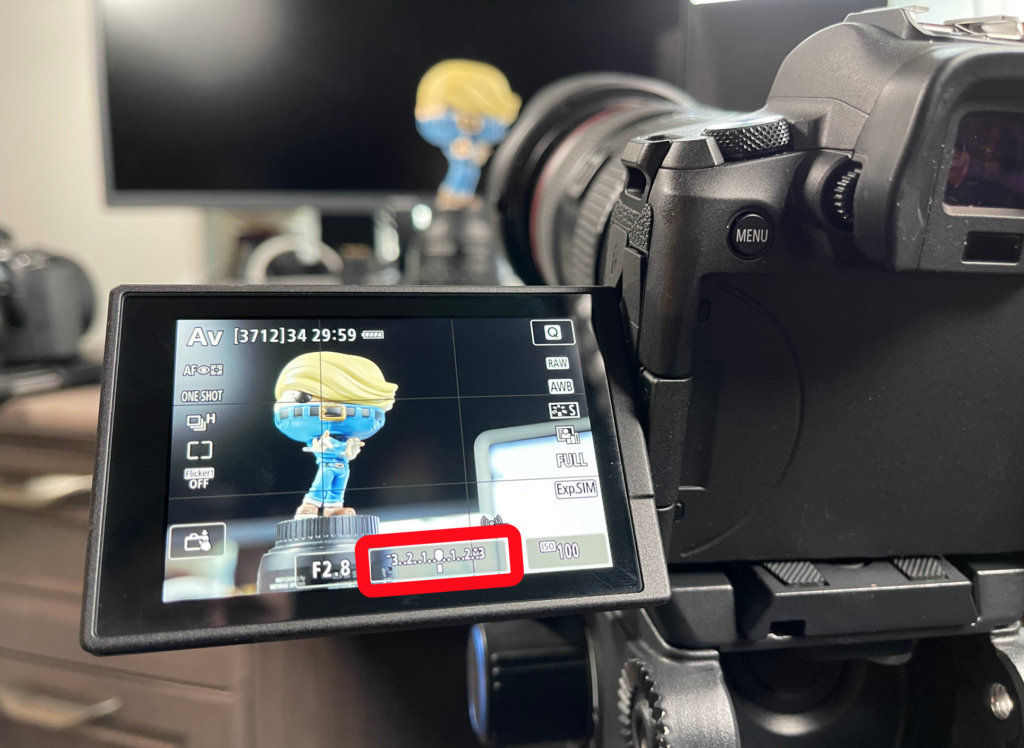
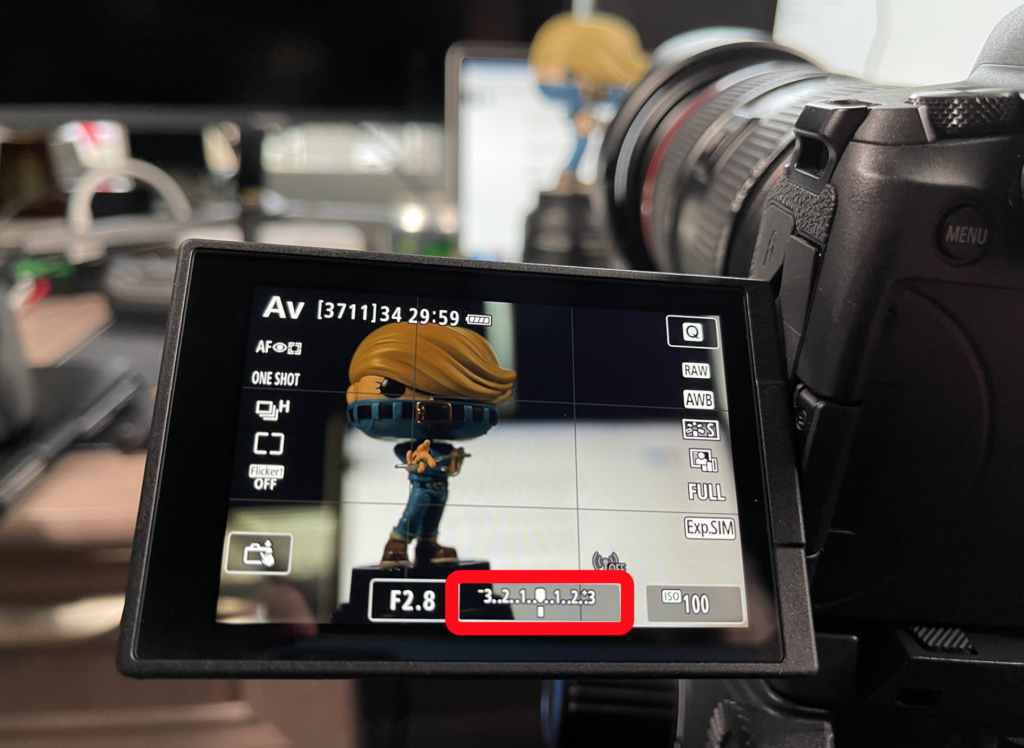
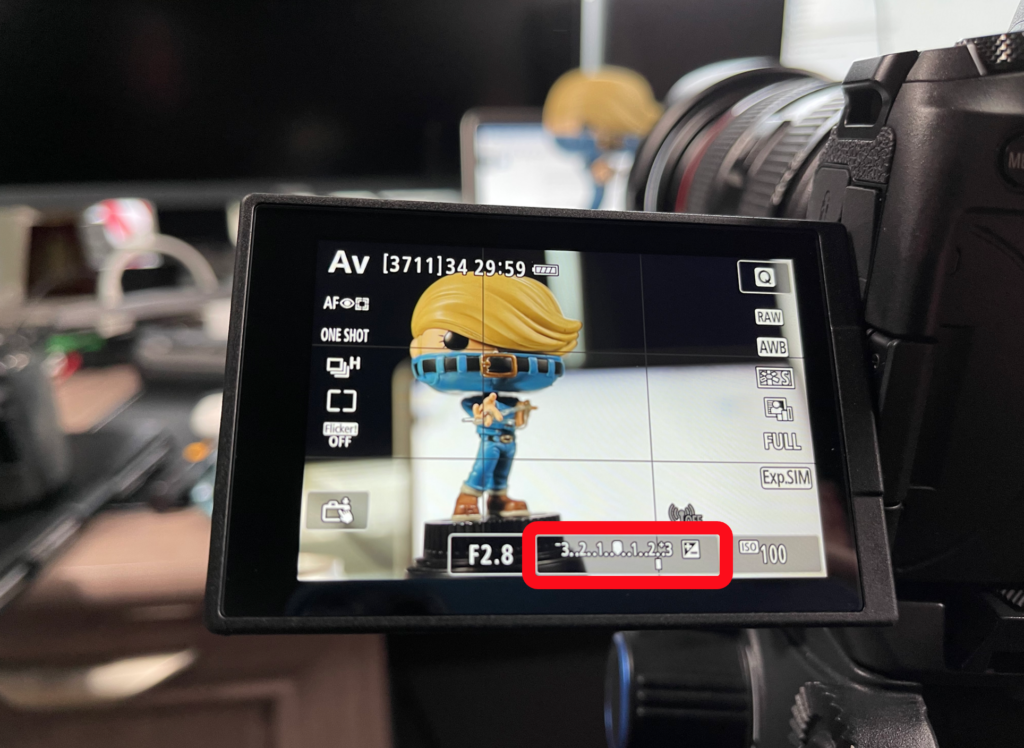
In the bottom of your viewfinder and LCD screen you see what looks like a little number line (circled in red in the following photos). That number line represents your exposure compensation. When the pointer on the number line is below 0, your photo gets darker. Above zero, and your photo brightens.
Knowing how to use this basic Canon camera setting is important, because in Aperture Priority (Av) and Shutter Priority (Tv) modes, your camera always assumes your subject is a mid-tone (not too dark, not too bright). That’s problematic if your subject (or their background) is lighter or darker than mid-gray. Your image might turn out over- or underexposed.
To show you what this means, our subject – a Funko Pop figure (perfect for tabletop photography practice) – has a dark background. Since the camera is in Av mode (aperture priority), the camera assumes the subject is a mid-tone, and slightly overexposes the scene.
Practice Subject:
I use Funko Pop figures because they’re cheap, consistent, and perfect for learning lighting and exposure.
👉View the Funko Pop I used here
To fix it, adjust exposure compensation down a few notches until your subject is correctly exposed.
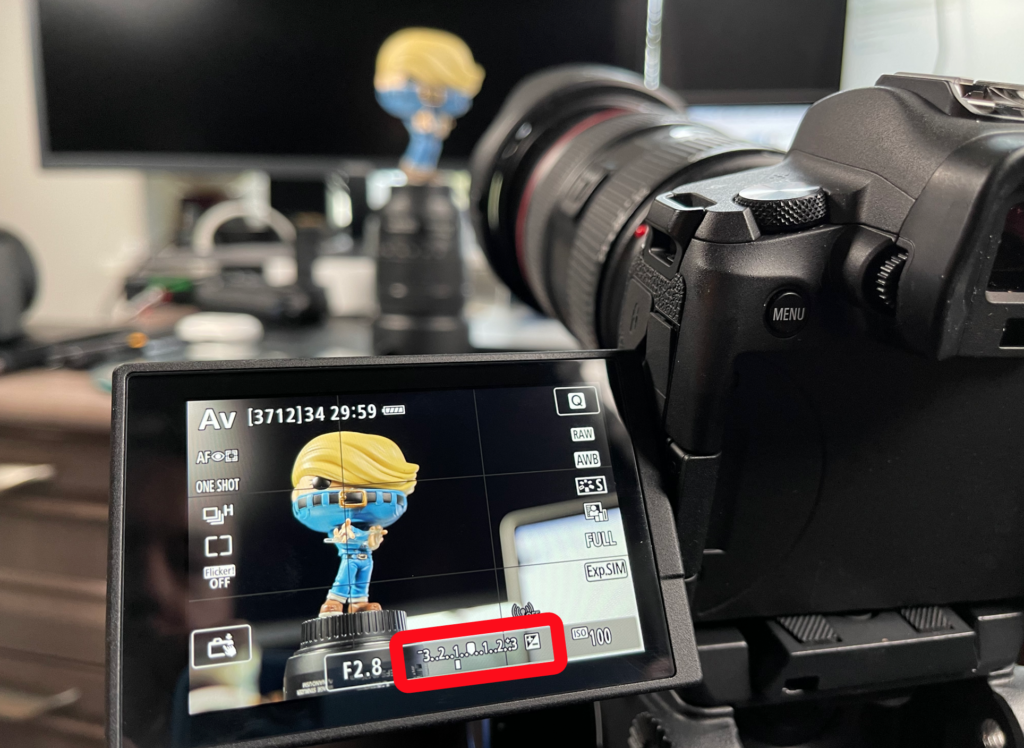
Conversely, when your subject is against a bright background, the camera underexposes your subject.
As a result, you’ll need to move your exposure compensation up a few ticks.
Exposure compensation lets you override the camera’s automatic assumptions, and lighten or darken the exposure to fix the problem. It basically gives you manual control with the convenience of semi-automatic.
5. ISO – Control Your Sensor’s Light Sensitivity
Another basic Canon camera setting is ISO. ISO refers to how sensitive your camera’s sensor is to light. The lower the ISO, the less sensitive–the higher the ISO, the more sensitive. There’s lots to consider with ISO, but for now just know that lower ISO numbers (usually 100-400), result in better image quality, (and vice versa). At low ISOs, there’s very little digital ‘noise’ in your photos.

In the first low-light image I used a Minion practice figure, and set my camera’s ISO to 100. To properly expose the scene, I adjusted the aperture (f/1.8) and shutter speed (4 seconds). Notice how crisp everything looks!

In the next photo, I shot the same subject, in the same lighting conditions. But this time I cranked up the ISO full-blast (40,000) to brighten the scene. I used abnormally high ISO to show you its main drawback: Notice how crappy — er, I mean “un-sharp” and “grainy” the shadow details look!
“Digital Noise”, (noticeable at higher ISOs and plain ugly at the highest settings), looks like pixelated, colored flecks in the shadow areas of your photos. Choosing your ISO setting is ultimately a matter of compromise. High ISOs (such as ISO 6400) let you use faster shutter speeds–meaning you won’t need a tripod or a flashgun in low-light scenarios. Choose wisely.
Here’s a general “rule of thumb” to get you started with ISO settings:
| Scenario | Recommended ISO Setting |
| Bright Day | 100 |
| Cloudy Day | 400 |
| Dusk and Dawn | 800 |
| Indoors (no flash) | 1600 |
| Night | 3200 or 6400 |
Run a few tests with your Canon camera to find your highest acceptable ISO.
6. Image Quality [File Formats]
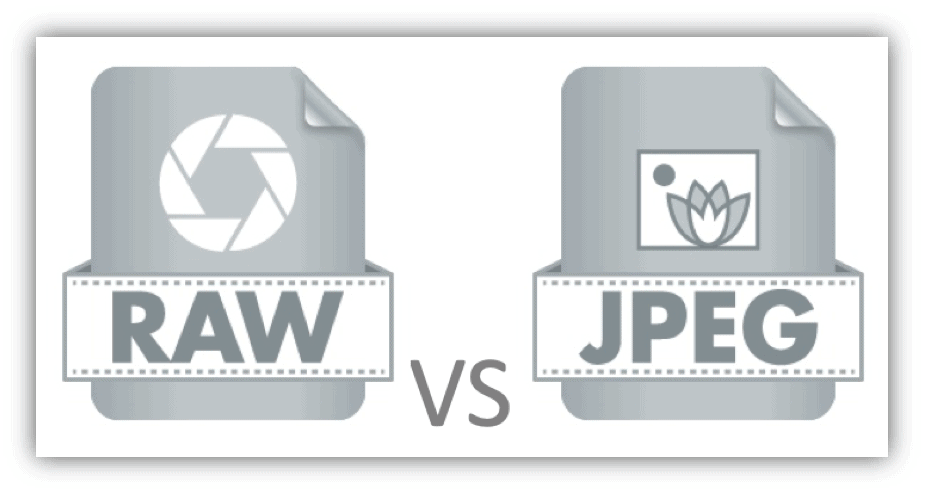
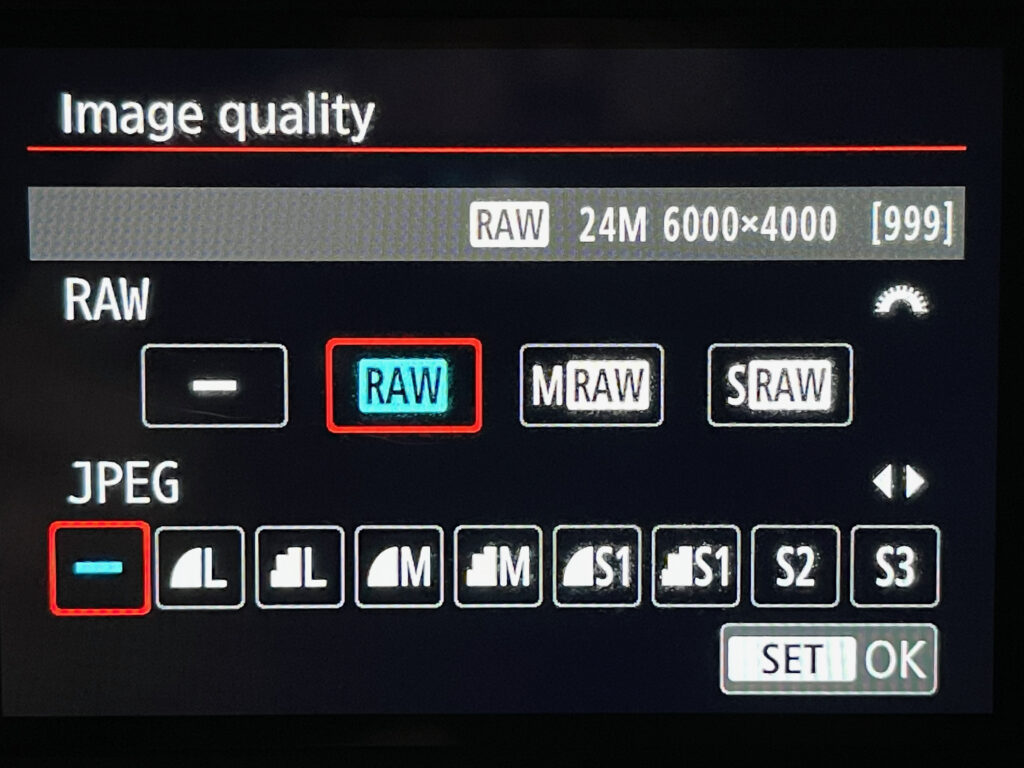
By default your basic Canon camera settings are configured for JPEGs. To see your Canon camera’s file format settings, press the Menu button, and go to the red “camera” menu (it’s the first one), page 1. Tap the option called “Image Quality.”

JPEG image files are processed in-camera. That means you can download them from your memory card and print them or share them online instantly. JPEGs are nice because they don’t take up much space on your memory cards and hard drives, and they’re processed and ready for use. The downside is their tone and color data is relatively limited. They won’t hold up very well if you try to heavily edit them.
As you gain experience, you’ll capture photos in the ‘RAW’. RAW files take up more space than JPEGs, but you get more flexibility in post processing. With RAW files, it’s much easier to adjust color, exposure, and white balance than with JPEGs. You definitely want to use RAW if you plan to edit your photos in Photoshop or Lightroom.
Since RAW files are bigger, it takes your camera longer to write the image files to the memory card. Not all cards write at the same speed. You might miss the shot with a “slow” memory card, depending on your subject. Here are my recommendations for memory cards best suited for different subjects:
Best Memory Cards for Using RAW (by use case)
Best Budget RAW Card
SanDisk Extreme PRO
Write Speed: 90MB/s
Best for: beginners, portrait, tripod work
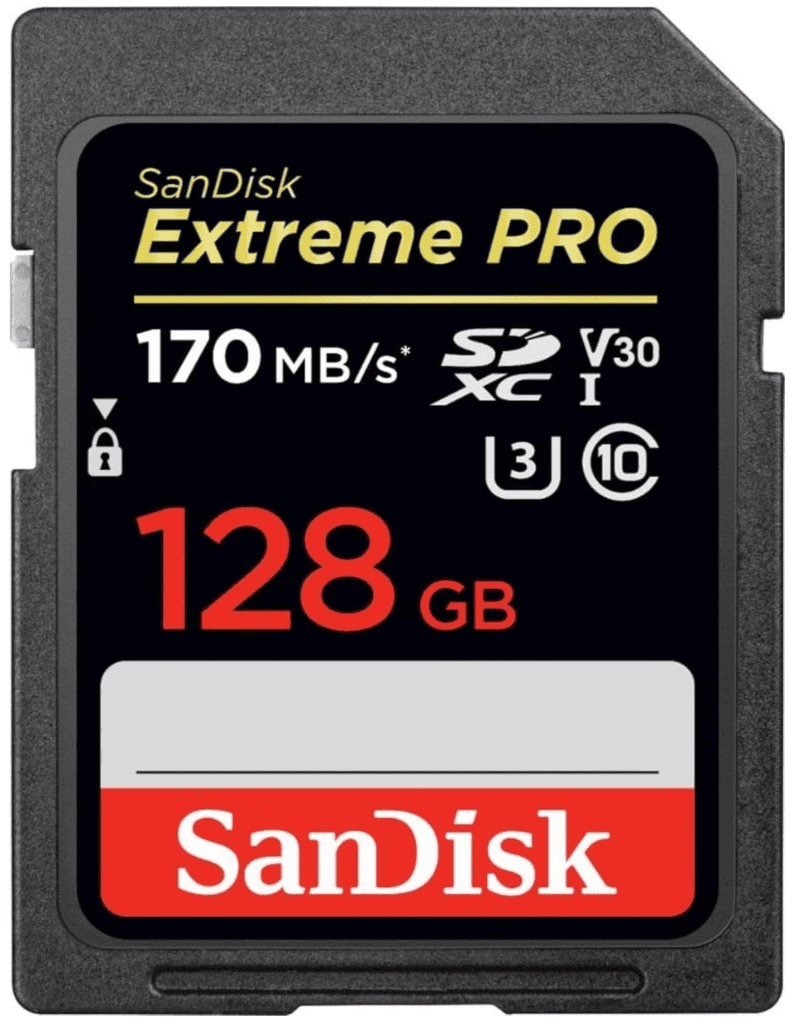
- Great for beginners
- Affordable
- Works on almost any Canon body
Best All-Around Card
Lexar Silver PRO
Write Speed: 120MB/s
Best for: street, travel, kids, pets
- Faster write speeds (120MB/s vs 90MB/s)
- Handles burst mode
- Reliable for events
Best for Sports / Action
ProGrade V90
Write Speed: 250MB/s
Best for: sports, wildlife, burst mode
- Insane write speed (250MB/s vs 120MB/s)
- Zero buffer lag
- Professional reliability
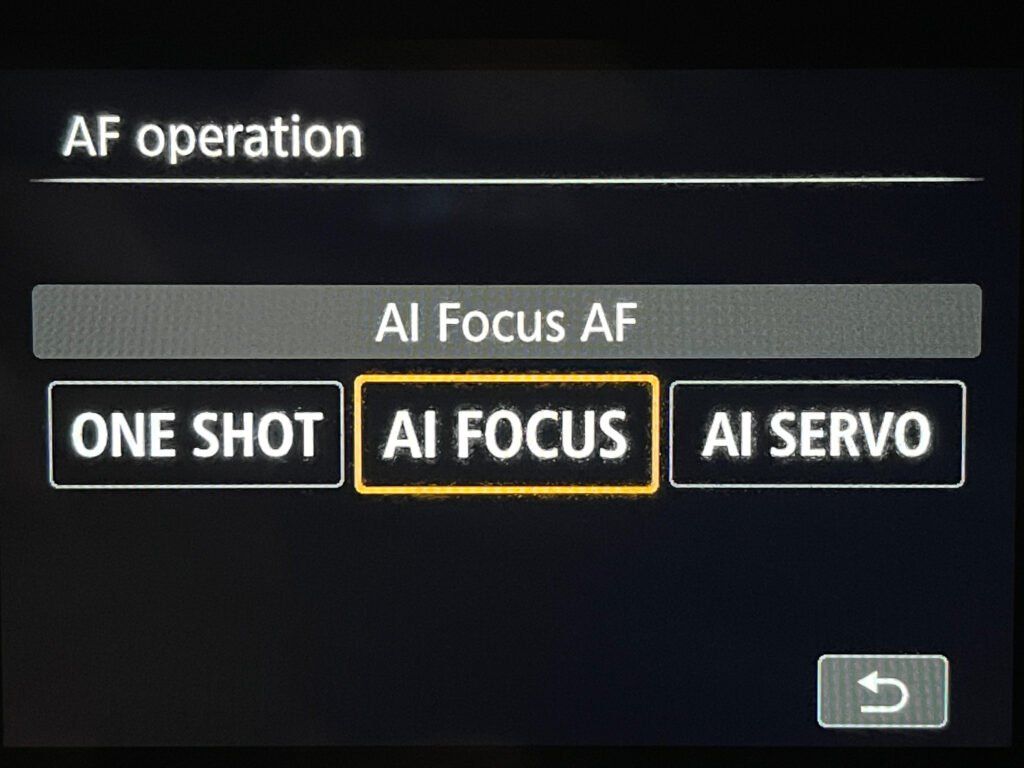
7. Focusing modes
To ensure a sharp subject no matter what you take pictures of, Canon cameras have three autofocus modes, as well as manual focus. The basic Canon camera setting mode you choose depends on your situation.
One Shot
One Shot locks focus as soon as autofocus is achieved. Use it for subjects that don’t move, like real estate, products, and portraits.
AI Servo
AI Servo continuously maintains focus on a moving subject as long as you keep the shutter button pressed halfway, and the active (red) focus point stays on your subject.
AI Focus
This focus mode blends One Shot and AI Servo. In this mode, your camera starts out in One Shot but automatically switches to AI Servo if your subject starts moving. It’s not perfect though, and many photographers prefer to not use it.
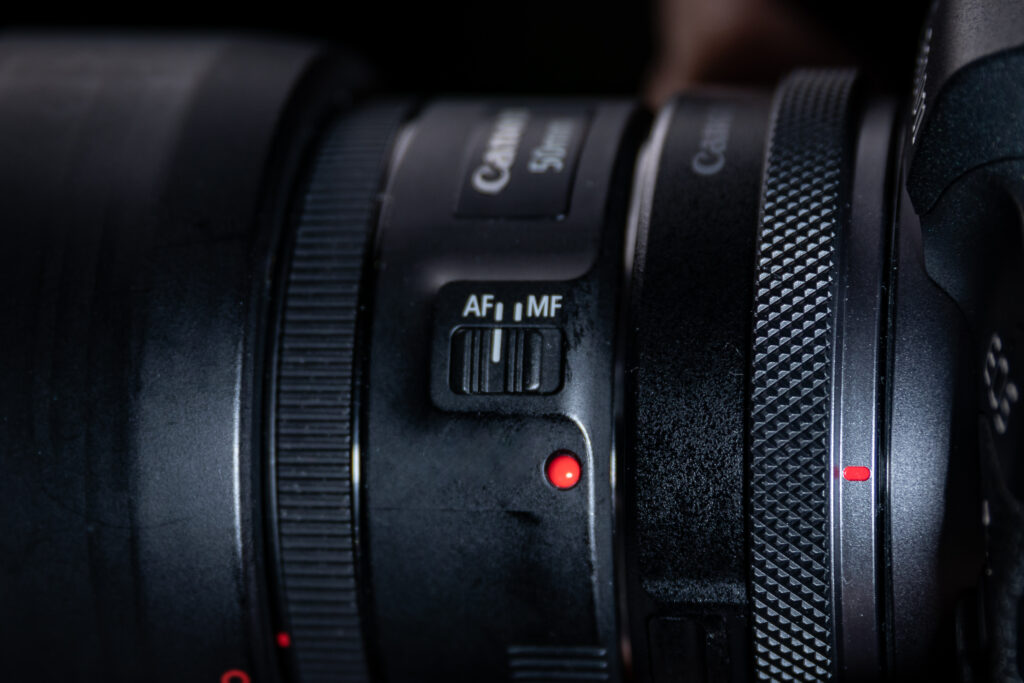
Manual focus
This is just what it sounds like. Switch to manual focus via the AF-MF switch on your lens. Focus on your subject by rotating the focus ring on the lens until your subject looks sharp through the viewfinder or on the LCD screen. This option is great for landscape and macro photography.
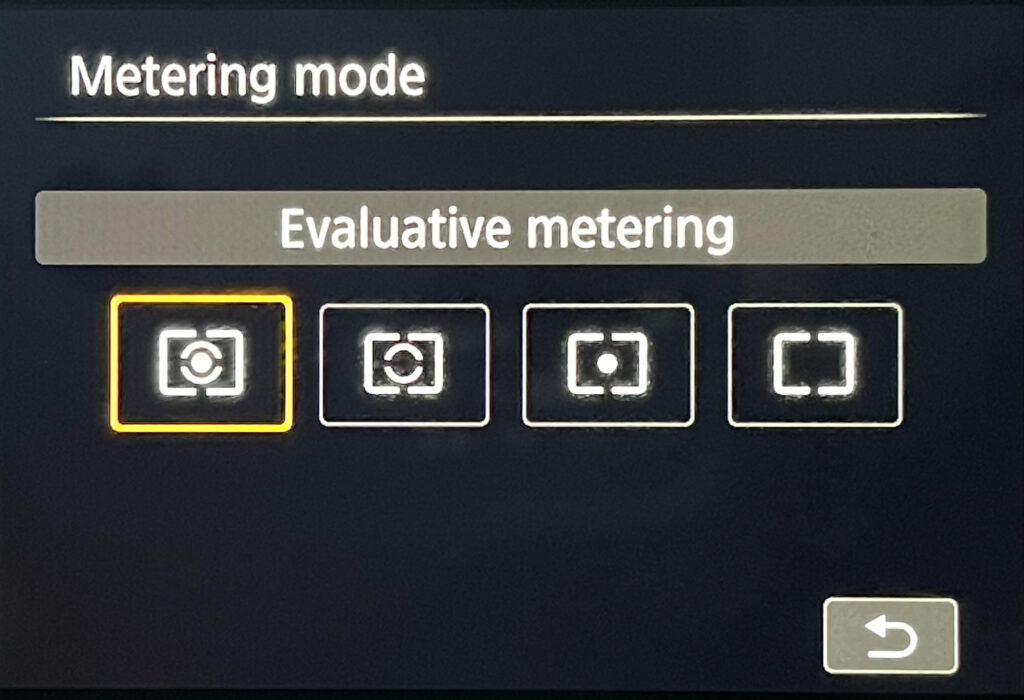
8. Metering modes
Metering modes let you change the way your camera reads the light in your scene, which then affects overall exposure. In most situations, Evaluative metering works the best. So what do the other modes do?
Partial and Spot Metering
Spot metering takes a light reading from roughly 2-4% of the frame, and Partial reads a larger, more forgiving area at around 10%.


Partial and Spot metering are both great when your subject is lit from behind, or when you want to expose for a specific part of the subject.
Center-weighted average

Center-weighted metering reads the light mostly around the center of the frame, and less so towards the edges. It’s useful when using neutral density (ND) filters, which can cause Evaluative metering to overexpose.
Evaluative

This ‘intelligent’ metering mode reads light from all parts of the frame, and calculates an average exposure based on the light and dark areas of the scene, with a bias towards the selected AF point(s). Evaluative metering helps you get a correct exposure in most situations.
9. Pop-up Flash Basics
You can’t beat a speedlight or flashgun for versatility, but if your camera has a pop-up flash it can be a great way to add light to subjects.
It’s a basic Canon camera setting that’s simple to use. Just press the flash button and take a picture. If your flash is too strong or too weak, use the flash exposure compensation setting in the main menu to adjust the power.
10. Composition (Advanced Visual Skills)
Composition is simply the way elements in your shot are arranged.
In a well composed picture, the elements feel balanced, and the viewer is drawn into the frame.
The “rule of thirds” is one of the simplest and most useful composition techniques to master. By following this guideline, you ensure your photos are visually balanced. All the elements in your scene work together in harmony.
Simply imagine your frame with two horizontal and two vertical lines like a tic-tac-toe. Position your subject on one of the four intersection points on the grid for a good, solid composition. To make things easier, most Canon cameras let you overlay a grid on your LCD screen and viewfinder.
If you’d like to go deeper into visual design and artistic composition beyond camera settings, I’ve written a full guide here: “15 Photography Composition Techniques“.
11. Focal length (Lens & Optics Fundamentals)
This basic Canon camera setting isn’t really a camera setting per se, but it is important. Cameras are often sold as kits with a camera body and basic zoom lens. Kit lenses are normally 18-55mm, and useful for a wide range of subjects. “Focal length” refers to how wide the field of view is. A smaller number (18mm) gives you a wider view, and a larger number (55mm) creates a narrower, more “zoomed in” view.
Focal length doesn’t just control how close things appear — it also controls compression, distortion, background blur, and the overall “look” of your photos.
For a complete explanation of how lenses and focal length affect perspective, compression, and background blur (beyond camera settings), see: Beginner’s Guide to Camera Lenses.
18mm is ideal for landscapes. 35mm is good for a wide range of subjects. 55mm is great for portraits as well as getting closer to subjects that are farther away. Focal length also affects the depth of field–background sharpness decreases as the focal length increases.
Landscapes & Real Estate
For big scenes, rooms, and dramatic wide views
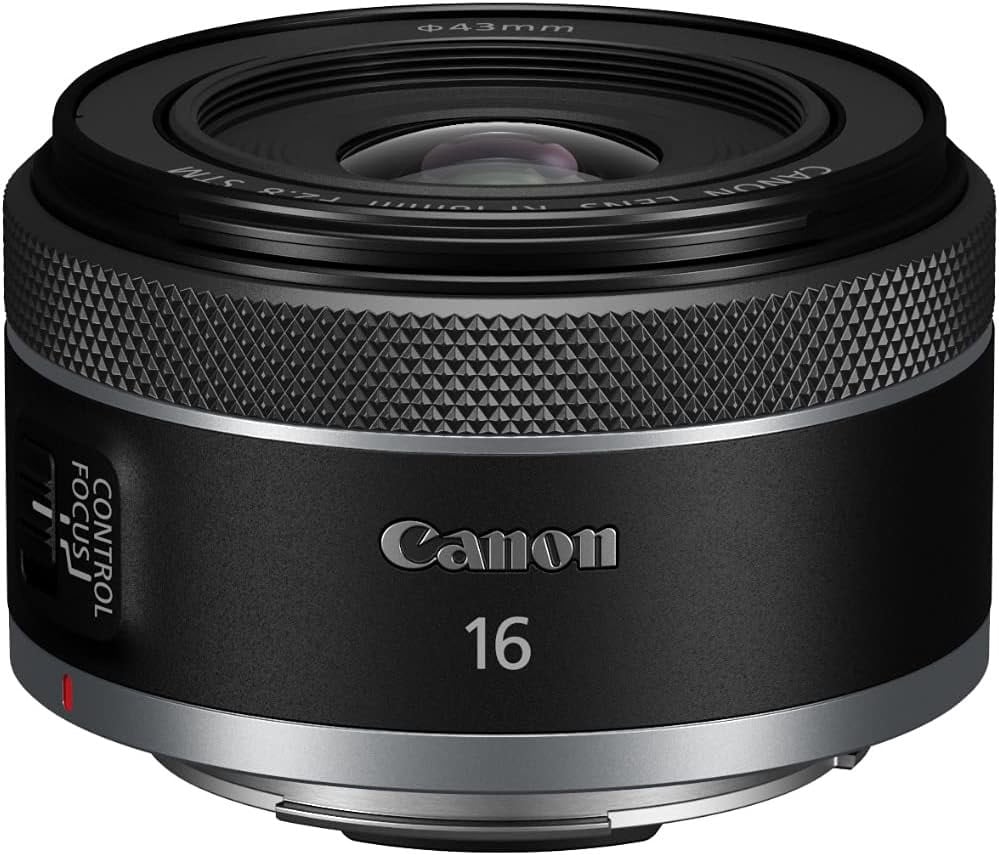
Focal Length: 16-18mm
Best Pick: Canon RF 16mm f/2.8 STM
Best For:
- Landscapes
- Real estate / Airbnb
- Architecture
- Room interiors
- “Big sky” scenic shots
Walking-Around Lens
The one you usually leave on your camera
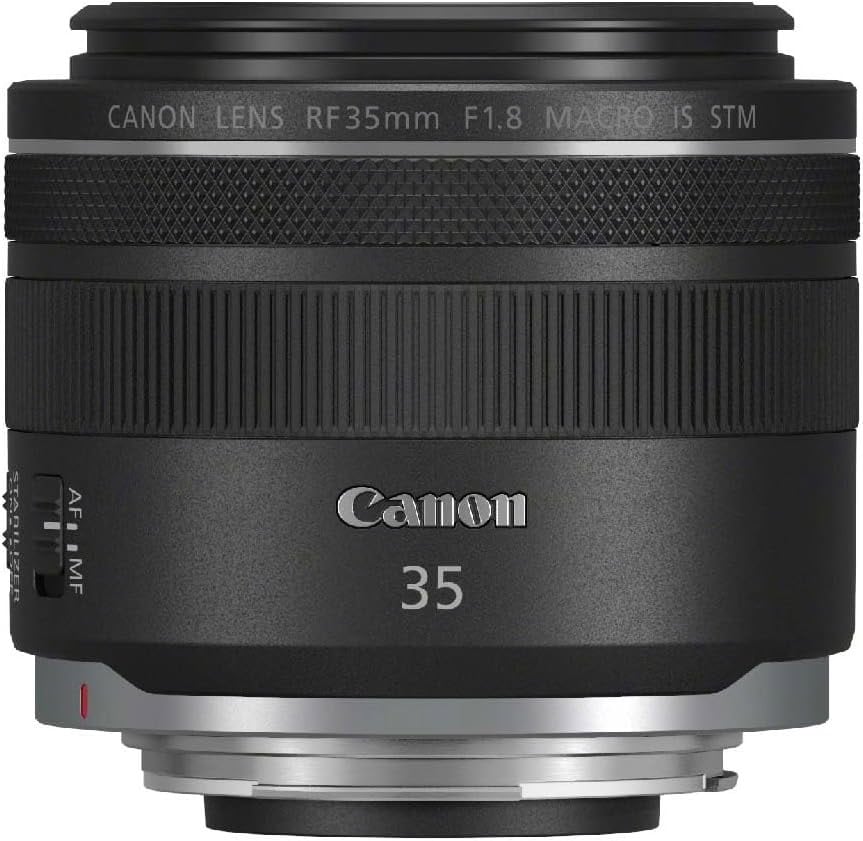
Focal Length: 35mm
Best Pick: Canon RF 35mm f/1.8 Macro IS STM
Best For:
- Street photography
- Travel
- Family & Kids
- Food & Details
- Blog & Product Pics
Portrait & People
For professional-looking photos with creamy blur
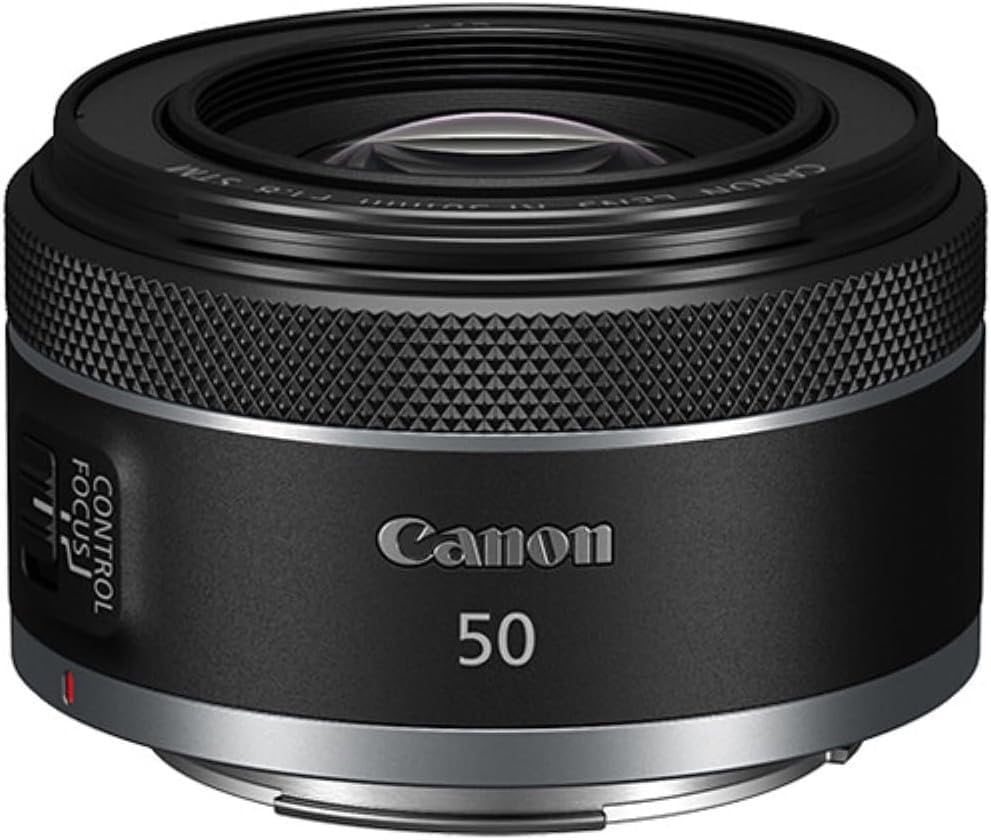
Focal Length: 50mm
Best Pick: Canon RF 50mm f/1.8 STM
Best For:
- Portraits
- Pets
- Kids
- Social media
- That “real camera” look
Practice
Now that you understand the basic settings, let’s practice dialing them in.
Settings for Landscapes
Use a tripod if you’ve got one. For the best light, plan to take photos just after sunrise or just before sunset. First, switch your camera to Aperture Priority (Av) mode, with the aperture set to f/16 and ISO at 100. Next, zoom your lens out to 18mm for the widest possible view, and switch it to manual focus.
Now, turn on Live View (the LCD screen) and compose your image. Once your image is composed, zoom in to a point that’s roughly one-third of the distance into the scene, and manually focus on that point. Finally, for a sharp shot, activate the self-timer and press the shutter button.
Settings for Portraits
First, find an area with an uncluttered background that extends a few meters behind your subject. Next, switch your camera to Aperture Priority (Av) mode with the aperture set to f/5.6 and ISO at 100 or 400 depending on how bright your scene is. Zoom your lens in to 55mm.
Next, set the focus mode to Single Shot and make sure just a single AF point is active. Finally, look through your viewfinder, and adjust the AF point’s position so it’s over your subject’s closest eye. You’re now ready to begin photographing.
To learn more about the best settings to use for indoor portraits, be sure to read Best Canon Camera Settings for Indoor Portraits.
Settings for Panning Shots
First, set your lens to 35mm or 55mm, depending on your distance from the subject. Next, switch your camera to Shutter Priority (Tv) mode and set the shutter speed based on the table below. Now, set the ISO to 100 or 400, depending on how bright your scene is, and use AI Servo AF (continuous AF) with the central focus points active.
As your subject approaches, track them and half-press the shutter button. Lastly, as they pass, keep tracking them by twisting on your hips and press the shutter button all the way while smoothly continuing to track them.
| Walking | 1/8 to 1/15 sec |
| Running | 1/15 to 1/30 sec |
| Cycling | 1/15 to 1/60 sec |
| Cars | 1/30 to 1/125 sec |
| Racing | 1/125 to 1/250 sec |
Conclusion
So how did you do? Let us know in the comments!
Remember–reading and knowing this stuff is only a starting point. Practicing these concepts is how you’ll really start to grow and learn. Got questions? Drop a comment!


![How to Photograph Waterfalls [And Get That “Misty” Look]](https://kewltekphotography.net/wp-content/uploads/2020/04/IMG_0388-1-768x512.jpg)
Have learnt a lot
Thank you Emmanuel! I’m glad you liked the post!
Nice, clear explanation. I will share if that’s OK
Thanks Graham! I’m glad you liked the post. Feel free to link back to it as needed.
Thanks for all that info. I am a newbie and the tips are great. Cannot wait to try them out.
I’m happy the article was helpful for you!
More classes on this
Thanks Kevin! I’m working on new content now. Stay tuned!
Thanks Russell! Very informative blog, quite insightful for a beginner like me. I was looking for exactly this level of spoon-feeding in my early stages of photography.
The examples (photos) did a world of good for me.
Aperture details as per weather and shot is very helpful.
Great job!
Hi Dhruv! I’m happy the blog helped you! When I started out, it was hard to find “to the point” information. Most photographers say, “It depends”, when you ask which settings to use. I understand that light changes from moment to moment, but all I needed was a “starting point” I could use as a guideline. That’s why I wrote this blog. Remember, the way to get better is to get out there and take pictures, and experiment with different settings. Soon, it’ll be second nature to you! Good luck Dhruv in your photography journey!
Thanks Russell! Awesome information throughout the whole site. Our business stepped up to a Canon R5C and my head is spinning with all the camera modes. Really appreciate the information not only for the modes but practical uses. Your whole site is loaded with great information!
Thank you Brent! I’m glad my post helped you out!
Really informative, thanks, ????Russell Robinson. How is the canon EOS 850D for Street Photography?
I’m glad you liked the article. The EOS 850D (T8i in the US) is a great little camera. I’m sure it would work fine for street photography.
Thank you for breaking this down completely! Some of the brightness explanations can be tough to decipher- you nailed it! I cannot wait to try out these tips and grow from here.
Hi Kali! I’m happy the article helped! I’m sure you’ll do awesome with your photography!
Great refresher for someone who use to do this as a career and have been in retirement for 3 years thank you!
Thank you! I’m happy you liked the article!
I will try these
That’s great Zelda! I know you’ll take some amazing pictures!
Wow! Thank you! I’ve never read such an informative yet simple to understand article written about all the settings specific to a Canon camera. I appreciate the examples you included greatly. This is fantastic. I will incorporate it into my photography and reference it often.
Thank you Sara! I’m happy the article was helpful for you!
I have always been passionate about photography, I have been able to capture beautiful photos of nature with my cell phone. I recently decided to switch to a DSLR, I bought a SL1 to start in photography, but I have always had problems with the Shutter Priority mode, thanks to your blog, I have mastered it completely. Thank you!
That’s great news! I’m happy my blog helped you!
I’ve learned a lot and thank you for the lessons
Thank you John! I’m happy it helped!
Thanks for the helpful post
You are most welcome! Thanks!
Thanks for explaining, especially the pictures you added helped me a lot
Hi Saskia! Thank you! I’m happy it helped.
Excellent information. Simple and to the point. Thank you.
Thanks Rick! I’m glad it clicked!