Ever wondered if you’re making the most out of that pricey piece of glass attached to your DSLR? You may have already guessed that the lens you choose has a major influence on your photo quality. Focal length affects how much of the scene makes it into your photo. Aperture affects the depth of field, and (by extension), your shutter speed. So which lens should you use?
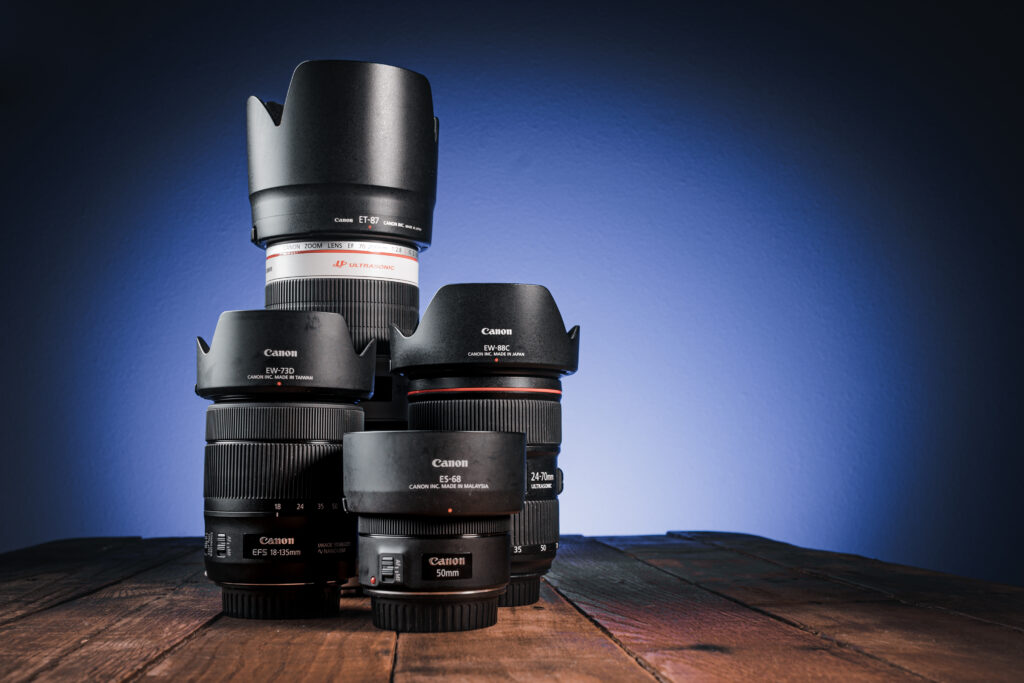
Certain lenses pair well with certain subjects. Wide-angles are a natural choice for landscapes and real estate. Sports and wildlife almost always demand a telephoto. But the choice isn’t always this obvious. When you understand how different lenses affect your images, you’ll start to think ‘out of the box’ and use lenses in creative new ways to level up your results.
This beginner’s guide introduces you to a handful of lens types and the effects they have your images, subjects, and scenes. We’ll cover the following:
- Wide-Angle
- 50mm Prime
- 70-300mm Telephoto Zoom
- 8mm Fisheye
- 100mm Macro
Whatever your lens brand (Canon, Sigma, Tamron, Tokina, etc.), these tips are relevant. So get comfy, grab a drink, and let’s get started!
Wide-Angle Lenses
The widest setting on a standard EF-S 18-55mm kit lens gives you a reasonably wide view, but what would a 10-18mm ultra-wide do for your pictures? Simply put, the wider the lens, the more of the scene will be in your image. But successful shots don’t just have “lots of scene”. Shooting with wide lenses can easily make everything appear tiny in your frame. Think about your composition and maximize the impact of your images.
Compare these images of the cruise ship port in Ketchikan, Alaska. Both images were shot from the same spot using a Canon 80D. The first photo was shot at 10mm, and the second at 24mm. The 10mm lens has lots of “scene”, but notice how small the cruise ship looks compared to the 24mm image. There’s nothing technically “wrong” with either image, I just wanted you to see how focal length can affect the size of your subject.
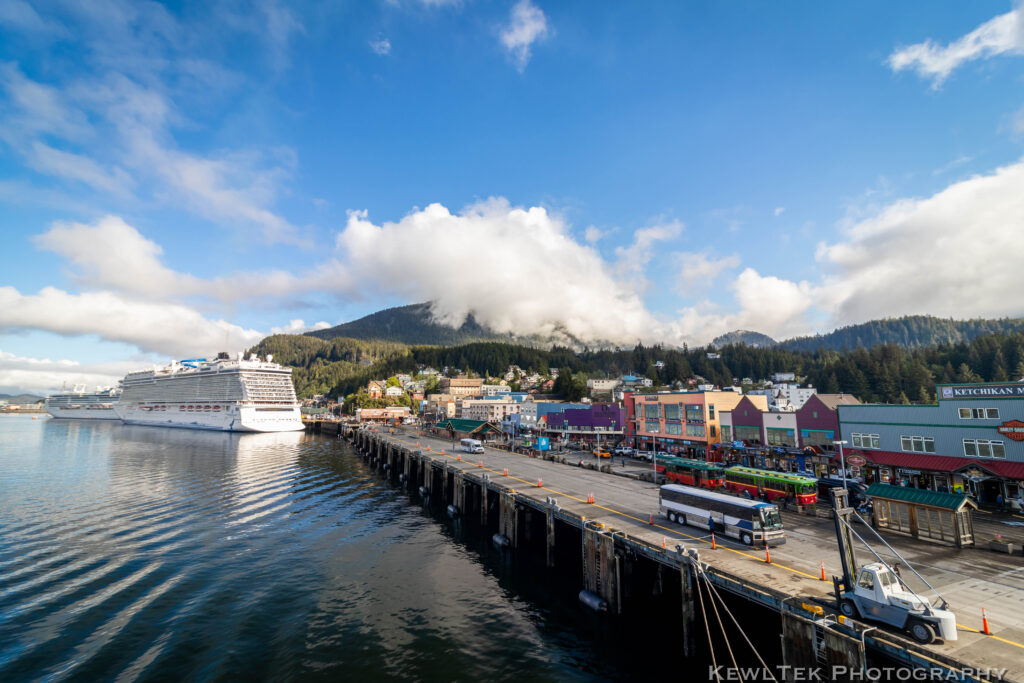
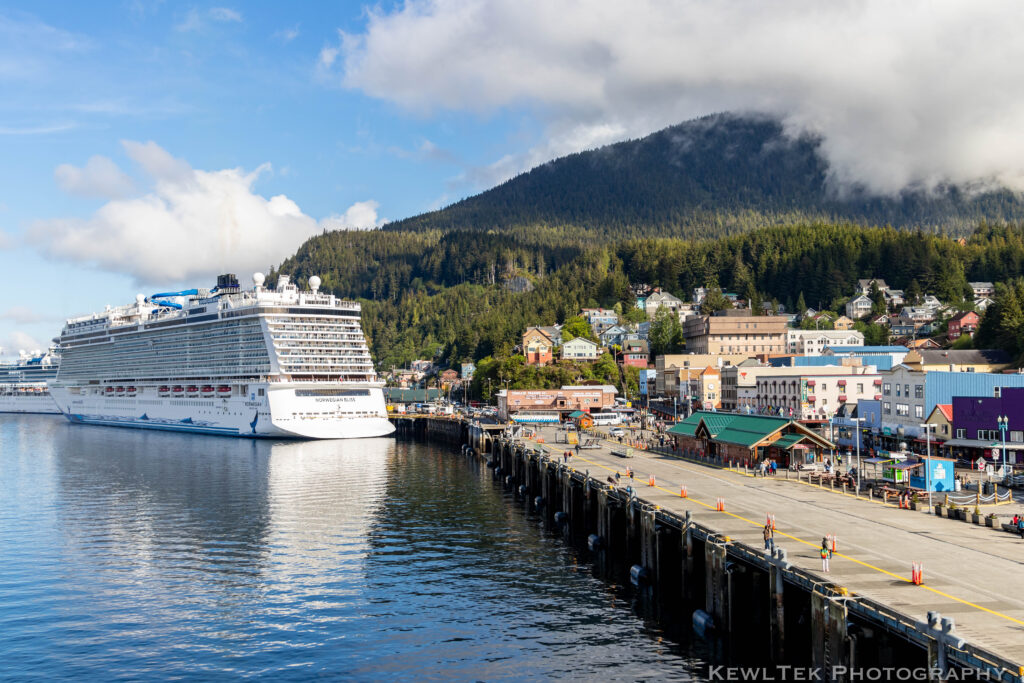
To make your wide-angle shots really pop, experiment and get close to your subject to exaggerate the perspective. Use the foreground or leading lines to give your image a three-dimensional feel. If you don’t, your wide-angle shots might look a bit “empty”.
Converging Verticals
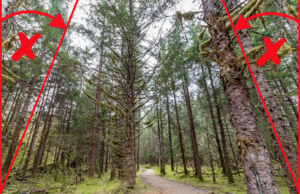
In some cases you might run into the problem of ‘converging verticals’, especially with building and architecture shots. When you angle your camera up (even just a little bit), the vertical lines at the edges lean inwards, and make your subject look like it’s tipping over. Converging verticals is a typical phenomenon, but it’s simple to avoid: Just keep the back of your camera parallel to your subject. You can also try shooting with the camera low to the ground to include interesting foregrounds.
Focal Length and Sensor Size

Your camera’s sensor also has an effect on the field of view. Canon DSLRs like the T7i, 90D, and 7D Mark II have smaller ‘APS-C’ sensors, with a crop factor (magnifying effect) of 1.6x. Because of the crop factor, many people refer to APS-C sensors as “cropped sensors”. So what does that mean? A 50mm lens on an APS-C sensor has the same field of view as an 80mm lens on a full-frame sensor. Math: 50mm multiplied by the 1.6x crop factor, equals 80mm. (50 x 1.6 = 80). Here’s a rundown of which lenses you need to get different effects:
| Sensor Type | Wide-angle | Standard zoom | Telephoto |
|---|---|---|---|
| APS-C | 10-16mm | 18-55mm | Above 70mm |
| Full frame | 14-24mm | 28-70mm | Above 85mm |
Pro Tip! Watch Out For Distortion
When you photograph a group of people, you might be tempted to pop on your ultra-wide lens, especially when space is limited. But go too wide and you’ll get lots of unflattering distortion, and make the people closest to the camera appear much larger than those further back.
Look for interesting foregrounds or leading lines to add a sense of depth to your images
Get the Sharpest Results
Most lenses have a ‘sweet spot’ between f/8 – f/11 that give you sharp results. In my post about prime lenses, I drew this handy little aperture chart to help you visualize ‘depth of field’. Depth of field refers to how much (or little) background blur there is in your image. Opening and closing the aperture increases and decreases the amount of background blur in your images–but when it comes to your subject, you always want them to be razor sharp. The chart might lead you to conclude that the narrowest aperture, f/22, gives you the sharpest images. However, that’s not necessarily true, due to a phenomenon called diffraction. I won’t go into detail about diffraction here–just remember that most lenses have a “sweet spot” for sharp results somewhere between f/8 and f/11.
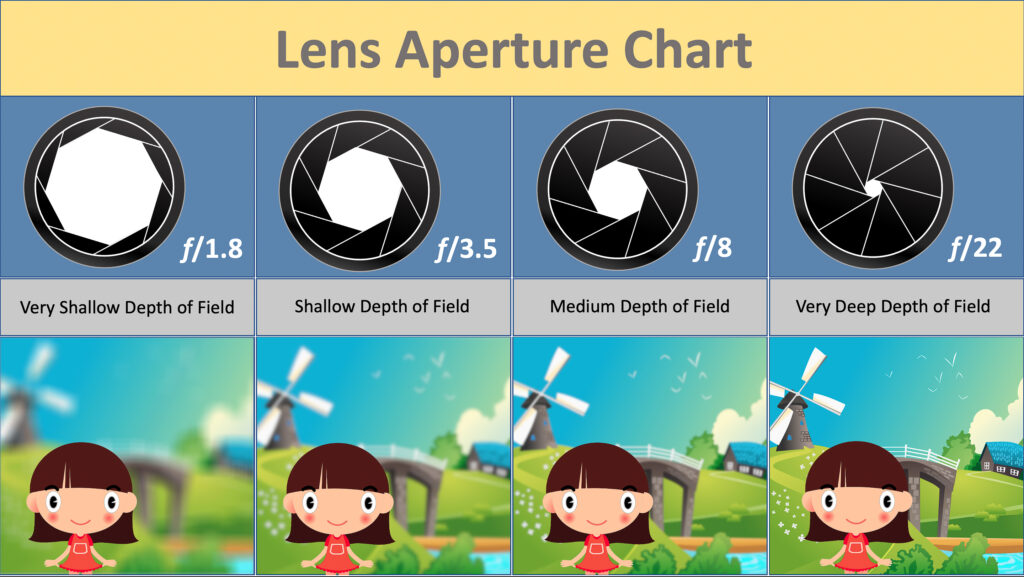
There’s other factors that affect image sharpness as well, such as lens quality and camera shake. The reason charts like this exist, is because aperture is the easiest factor to control when you’re out shooting. Wide apertures produce reasonably sharp subjects, but edges are soft. Shooting with the narrowest aperture reduces background blur, and brings most of the scene into focus, but overall image sharpness goes down a little due to diffraction. So what’s the answer then? Remember that f/8 – f/11 will generally give you the sharpest subjects.
Prime Lenses
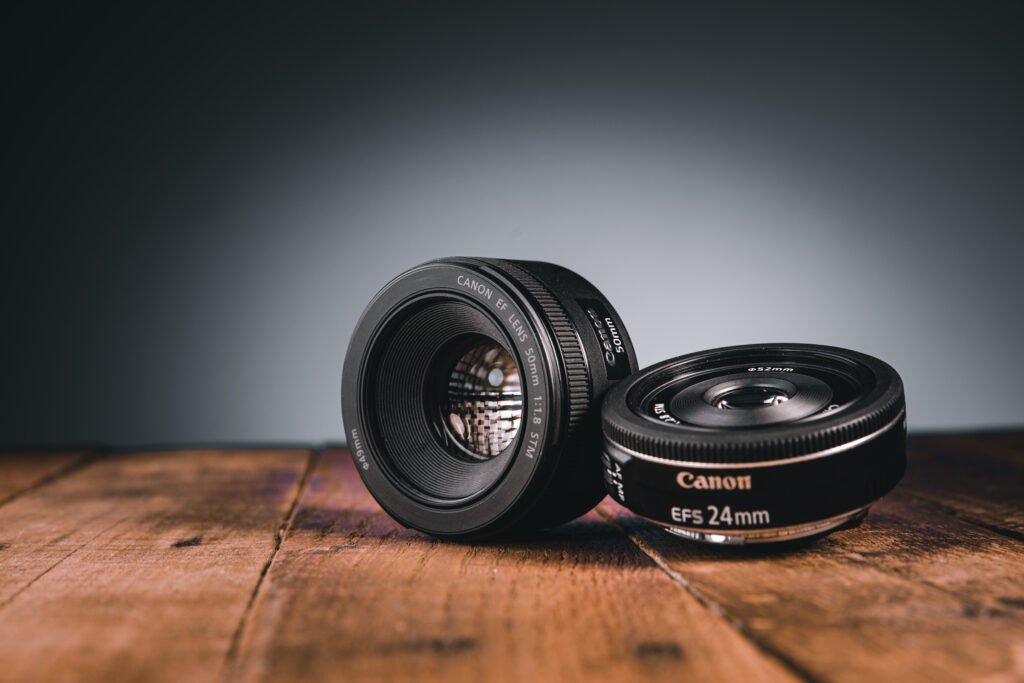
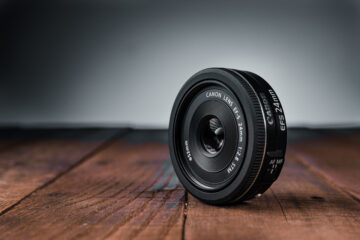
Fixed focal-length prime lenses may seem outdated in an era of image-stabilized zooms and high-ISO DSLR and mirrorless cameras. But once you experience what primes can do, you’ll want one (or two, or three) in your camera bag. There’s lots of prime lenses available, and prices are steep for the best ones. But before you run out and get a second job to afford one, take a look at more reasonably priced options like the Canon EF 50mm f/1.8, which sells for around $125, or the Canon EF-S 24mm f/2.8, for about $150.
The main advantage of prime lenses is a wider maximum aperture, (eg f/1.8 compared to f/3.5). Wide apertures let in more light. That means you can use faster shutter speeds with the same ISO in low light scenarios without risking blur from camera shake. Being able to use faster shutter speeds is why photographers refer to wide aperture lenses as “fast lenses”, or “fast glass”. Wide apertures also give you beautiful background blur–called “bokeh”–due to their shallow depth of field.
Experiment with Depth of Field
A shallow depth of field (a beautifully blurred background) helps your subject pop. Don’t stress out about not hitting that “sharpness sweet spot”, because you’ll find that any lack of sharpness is usually confined to the edges of the frame. As long as your main point of focus stays in the central area, you’ll be fine.
Experiment with Your Viewpoint
Zoom lenses are convenient, but don’t let them make you lazy when choosing a viewpoint. Yes, I said “lazy”, because I’m guilty as charged. Zoom lenses let you stay comfortably planted in one spot and not move. To change your viewpoint, you just zoom in and out. With prime lenses, the only way to change your composition is to physically move–or “zoom with your feet”. Moving yourself and your camera leads you to capture awesome creative shots you might not otherwise have gotten!
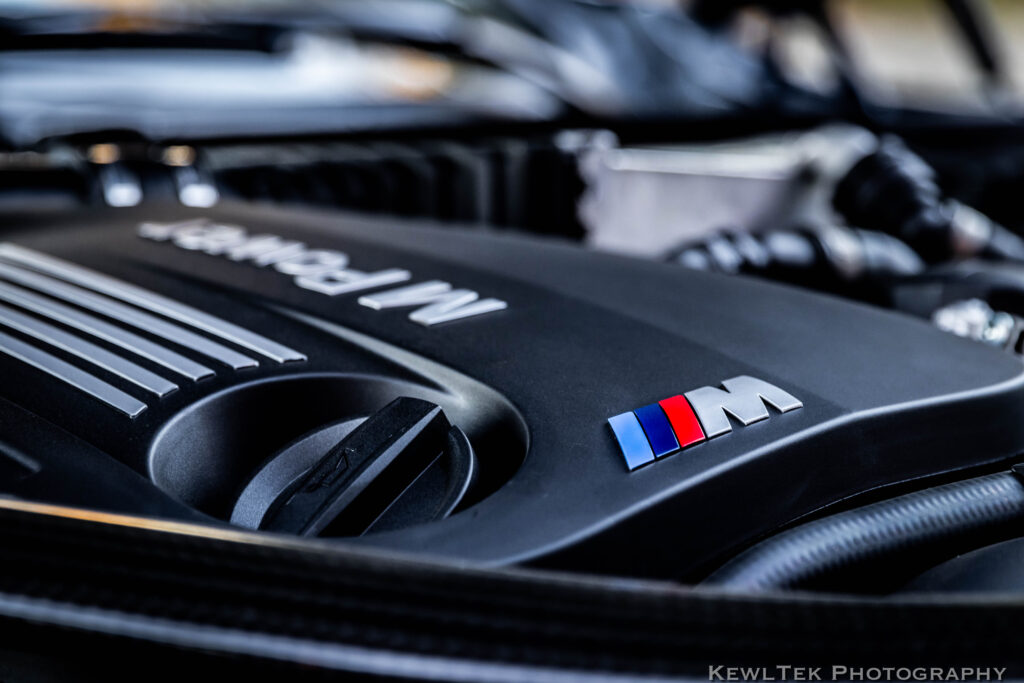
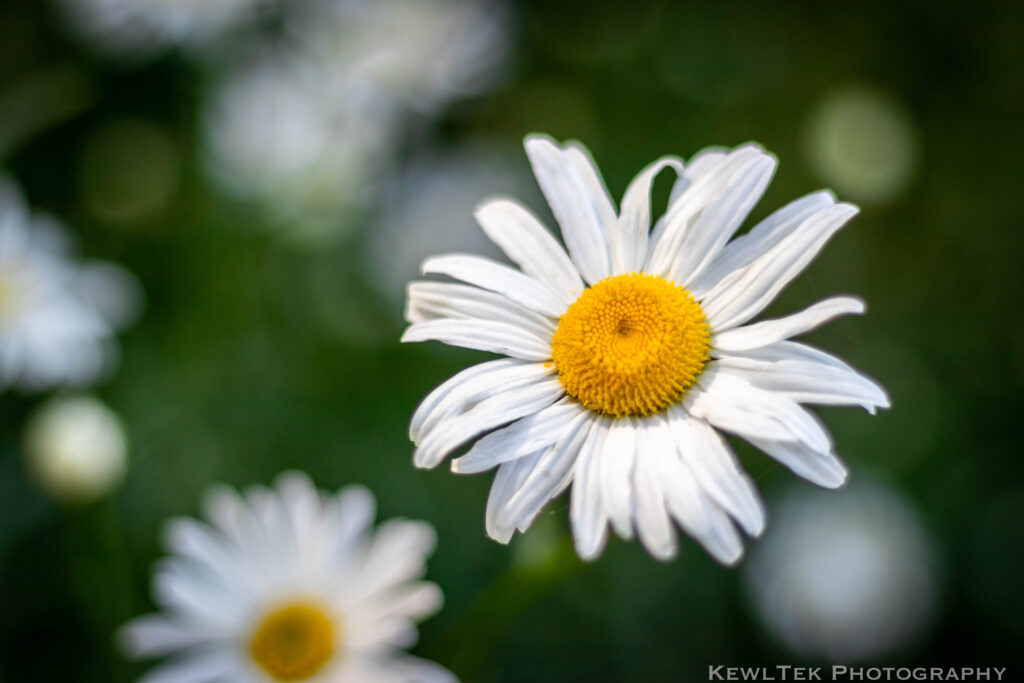
Prime lenses are perfect for exploring different viewpoints. They can produce striking images of relatively familiar subjects such as flowers or car badges.
Pro Tip! Always focus on the eyes
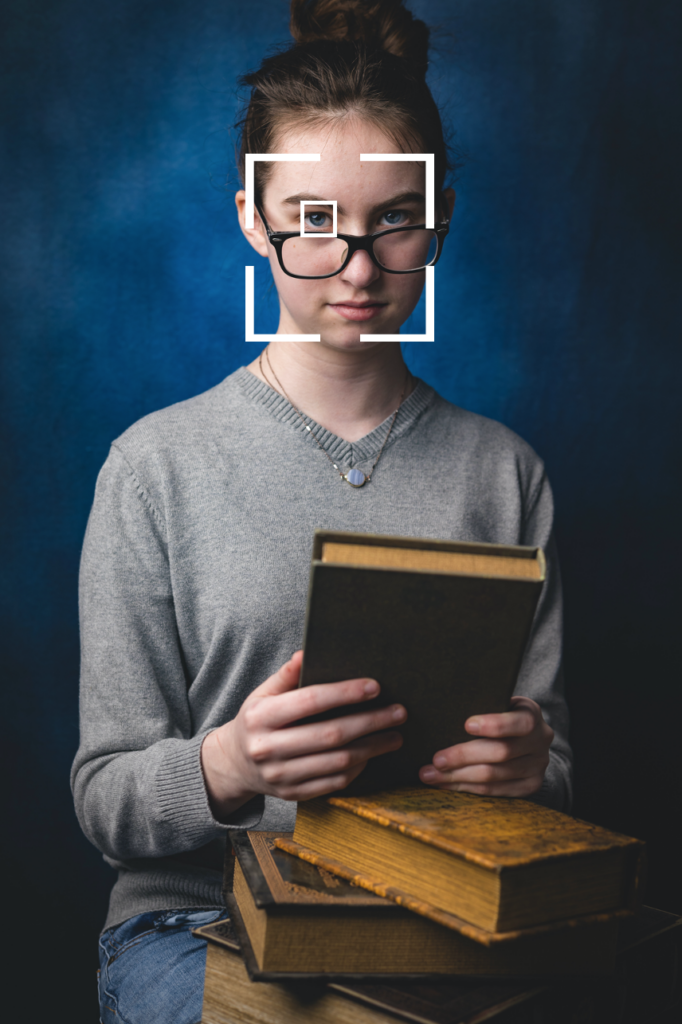
When you work with a shallow depth of field, you’ll find accurate focusing very difficult. If you shoot portraits, make sure your subject’s eyes are sharp. Use “eye detect” autofocus if your camera has that feature. If not, use a single AF point and position it over the eyes (or closest eye) of your subject.
Telephoto Lenses
Extending your camera’s reach with a long lens lets you capture subjects that are out of the range of lesser optics.
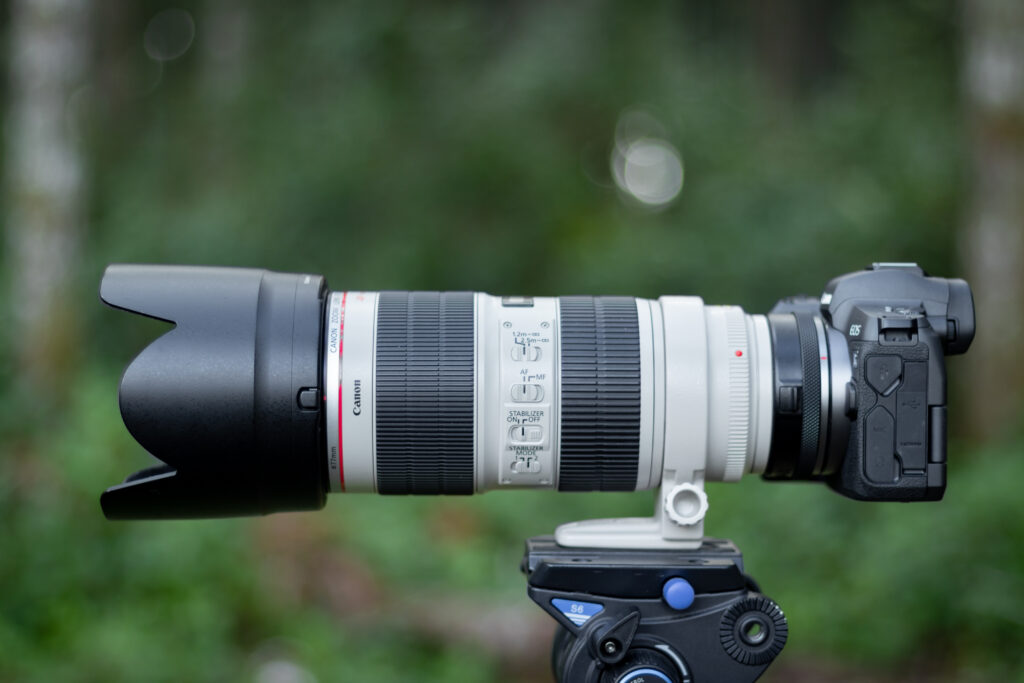
A telephoto lens is the natural choice for subjects that you can’t get close to. Sports and wildlife photographers almost certainly have them attached to their cameras. But long lenses are great for many other subjects as well. Since they let you shoot from greater distances, you can easily isolate individual subjects from their surroundings.
Compression
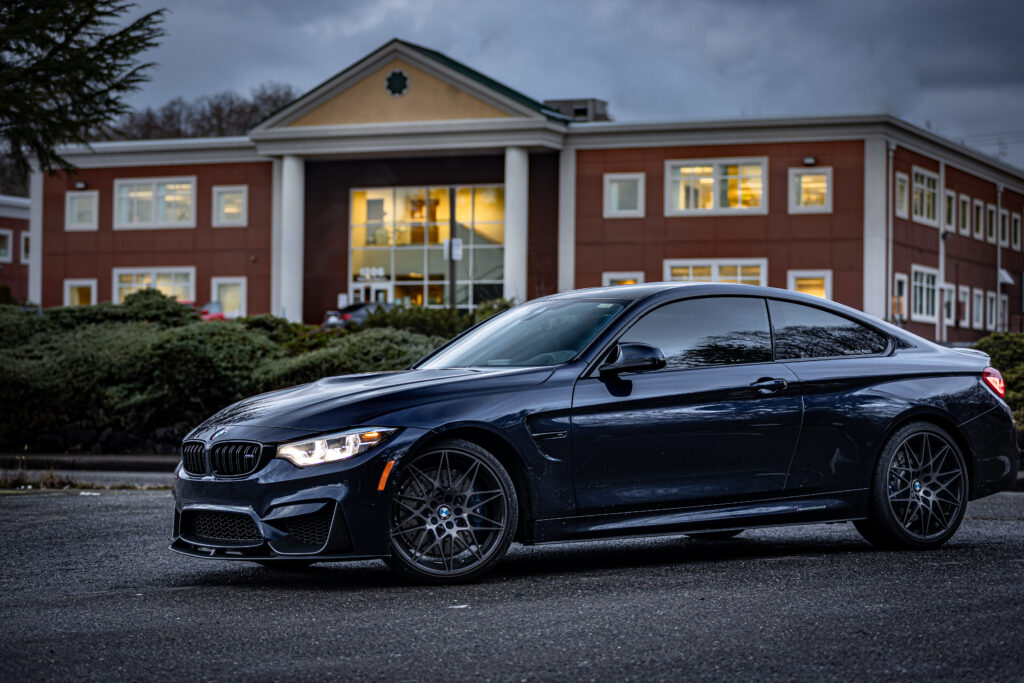
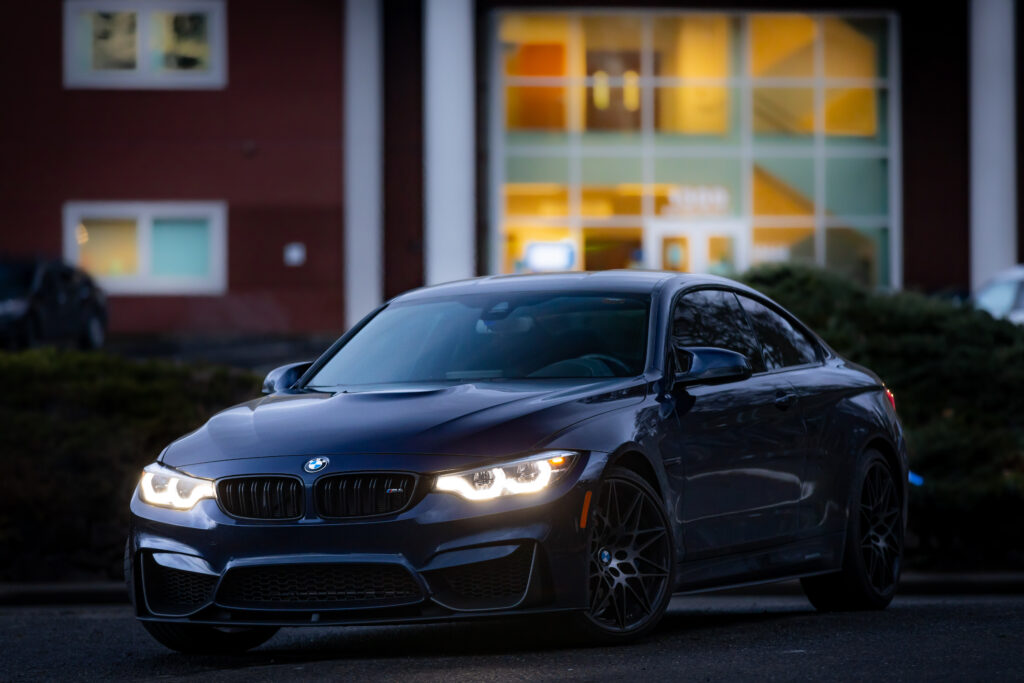
Another cool effect of long lenses is that they make subjects at different distances appear to be very close together in the final image. Look at the two images of the car above. The first image was captured at 80mm. The second image at 200mm. Although the car’s angle is a little different in each image, the distance to the building in the background is exactly the same in both photos. See how much closer the building appears in the second image? That compressed perspective is referred to as “compression”. Long lenses are also perfect for candid portraits, as well as picking out individual details in landscapes and architecture.
Shoot from a distance and isolate individual subjects from their surroundings
Image Stabilizers
The downside to long lenses is that they’re more prone to camera shake–(more on that in a minute). To prevent this, lens makers equip lenses with “image stabilization” systems so you can take sharp handheld pictures at slower shutter speeds. So which lenses have image stabilization? Look for lenses with the following abbreviations:
| Manufacturer | Lens Stabilization Abbreviation |
|---|---|
| Canon | IS (Image Stabilization) |
| Nikon | VR (Vibration Reduction) |
| Tamron | VC (Vibration Compensation) |
| Sigma | OS (Optical Stabilizer) |
With a little practice, you’ll be able to shoot handheld at shutter speeds well below those you’d normally use. For example, a four-stop IS system lets you shoot with a shutter speed of 1/20 sec, as opposed to 1/320 sec.
Prevent Camera Shake
Long telephoto lenses don’t just magnify your subjects, they also magnify camera and lens movements. That means they’re more susceptible to blurry photos from camera shake, so take extra care when using them.
A general rule for shake-free results is to use a shutter speed equal to your focal length or faster. So if you’re zoomed in to 200mm, you should get sharp results with a shutter speed of 1/200 sec or faster. If you zoom in to 300mm, then set your shutter to 1/300 sec. You get the idea. If a shutter speed that fast results in a dark image, you’ll need to bump up your ISO a little to help you get proper exposure. But what if you don’t want to introduce ‘digital noise’ into your image by bumping up your ISO? The obvious answer is to use a tripod, but sometimes that’s just not practical. If that’s the case, look for something to brace yourself against, such as a fence, bench, wall, or streetlamp.
If you’re shooting at a focal length of 200mm, you should get sharp results at 1/200 sec or faster.
Fisheye Lenses
Embrace the extreme distortion fisheye lenses create and get really…”different” results.
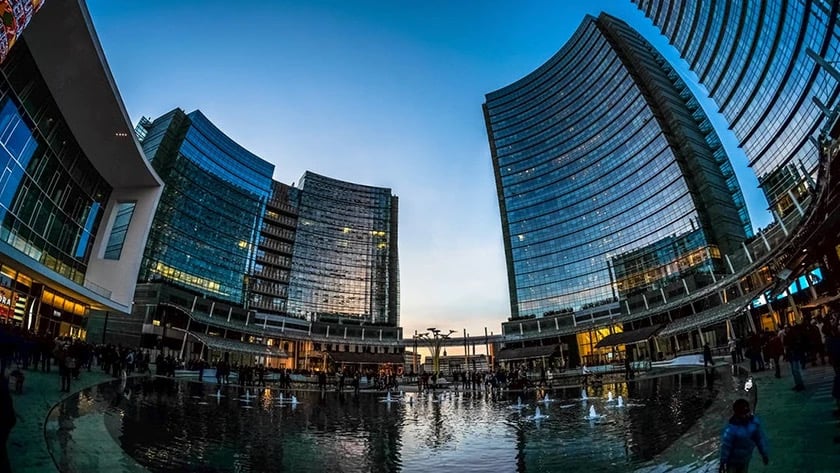
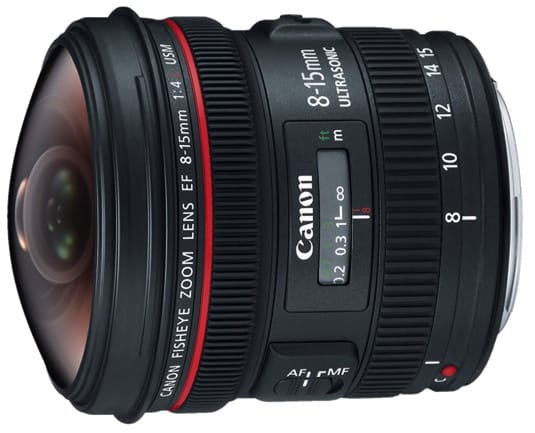
Like wide-angle lenses, fisheyes let you shoot wide, but their distorted view creates much more “stylized” results. You need to use different shooting techniques with fisheyes, because most normal rules don’t apply. For instance, you’ll have to get much closer to your subject than with a conventional lens. Fisheye distortion also makes it hard to use compositional techniques that work with other lenses.
Experiment with different framing techniques. Symmetrical compositions work particularly well, and portraits take on a caricature-like quality.
Two Fisheye Types
There are two main types of fisheye lens: full-frame and circular. A full-frame fisheye creates images that cover the entire sensor, while circular fisheyes make round images in the middle of the sensor with a dark border around it.
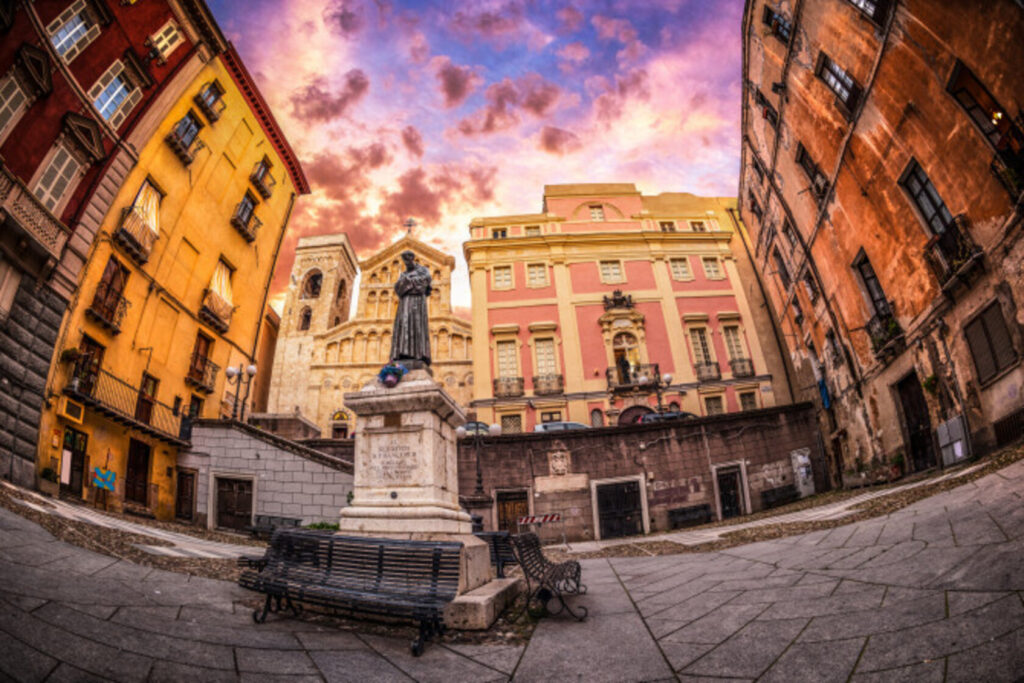
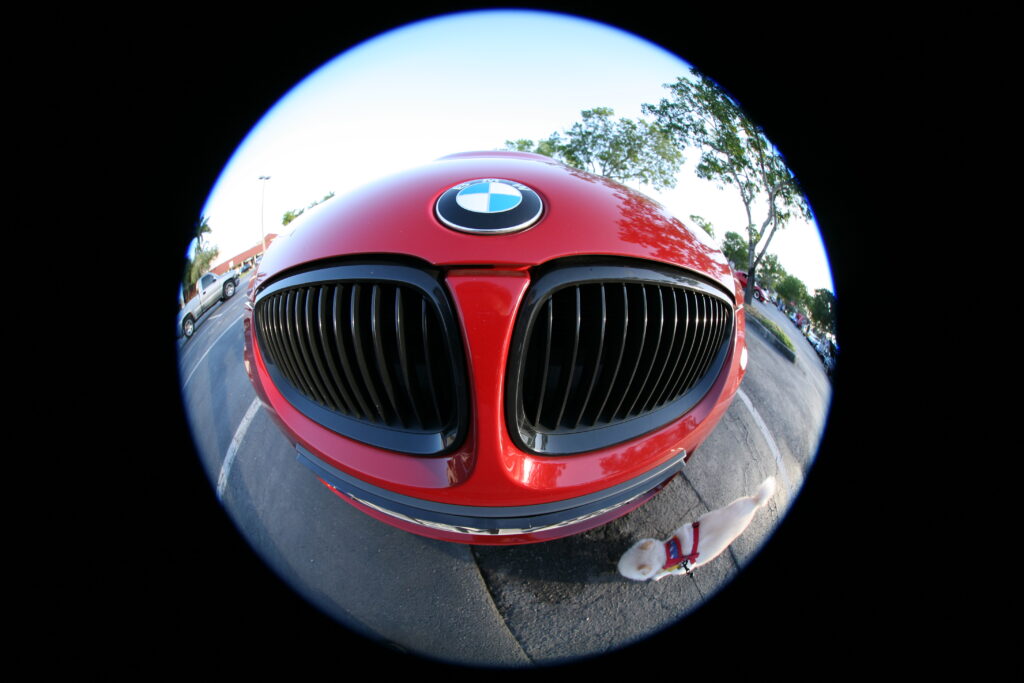
The effect depends on the lens as well as your camera’s sensor. A lens that makes full-frame images on an APS-C sensor (Canon 80D or T6i for example) will look different on a full-frame camera (5D Mark IV or EOS R). For example, the Sigma 8mm lens produces fully circular images on a full-frame, and images somewhere between circular and full-frame on a cropped sensor camera.

Distorted View
Fisheye lenses are known for their distorted view of the world. Normally, you want to avoid distortion–but with fisheyes, distortion is the objective. Fisheye distortion ranges from bending lines, to entirely circular images.
Pro Tip! Check the Edges of Your Frame
Fisheye lenses give you such an extremely wide view, that your own feet or your tripod legs might end up in the shot. This usually looks like a mistake, so check the edges of your frame from time to time to make sure you (or your tripod) aren’t in the shot!
Get Well-Balanced Exposures
Extremely wide fields of view with large areas of sky and foreground can mean you might end up with too much contrast–lots of bright highlights, and lots of dark shadows all in the same scene. To solve this, shoot in Raw. Then edit your photos in Adobe Lightroom–making sure to adjust the exposure (dial down highlights, and bump up shadows). In extreme conditions, you can try exposure bracketing–shoot 3 to 5 photos of the same scene, each one at a different exposure. Then in Lightroom, combine them as a composite.
Macro Lenses
Macro lenses let you unlock a whole new unseen world in almost any and every location.
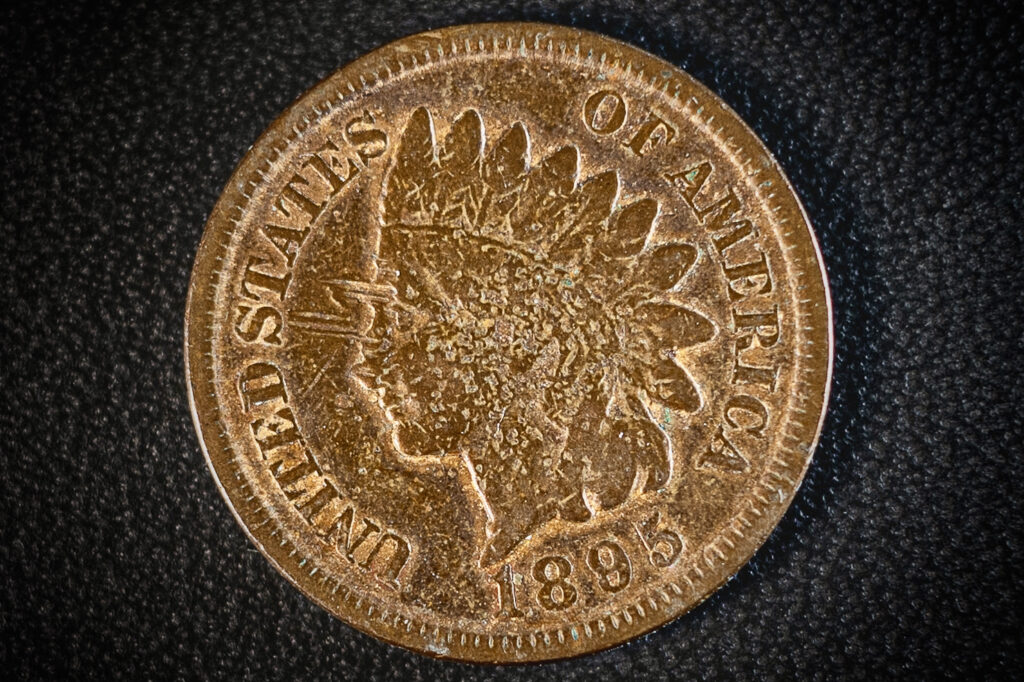
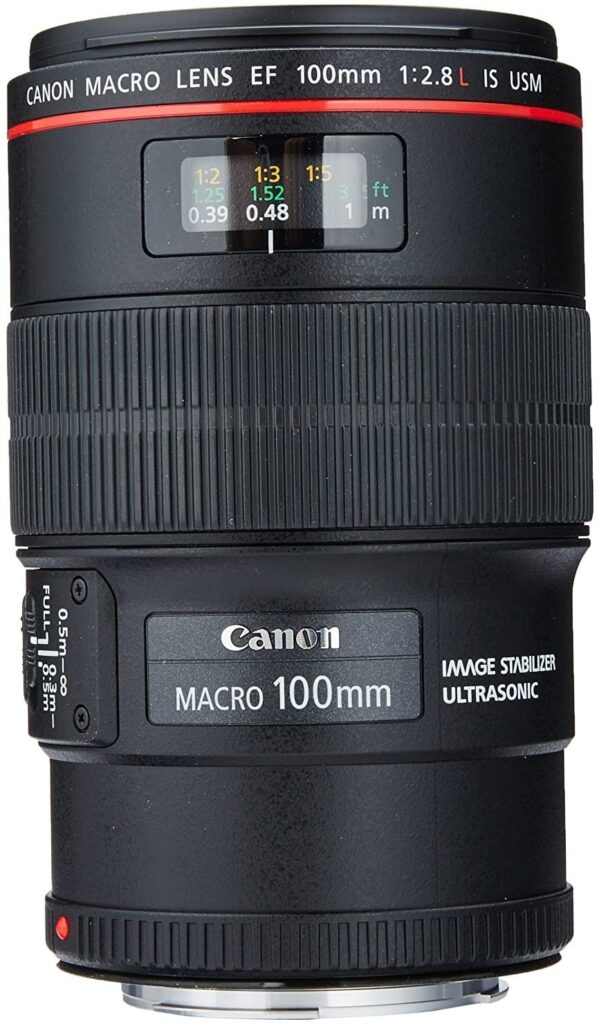
With a macro lens, you can enter a world that’s invisible to the casual observer. Most photographers use them to fill the frame with tiny subjects, but they’re much more versatile than just close-ups. Most Canon macro lenses are between 50mm to 180mm, and have reasonably fast maximum apertures, which are perfect for blurred backgrounds.
At normal distances, you can use a macro lens like a prime lens. Most have a minimum aperture of f/2.8, which creates a shallow depth of field for portraits. For normal shooting, simply use the same techniques you’d use with prime lenses. It’s at close distances that a macro lens really comes into its own, and the depth of field can be just a few millimeters.
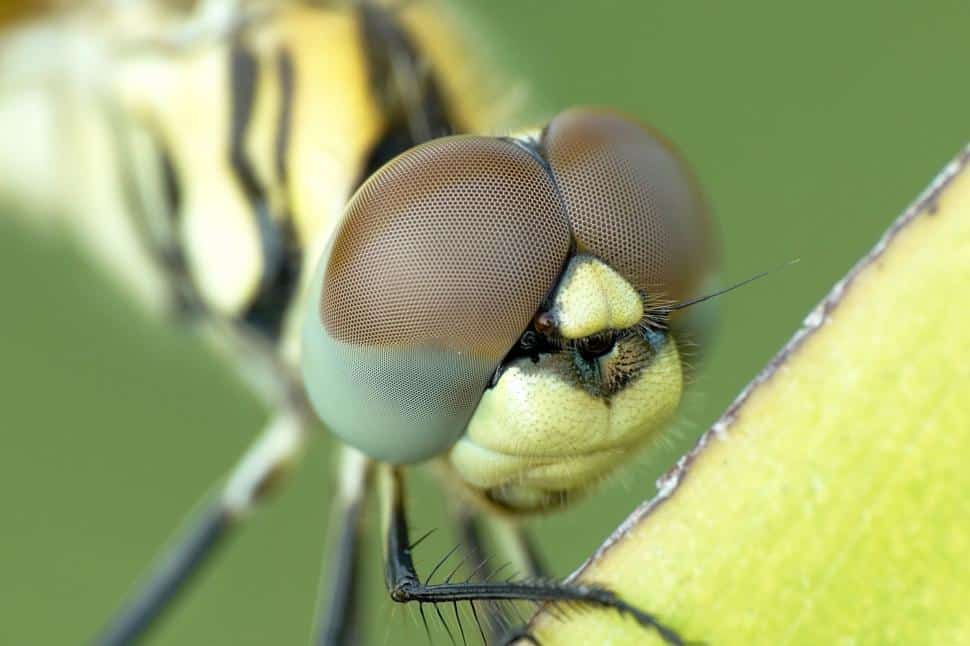
For tiny subjects, switch to manual focus, and carefully focus on the part of the subject you want to be sharp. If the subject doesn’t move, use a tripod for even more focus precision. If it’s tough to focus through the viewfinder, use Live View mode and zoom in to check the focus.
At close distances with a macro lens, the depth of field can be just a few millimeters

Working Distance
You can buy macro lenses with various focal lengths like 60mm, 90mm, 100mm, or 180mm. The main difference with these lenses is how close you have to be to your subject to achieve the same level of magnification. That distance might not seem important, but it alters your perspective. It also makes a big difference when shooting skittish subjects like insects, which you usually can’t get close to without scaring them off.
Pro Tip! A Macro Label Doesn’t Always Mean a Macro Lens
You might see the word ‘macro’ on some zoom lenses, but they don’t give you the same results as ‘true’ macro lenses. A ‘macro’ label on a zoom lens means it can focus a little closer than other similar lenses, not that they can focus on tiny subjects.
Close-Up Creative Point of View
The best part about macro lenses is that they let you get creative shots of boring things. Focus at very close range lets you shoot everyday objects in new and exciting ways. With a little imagination, you can create cool, abstract images.

Conclusion
Alright! This beginner’s guide introduced you to a handful of lens types and the effects they can have your images, subjects, and scenes.
Now it’s your turn! Post a link to your social media feed below so we can check out your cool images! Be sure to let us know which type of lens you used!

0 Comments