Which Camera Lens Should You Use? A Beginner’s Guide
Choosing a camera lens doesn’t require you to memorize focal lengths or understand every lens type. What actually matters is what you’re photographing (people, food, kids, products, travel, etc.), and how you want your photos to look.
This guide isn’t a list of “best lenses.” It’s a decision guide to help you understand which type of lens makes sense for your situation, and where to go next once you know that.
Quick Lens Choices (Brand Agnostic)
- Family Photos Indoors –> Fast prime lens
- Kids running or events –> Versatile zoom lens
- Food or product photography –> Prime or short telephoto
- Travel and everyday use –> Mid-range zoom
- Learning photography basics –> One simple prime lens
If you already know what you want to photograph, start here and then jump to the section that applies to you.
- What Is Focal Length?
- Understanding Aperture (the f/number)
- Prime vs Zoom Lenses
- Types of Lenses (Wide, Standard, Telephoto, Macro, Fisheye)
- Which Lens Should YOU Use?
- Lens Recommendations for Every Budget
- How to Choose Your Next Lens
- Beginner Mistakes to Avoid
- My Personal Lens Picks
- Final Tips & Wrap Up
Why Choosing a Camera Lens Feels Confusing
Camera lens choice is confusing because lenses are usually described in technical terms. I mean, what on earth does “18-55mm f/3.5-5.6 IS STM” actually mean anyway? Right? All that techno mumbo jumbo doesn’t help you know if this lens is good for sports, food, or portraits. Focal lengths, apertures, and lens types are useful concepts, don’t get me wrong. But without context, they don’t tell you which lens will actually help you get the photo you want.
But here’s a secret:
Your lens affects your image quality more than your camera body does.
Your lens controls:
Two people can use with the same camera and end up with completely different results. How? The lenses they use.
This guide breaks everything down simply, with examples from real-world photography. You’ll learn exactly which lens fits your style, your camera, and your goals.
1. What Is Focal Length? (The Most Important Concept)
Focal length is measured in millimeters (mm). It doesn’t describe the physical length of the lens, instead it tells you how the lens sees the world. Focal length determines:
- how wide or tight your shot feels
- how close or far your subject appears
- how compressed or spacious the scene looks
Depth of field and background blur matter too, but focal length sets the overall look of the scene before aperture fine-tunes it.
Here’s an easy cheat-sheet:
|
Focal Length: |
Visual Feel: |
Common Uses: |
|
10mm to 22mm |
Very wide |
Landscapes, Interiors, Travel |
|
24mm to 35mm |
Wide, but natural |
Street, Travel, Everyday |
|
35mm to 70mm |
Human eye look |
Portraits, Products |
|
70mm to 200mm |
Tight, compressed |
Portraits, Sports |
|
300mm and up |
Very tight, zoomed in |
Wildlife, Birds |
In simple terms, wide lenses (10mm to 35mm) expand space, and make everything look farther apart. Telephoto lenses (70mm to 200mm and up) compress space, making background objects look closer.
Compare these images of a cruise ship in Ketchikan, Alaska. Both images were taken from the same spot using a Canon 80D. The first photo is 10mm, and the second is 24mm.
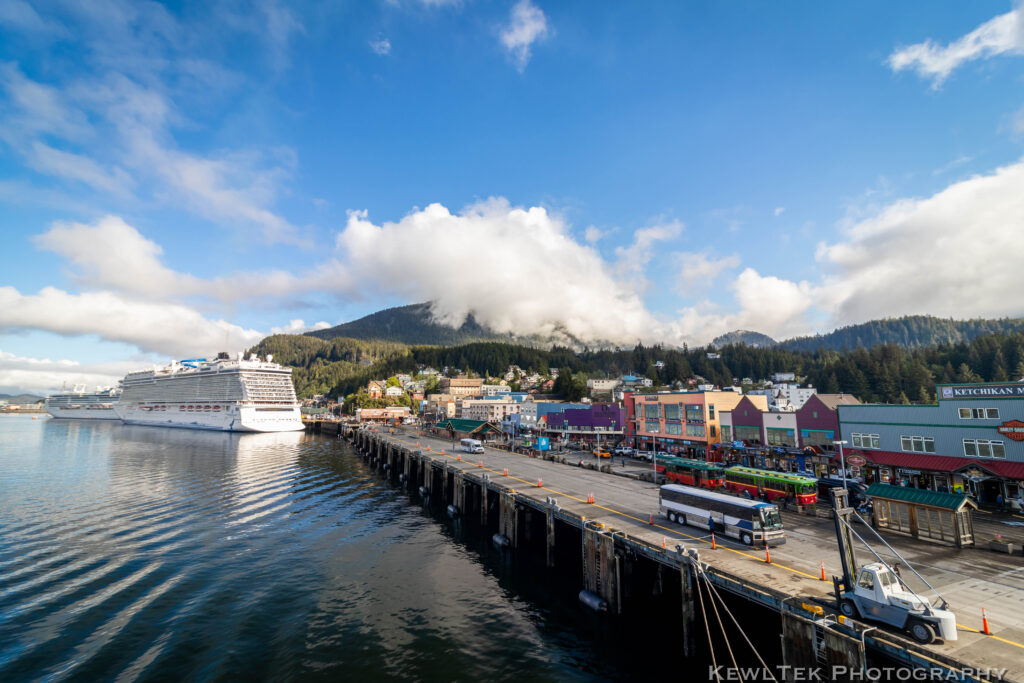
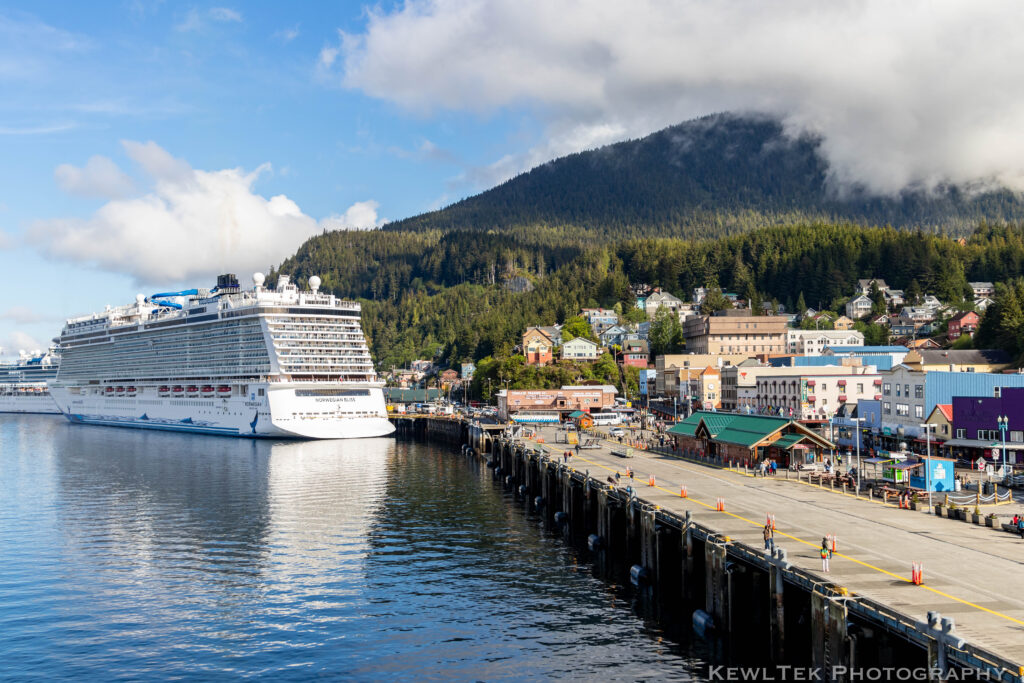
These photos demonstrate how focal length changes subject size and scene compression. Notice how the mountains and cruise ship look farther away in the 10mm shot? And much closer in the 24mm shot? That’s compression.
Remember: If you want more dramatic looking landscapes, go wider. If you want more dramatic portraits, go tighter.
2. Understanding Aperture
So what’s the difference between f/1.8 vs f/4 vs f/11 anyway? Aperture is one of the most important settings in photography, and one of the most confusing when you’re first starting out. The good news? Once you understand what the f-number actually represents, everything else becomes easier.
You can compare a lens’s aperture to the pupil of your eye. In bright light, your pupils get smaller (and let in less light). In low light, they open wider (to let in more light). A camera lens works exactly the same way. The f-number (f/1.8, f/4, f/11…) tells you how open or closed the aperture is.
Aperture controls three things:
1. Light
A wider aperture (lower f-number) lets in more light. A narrower, or more closed aperture (higher f-number) lets in less light. Some lenses only open as wide as f/3.5. Others can open as wide as f/1.2. How wide the aperture can open affects how easily you can photograph indoors or in dim light without needing a flash.
2. Depth of Field
Depth of field refers to how much of your scene is in focus.
- f/1.8 → shallow depth of field → blurred background
- f/11 → deep depth of field → more of the scene in focus
This is how photographers make portraits look so dreamy, and landscapes look so sharp and crisp.
3. Background Blur (Bokeh)
Bokeh is the quality of the out-of-focus areas in your image.
- lower f-numbers = creamier, softer backgrounds
- higher f-numbers = sharper, more in-focus backgrounds
This is where aperture affects the look of your photos the most.
Here’s an illustrated example you can reference:
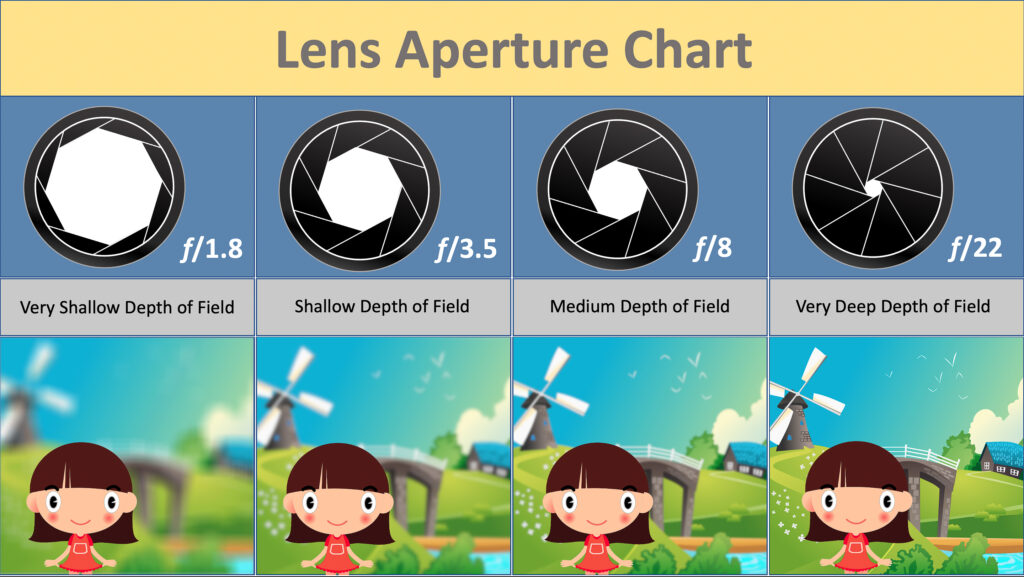
Low f-number (f/1.8-f/2.8)
This is the “dreamy blur” zone.
Best for:
- portraits
- indoor photography
- nighttime photography
- anything where you want the subject isolated
Why it’s useful: A wide aperture lets you capture images in low light without raising ISO too high, and it produces soft, creamy backgrounds that make your subject stand out.
Beginner warning: At f/1.8, depth of field is very thin. Always focus on the eyes when photographing people.
Mid-range f-number (f/3.5-f/7.1)
This is the “safe zone” where most every-day photography lives.
Best for:
- travel
- street photography
- pets
- kids
- casual portraits
- group photos
Why it’s useful: You get a balance. Enough depth of field to keep your subject sharp, but still some background separation. Most kit lenses start here, and that’s perfectly fine.
Higher f-number (f/8 – f/22)
This is where everything becomes sharp from foreground to background.
Best for:
- food and product photography
- landscapes
- cityscapes
- architecture
- macro photography (when you need more of the subject in focus)
Why it’s useful: Higher f-numbers give you a deeper all-in-focus look.
Beginner warning: At f/11 and up, the lens lets in much less light. You may need:
- a tripod
- slower shutter speeds
- higher ISO
Pro Tip! Always Focus on the Eyes
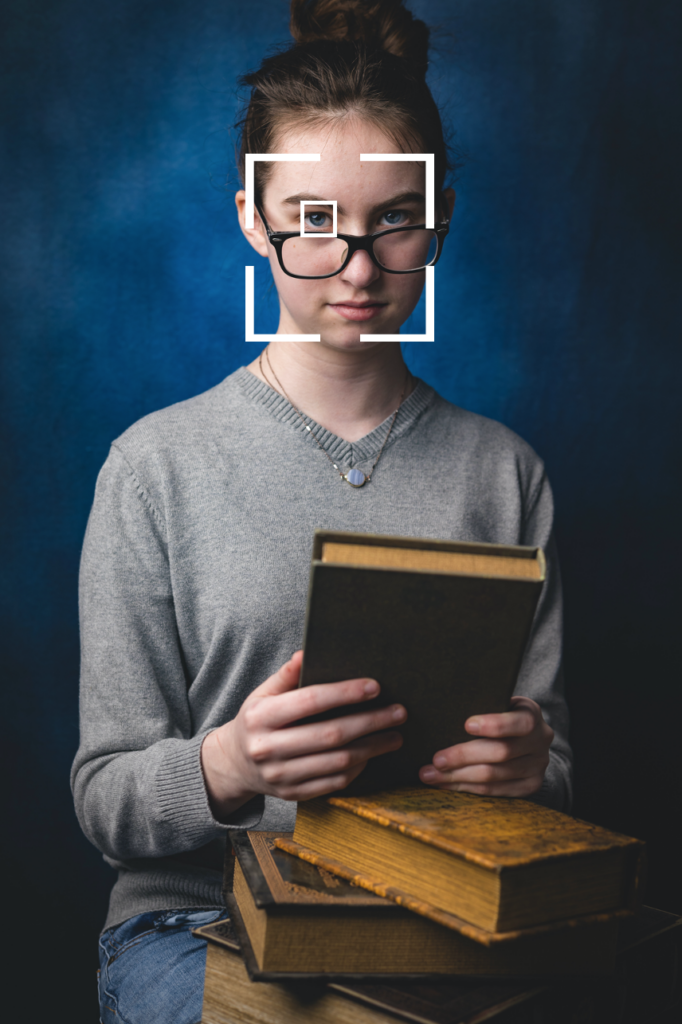
When you work with a shallow depth of field, you might find accurate focusing difficult. If you create portraits, make sure your subject’s eyes are sharp. Use “eye detect” autofocus if your camera has that feature. If not, use a single AF point and position it over the eyes (or closest eye) of your subject.
Experiment with Depth of Field
A shallow depth of field (a beautifully blurred background) helps your subject pop. Don’t stress out about not hitting that “sharpness sweet spot”, because you’ll find that any lack of sharpness is usually confined to the edges of the frame. As long as your main point of focus stays in the central area, you’ll be fine.
3. Prime vs Zoom Lenses
When you start looking at lenses, you’ll see two main types everywhere: prime lenses and zoom lenses. Both can produce excellent images–they just solve different problems.
Prime Lenses (Fixed Focal Length)
Examples: 24mm, 35mm, 50mm, 85mm, 100mm
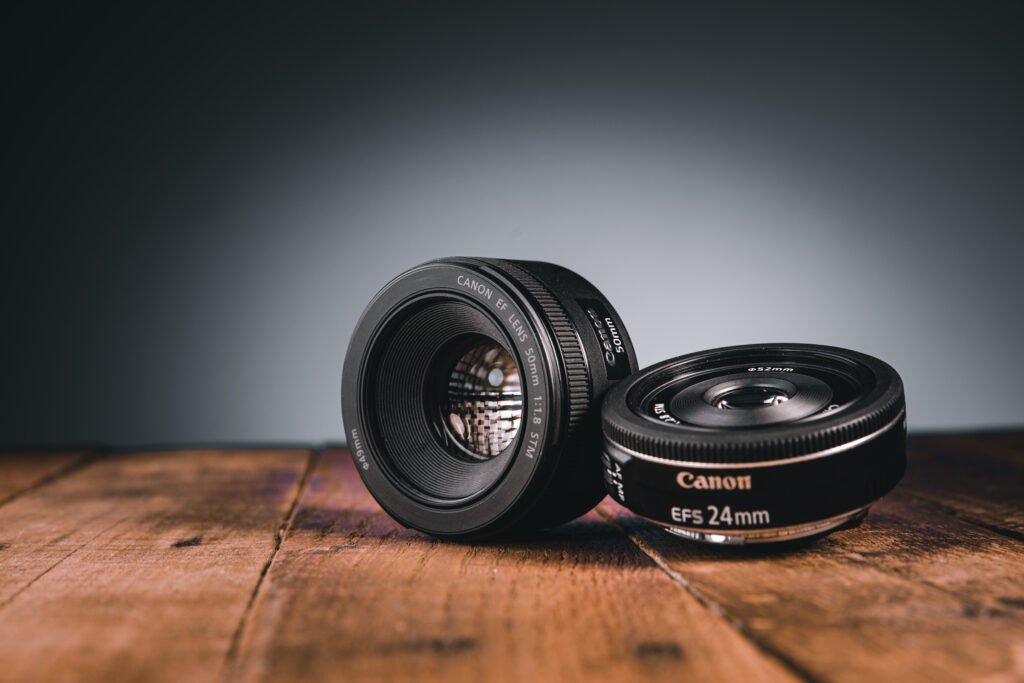
Fixed focal-length prime lenses may seem outdated in an era of image-stabilized zooms and high-ISO cameras. But once you experience what primes can do, you’ll want one (or two, or three) in your camera bag. There’s lots of prime lenses available, and I recommend taking a look at reasonably priced options like the Canon EF 50mm f/1.8, which sells for around $170, or the Canon EF-S 24mm f/2.8, for about $165.
The main advantage of prime lenses is a wider maximum aperture, (eg f/1.8 compared to f/3.5). Wide apertures let in more light. That means you can use faster shutter speeds with the same ISO in low light scenarios without risking blur from camera shake. Being able to use faster shutter speeds is why photographers refer to wide aperture lenses as “fast lenses”, or “fast glass”. Wide apertures also give you beautiful background blur–called “bokeh”–due to their shallow depth of field.
Pros and Cons of Prime Lenses
Pros:
- Sharper images than most zooms at the same focal length
- Wider apertures (f/1.4, f/1.8, etc.) for better low-light performance and creamy background blur
- Smaller and lighter than zooms
- Better value for the image quality — you get incredible sharpness without spending $2000 or more
Cons:
- No zoom — You have to “zoom with your feet,” and walk closer or farther from your subject to reframe, which can be tough in tight spaces or at events.
- Less flexible for fast-changing moments (kids, pets, events)
- Harder to frame in small rooms (people underestimate how often this affects them)
- You’ll definitely want more than one. A 50mm is awesome, but then you’ll wish you had a 35mm for street photography, a 24mm for tight spaces, and an 85mm for portraits.
Who Primes are Perfect for:
- Portrait Photographers
- Low-light environments
- Bokeh lovers
- Storytellers who like simplicity
- Photographers who value image quality over convenience
Tip: If you're on a budget and want a big jump in image quality, a 50mm f/1.8 (Canon, Nikon, and Sony all make 'em) is the best "first upgrade" lens you can buy. It's inexpensive, sharp, and teaches you how to compose intentionally.
Zoom Lenses (Variable Focal Length)
Examples: 24-70mm, 16-35mm, 70-200mm

Zoom lenses let you change focal length without moving your feet. They’re incredibly convenient. One lens can replace several primes.
Pros and Cons of Zoom Lenses
Pros:
- One zoom replaces several primes
- Extremely versatile — wide, normal, and telephoto in one lens
- Great for travel, events, kids, pets
- You can react faster (capture the moment easier) when scenes change
- You may only need one or two zooms to cover almost everything
Cons:
- Bigger and heavier
- Kit zooms aren’t always sharp at the long end
- More expensive (good zooms cost more than most primes)
- Aperture is often narrower, like f/4 or f/5.6 instead of f/1.8
- Not quite as sharp as primes (though modern zooms are excellent)
Who Zooms are Perfect for:
- Beginners who want convenience
- Travel photographers
- Parents photographing kids
- Event and wedding photographers
- Anyone who doesn’t want to carry 3 or 4 primes
Real-World Use Cases for Zooms and Primes
Zoom: Let’s say you’re photographing wildlife, for example your kid at the park. With a prime, you’re constantly moving closer and further. But with a zoom, you just rotate the zoom ring, and keep taking pictures.
Prime: Let’s say you’re indoors taking a portrait by a window. A prime lens (like a 50mm f/1.8 or 85mm f/1.4) gives you sharper results and that incredible, dreamy blurred background everyone loves.
That’s why many photographers eventually own both.
So which one is better?
Neither. They’re just different tools.
- Prime = image quality & low-light capability
- Zoom = flexibility & convenience
In the next two sections, we’ll break down:
Experiment with Your Viewpoint
Zoom lenses are convenient, but don’t let them make you lazy when choosing a viewpoint. Yes, I said “lazy”, because I’m guilty as charged. Zoom lenses let you stay comfortably planted in one spot and not move. To change your viewpoint, you just zoom in and out. With prime lenses, the only way to change your composition is to physically move–or “zoom with your feet”. Moving yourself and your camera leads you to capture awesome creative shots you might not otherwise have gotten!
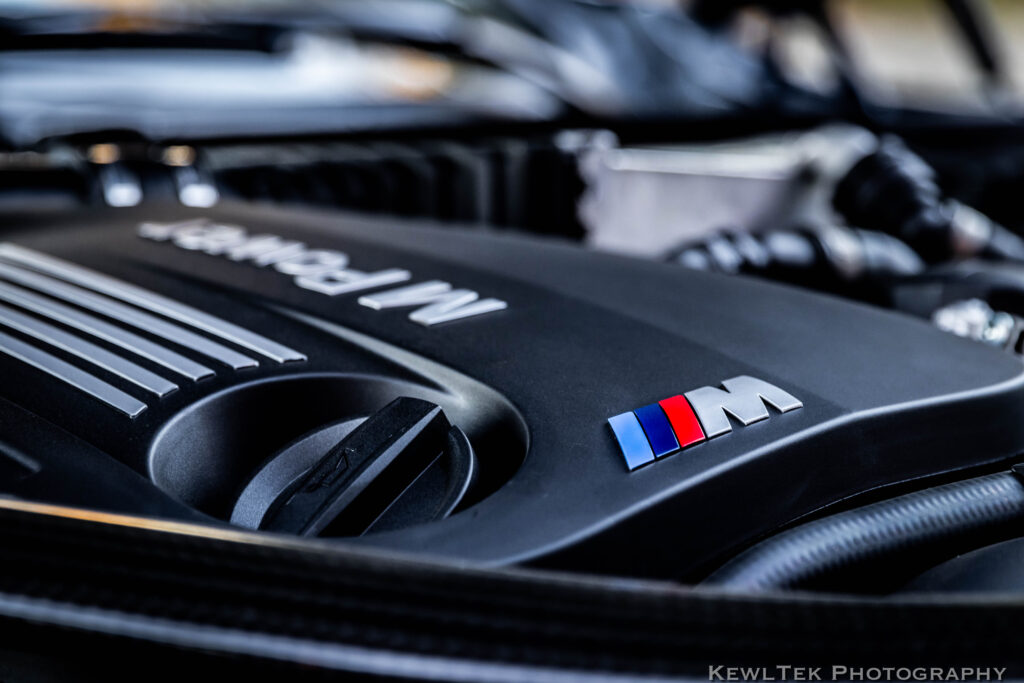
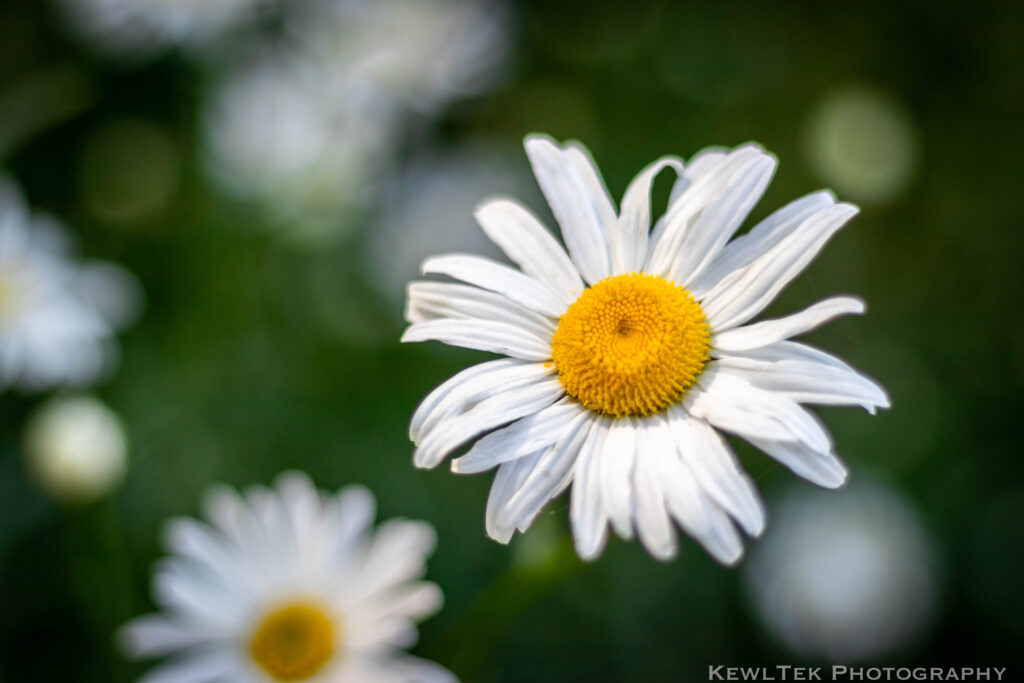
Prime lenses are perfect for exploring different viewpoints. They can produce striking images of relatively familiar subjects such as flowers or car badges.
New To Camera Settings?
If camera settings feel like a mystery, check out my complete beginner camera settings series. It covers how focal length, aperture, shutter speed, and ISO work together. If you’re just starting out or would like a refresh, it’s a helpful set of posts that starts with the 11 Essential Camera Settings Guide.
4. Types of Lenses (Wide, Standard, Telephoto, Macro, Fisheye)
To make your wide-angle shots really pop, experiment and get close to your subject to exaggerate the perspective. Use the foreground or leading lines to give your image a three-dimensional feel. If you don’t, your wide-angle shots might look a bit “empty”.
Converging Verticals
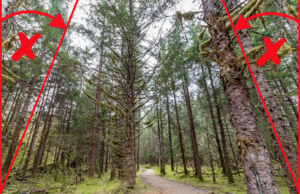
In some cases you might run into the problem of ‘converging verticals’, especially with building and architecture shots. When you angle your camera up (even just a little bit), the vertical lines at the edges lean inwards, and make your subject look like it’s tipping over. Converging verticals is a typical phenomenon, but it’s simple to avoid: Just keep the back of your camera parallel to your subject. You can also try positioning the camera low to the ground to include interesting foregrounds.
Pro Tip! Watch Out For Distortion
When you photograph a group of people, you might be tempted to pop on your ultra-wide lens, especially when space is limited. But go too wide and you’ll get lots of unflattering distortion, and make the people closest to the camera appear much larger than those further back.
Look for interesting foregrounds or leading lines to add a sense of depth to your images
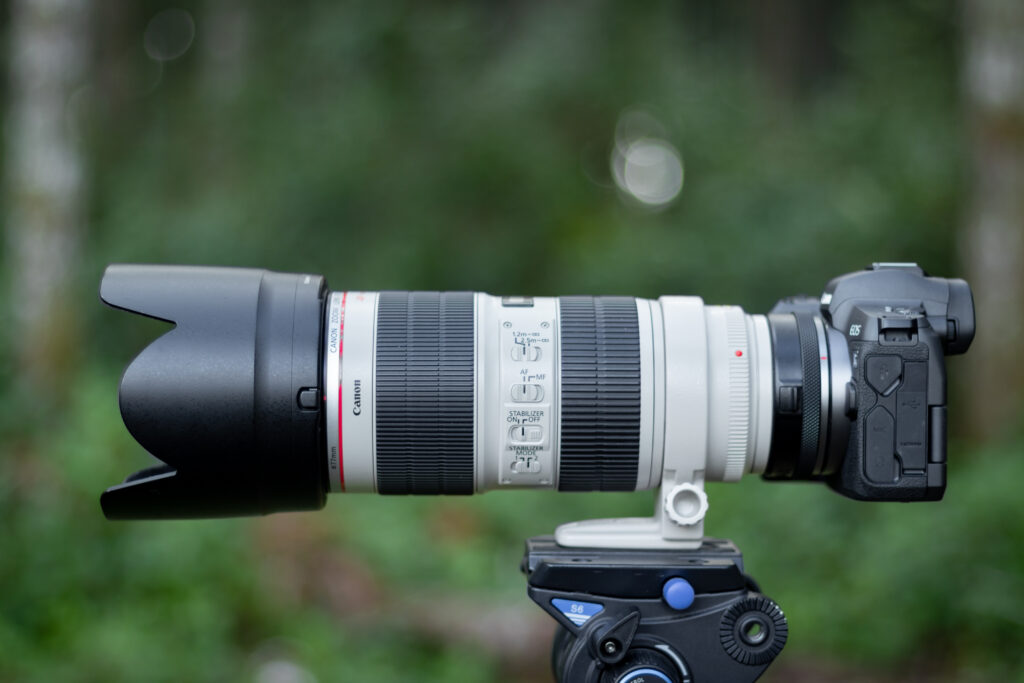
Telephoto Lenses
Extending your camera’s reach with a long lens lets you capture subjects that are out of the range of lesser optics.
A telephoto lens is the natural choice for subjects that you can’t get close to. Sports and wildlife photographers almost certainly have them attached to their cameras. But long lenses are great for many other subjects as well. Since they let you take photos from greater distances, you can easily isolate individual subjects from their surroundings.
Compression
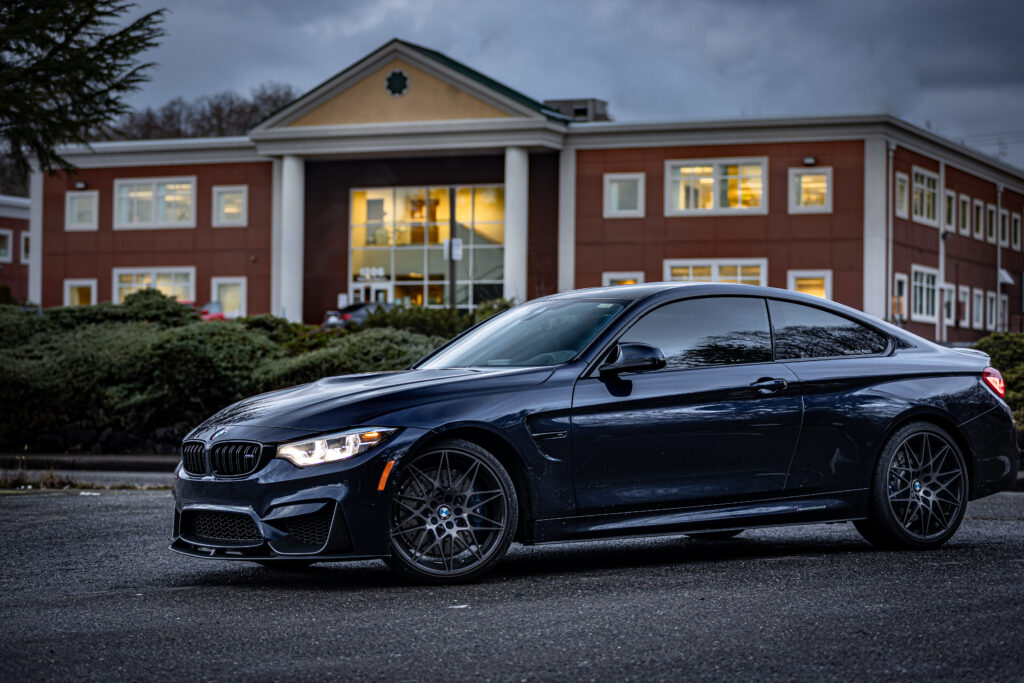
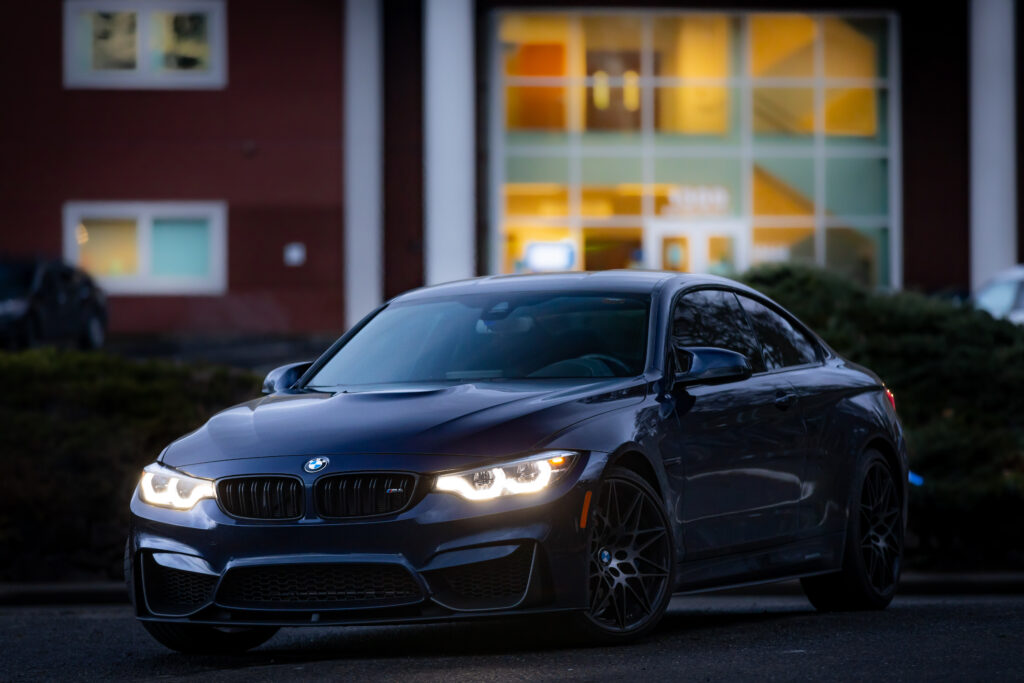
Another cool effect of long lenses is that they make subjects at different distances appear to be very close together in the final image. Look at the two images of the car above. The first image was captured at 80mm. The second image at 200mm. Although the car’s angle is a little different in each image, the distance to the building in the background is exactly the same in both photos. See how much closer the building appears in the second image? That compressed perspective is referred to as “compression”. Long lenses are also perfect for candid portraits, as well as picking out individual details in landscapes and architecture.
Capture subjects from a distance and isolate individual subjects from their surroundings
Image Stabilizers
The downside to long lenses is that they’re more prone to camera shake–(more on that in a minute). To prevent this, lens makers equip lenses with “image stabilization” systems so you can take sharp handheld pictures at slower shutter speeds. So which lenses have image stabilization? Look for lenses with the following abbreviations:
| Manufacturer | Lens Stabilization Abbreviation |
|---|---|
| Canon | IS (Image Stabilization) |
| Nikon | VR (Vibration Reduction) |
| Tamron | VC (Vibration Compensation) |
| Sigma | OS (Optical Stabilizer) |
With a little practice, you’ll be able to take handheld photos with shutter speeds well below those you’d normally use. For example, a four-stop IS system lets you photograph with a shutter speed of 1/20 sec, as opposed to 1/320 sec.
Prevent Camera Shake
Long telephoto lenses don’t just magnify your subjects, they also magnify camera and lens movements. That means they’re more susceptible to blurry photos from camera shake, so take extra care when using them.
A general rule for shake-free results is to use a shutter speed equal to your focal length or faster. So if you’re zoomed in to 200mm, you should get sharp results with a shutter speed of 1/200 sec or faster. If you zoom in to 300mm, then set your shutter to 1/300 sec. You get the idea. If a shutter speed that fast results in a dark image, you’ll need to bump up your ISO a little to help you get proper exposure. But what if you don’t want to introduce ‘digital noise’ into your image by bumping up your ISO? The obvious answer is to use a tripod, but sometimes that’s just not practical. If that’s the case, look for something to brace yourself against, such as a fence, bench, wall, or streetlamp.
If you’re using a focal length of 200mm, you should get sharp results at 1/200 sec or faster.
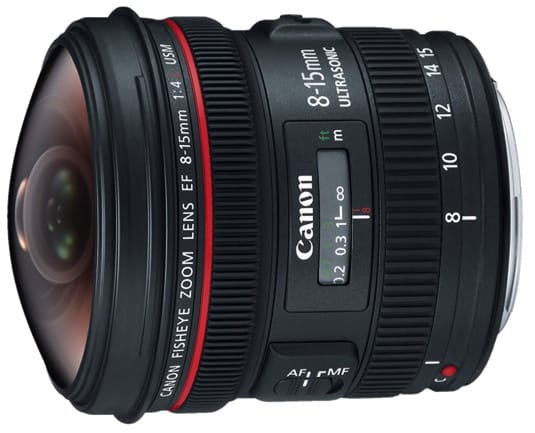
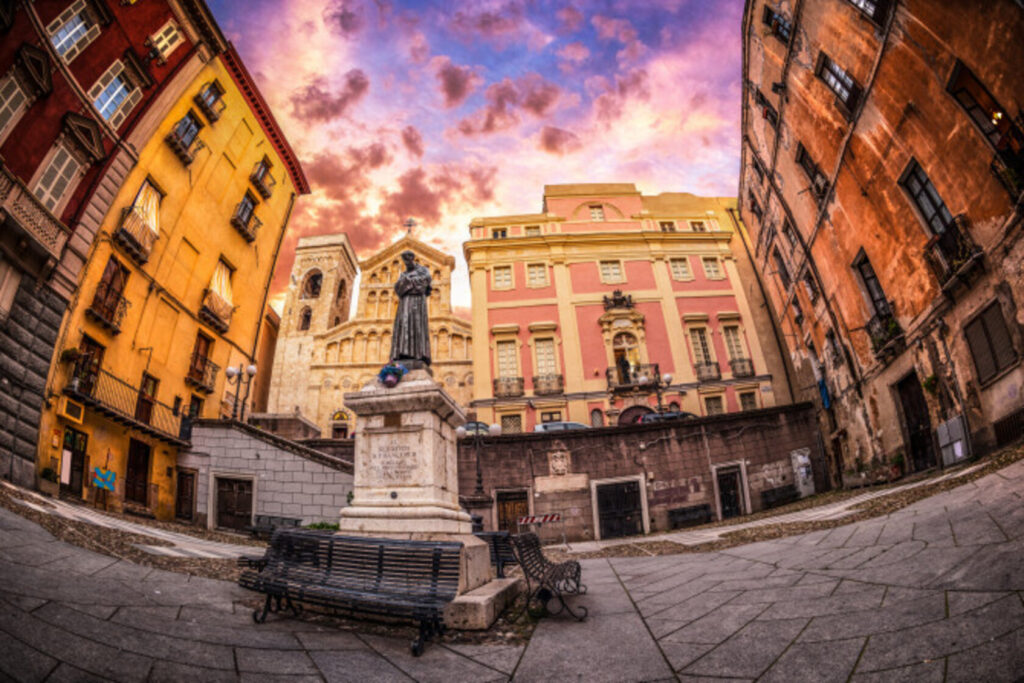
Fisheye Lenses
Embrace the extreme distortion fisheye lenses create and get really…”different” results.
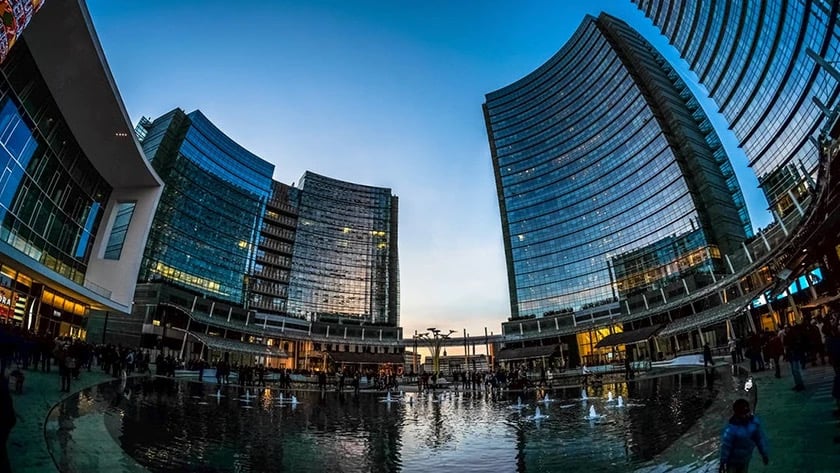
Like wide-angle lenses, fisheyes let you capture wide images of scenes, but their distorted view creates much more “stylized” results. You need to use different capture techniques with fisheyes, because most normal rules don’t apply. For instance, you’ll have to get much closer to your subject than with a conventional lens. Fisheye distortion also makes it hard to use compositional techniques that work with other lenses.
Experiment with different framing techniques. Symmetrical compositions work particularly well, and portraits take on a caricature-like quality.
Two Fisheye Types
There are two main types of fisheye lens: full-frame and circular. A full-frame fisheye creates images that cover the entire sensor, while circular fisheyes make round images in the middle of the sensor with a dark border around it.

The effect depends on the lens as well as your camera’s sensor. A lens that makes full-frame images on an APS-C sensor (Canon 80D or T6i for example) will look different on a full-frame camera (5D Mark IV or EOS R). For example, the Sigma 8mm lens produces fully circular images on a full-frame, and images somewhere between circular and full-frame on a cropped sensor camera.
Distorted View
Fisheye lenses are known for their distorted view of the world. Normally, you want to avoid distortion–but with fisheyes, distortion is the objective. Fisheye distortion ranges from bending lines, to entirely circular images.
Pro Tip! Check the Edges of Your Frame
Fisheye lenses give you such an extremely wide view, that your own feet or your tripod legs might end up in the shot. This usually looks like a mistake, so check the edges of your frame from time to time to make sure you (or your tripod) aren’t in the shot!
Get Well-Balanced Exposures
Extremely wide fields of view with large areas of sky and foreground can mean you might end up with too much contrast–lots of bright highlights, and lots of dark shadows all in the same scene. To solve this, capture RAW images. Then edit your photos in Adobe Lightroom–making sure to adjust the exposure (dial down highlights, and bump up shadows). In extreme conditions, you can try exposure bracketing–take 3 to 5 photos of the same scene, each one at a different exposure. Then in Lightroom, combine them as a composite.
Macro Lenses
Macro lenses let you unlock a whole new unseen world in almost any and every location.

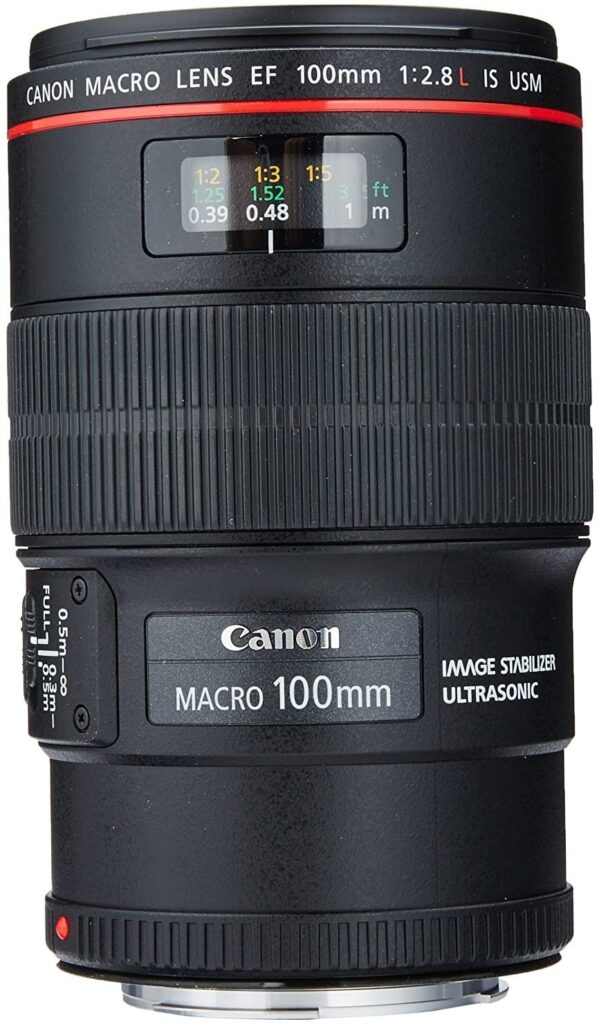
With a macro lens, you can enter a world that’s invisible to the casual observer. Most photographers use them to fill the frame with tiny subjects, but they’re much more versatile than just close-ups. Most Canon macro lenses are between 50mm to 180mm, and have reasonably fast maximum apertures, which are perfect for blurred backgrounds.
At normal distances, you can use a macro lens like a prime lens. Most have a minimum aperture of f/2.8, which creates a shallow depth of field for portraits. For normal scenarios, simply use the same techniques you’d use with prime lenses. It’s at close distances that a macro lens really comes into its own, and the depth of field can be just a few millimeters.
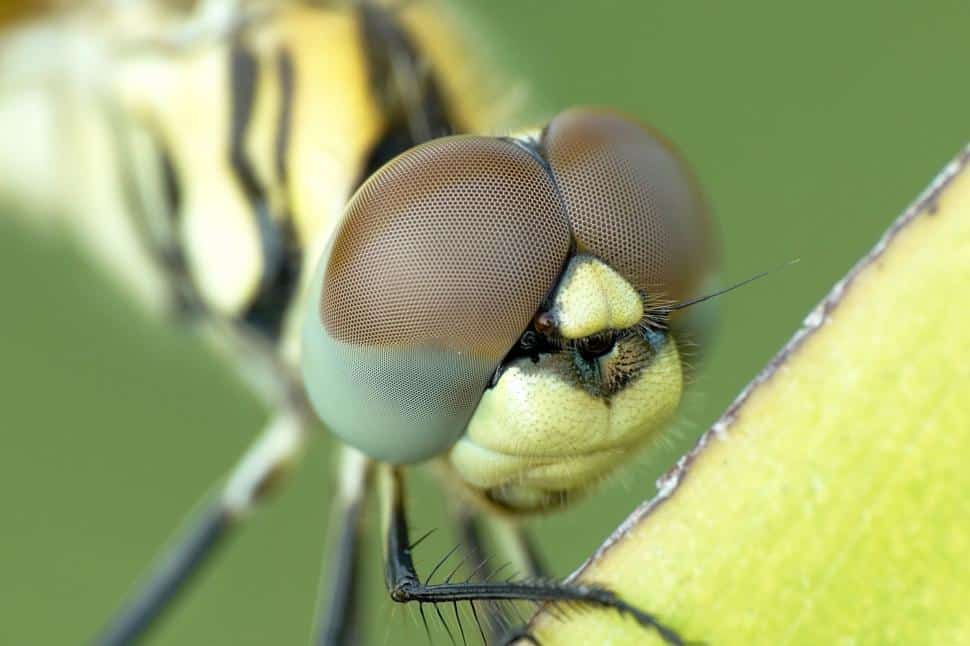
For tiny subjects, switch to manual focus, and carefully focus on the part of the subject you want to be sharp. If the subject doesn’t move, use a tripod for even more focus precision. If it’s tough to focus through the viewfinder, use Live View mode and zoom in to check the focus.
At close distances with a macro lens, the depth of field can be just a few millimeters
Working Distance
You can buy macro lenses with various focal lengths like 60mm, 90mm, 100mm, or 180mm. The main difference with these lenses is how close you have to be to your subject to achieve the same level of magnification. That distance might not seem important, but it alters your perspective. It also makes a big difference when photographing skittish subjects like insects, which you usually can’t get close to without scaring them off.
Pro Tip! A Macro Label Doesn’t Always Mean a Macro Lens
You might see the word ‘macro’ on some zoom lenses, but they don’t give you the same results as ‘true’ macro lenses. A ‘macro’ label on a zoom lens means it can focus a little closer than other similar lenses, not that they can focus on tiny subjects.
Close-Up Creative Point of View
The best part about macro lenses is that they let you get creative shots of boring things. Focus at very close range lets you capture everyday objects in new and exciting ways. With a little imagination, you can create cool, abstract images.
Conclusion
Alright! This beginner’s guide introduced you to a handful of lens types and the effects they can have your images, subjects, and scenes.