How To Make a GoPro Time-lapse Video

Have you ever seen amazing time lapse videos on your social media pages, and wondered how they did it? Good time lapse videos are mesmerizing and easy to make! In this post, I’ll show you how to make a GoPro time-lapse video.
Here’s the TL;DR
- Power up your GoPro
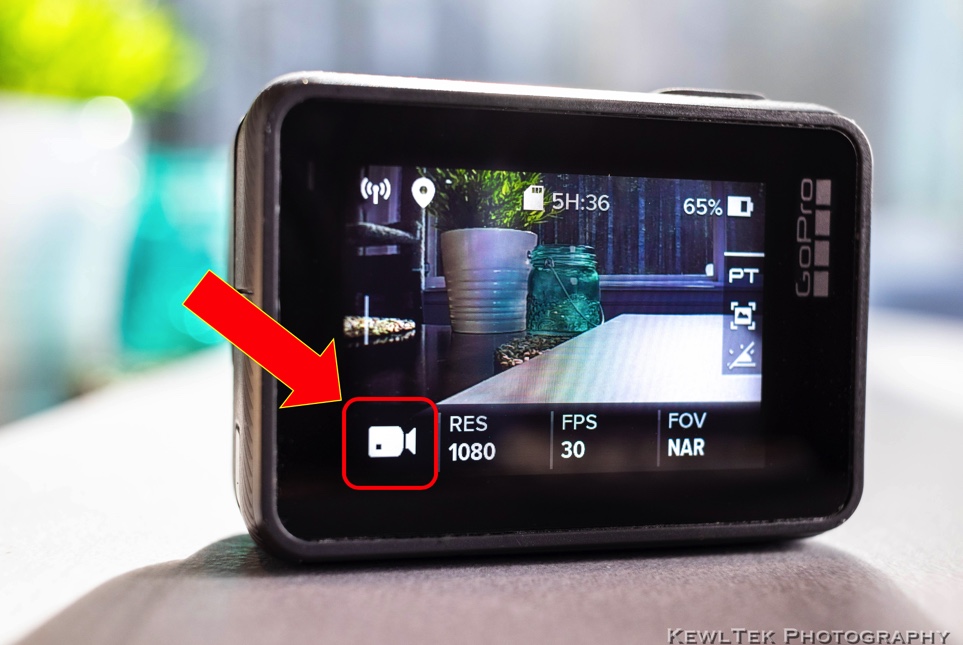
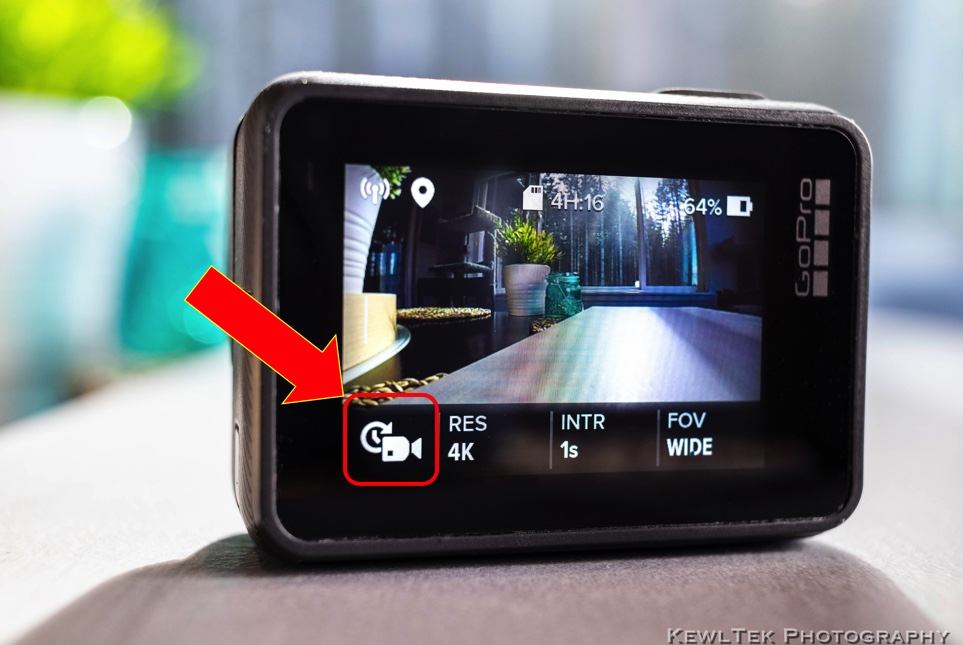
- Tap the “Camera Mode” icon in the lower left corner
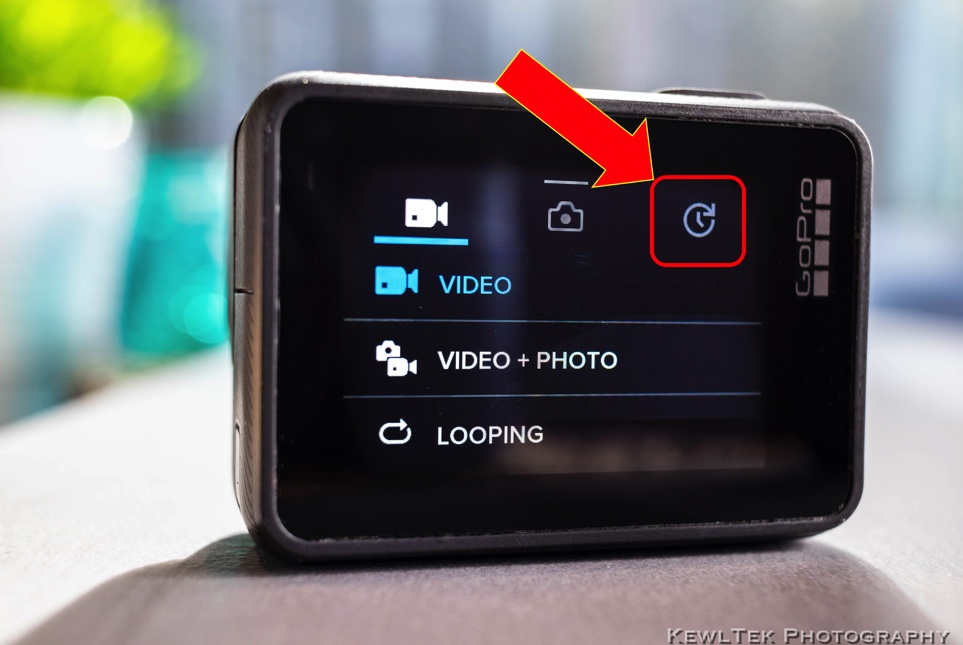
- Select the time-lapse camera mode icon in the upper right
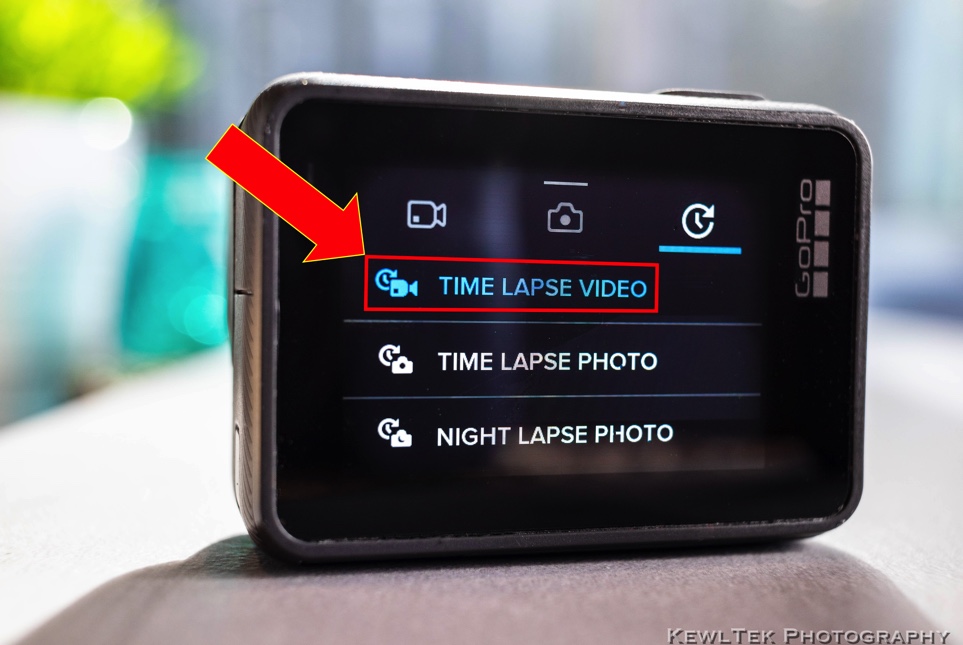
- Tap “Time Lapse Video”
- Press the record button
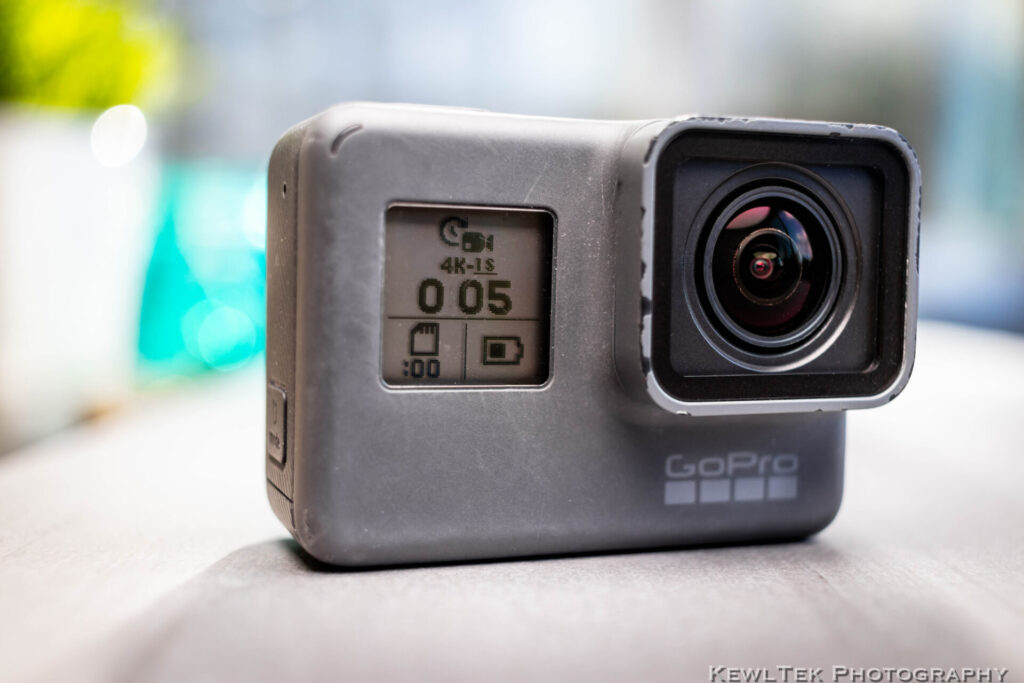
This post applies to the following GoPro models [Amazon links]:
Why make a GoPro time-lapse video?
They’re simple to create
Time-lapse movies used to require complex equipment, intervalometers, and fancy cameras. Photographers had to snap photos every 1 to 5 seconds, manually stitch them together, and play them back at 24 frames per second. The result was magical, but the process was tedious.
These days, things are much easier! GoPro time-lapse videos are automatically stitched together! Just tap a few options, press “Record”, and you’ve got a time-lapse!
They have multiple uses
Video producers use time-lapse movies between scenes to show the passage of time. Common subjects include the sun and stars as they move through the sky. Sunrises and sunsets are another popular subject, as well as busy city streets. If you have a suction cup mount, stick your GoPro to the top of your car, and record a time-lapse to create the illusion of super speed!
They’re mesmerizing
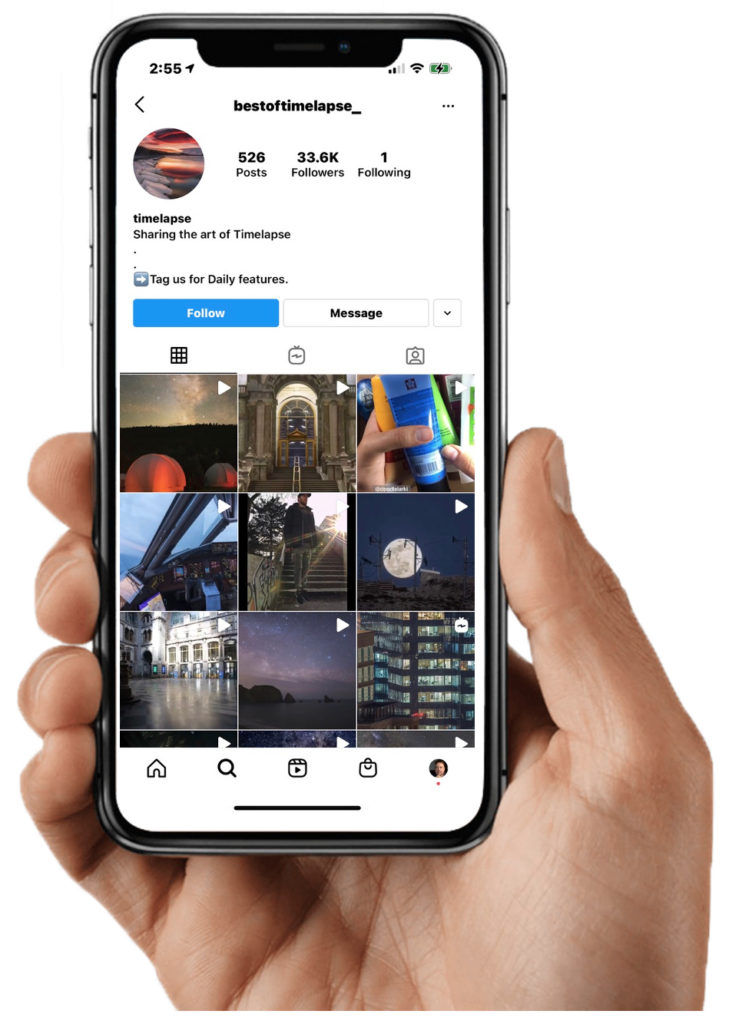
There’s entire Instagram pages dedicated to time-lapse videos. High-quality time-lapse videos are almost hypnotic. You could spend hours watching them.
If you want time-lapse movie inspiration, check out @bestoftimelapse_ on Instagram.
What’s a good time-lapse subject?
The best time-lapses capture a things that noticeably change during recording. Sunrises and sunsets, clouds blowing by, and busy city intersections, with cars and people zooming by are good choices. There’s no rules about what to film. Just try and film something with a distinct “before” and “after”.
Here’s an example of a time-lapse I created from the back of a cruise ship in Alaska using my GoPro:
Time-lapse made with a GoPro Hero5 Black at the Hubbard Glacier in Alaska
How to prepare for your time-lapse
Use basic framing and composition techniques like the rule of thirds, high angle/low angle, horizons straight, etc. Here’s a bare bones checklist of things to check before pressing record:
- Lighting
- Will the sun arc across the sky and possibly blow out your time-lapse? Consider repositioning your GoPro, or improvising shade
- Tripod, mount, or other stabilization platform
- Is it windy? Is the GoPro liable to be bumped or kicked during your recording? Make sure you have a stable platform
- Battery charged
- Make sure your GoPro has the juice it needs for the duration of the time-lapse
- Space on your memory card
- Don’t end up with a full card mid-way through your epic capture
- Rain in the forecast?
- Position your camera so rain doesn’t spatter the lens. In the Hubbard Glacier video above, you see lots of rain spatter!
- Got a chair? A place to sit?
- You may be recording for over an hour, so get comfortable. Bring a good book, or catch up on Facebook and Instagram on your mobile phone
- “Quiet on the set!” Just kidding…
- GoPro cameras don’t record audio during a time-lapse. So you can chat away while your camera does its thing
Visualize your scene, and frame it to align with your vision of the finished time-lapse movie. Now you’re ready to record!
GoPro Settings
There’s three ways to switch your GoPro into time-lapse mode:
- Tap the power button to change modes
- Tap the menu options on the back screen
- Use your voice
1. Tap the power button to change modes
This one is straight forward. Just click the power button on the side of your GoPro to cycle through the modes:
- Video
- Photo
- Burst
- Time Lapse Video
2. Tap the menu on the back screen
3. Use GoPro Voice Commands:
Just like “Hey Siri”, “Ok Google”, and “Alexa”, you can use your voice to control your GoPro camera!
If you’re on an adventure, wearing gloves, have your hands on handlebars–whatever–and can’t fiddle with your action camera to start a recording, tell your GoPro what you want to do, and it obeys!
- “GoPro Start Timelapse“
- “GoPro Stop Timelapse“
Here’s a list of commands, and voice command capable cameras.
Voice Commands
- “GoPro Start Recording”
- “GoPro HiLight” (Adds a highlight tag while recording video). Capture Guide has secret “HiLight” tag commands:
- “That was sick!”
- “Oh shit!”
- “GoPro Stop Recording”
- “GoPro Take a Photo”
- “GoPro Shoot Burst”
- “GoPro Start Time Lapse”
- “GoPro Stop Time Lapse”
- “GoPro Video Mode”
- “GoPro Photo Mode”
- “GoPro Time Lapse Mode”
- “GoPro Burst Mode”
- “GoPro Turn Off”
Cameras that use voice commands:
- MAX
- HERO8 Black
- HERO7 (White, Silver, & Black)
- HERO6 Black
- Fusion
- HERO5 Black
- HERO5 Session
- HERO (2018)
- Remo
Time-lapse Options
Just like regular video mode, you have options for time-lapse recordings.
- RES (Resolution)
- INTR (Interval)
- FOV (Field of View)
1. RES (Resolution)
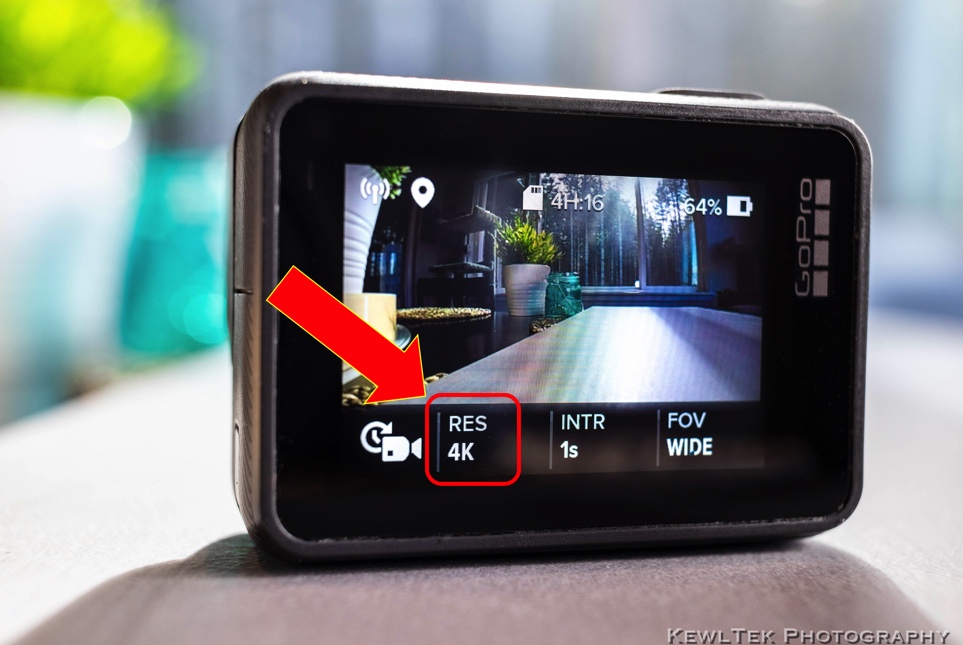
Resolution goes from 480p all the way up to 4K. If you select 4K or 2.7K (4:3) you’re restricted to a “Wide” field of view. If you want a less “wide” field of view, you have to select 1080p or below.
2. INTR (Interval)
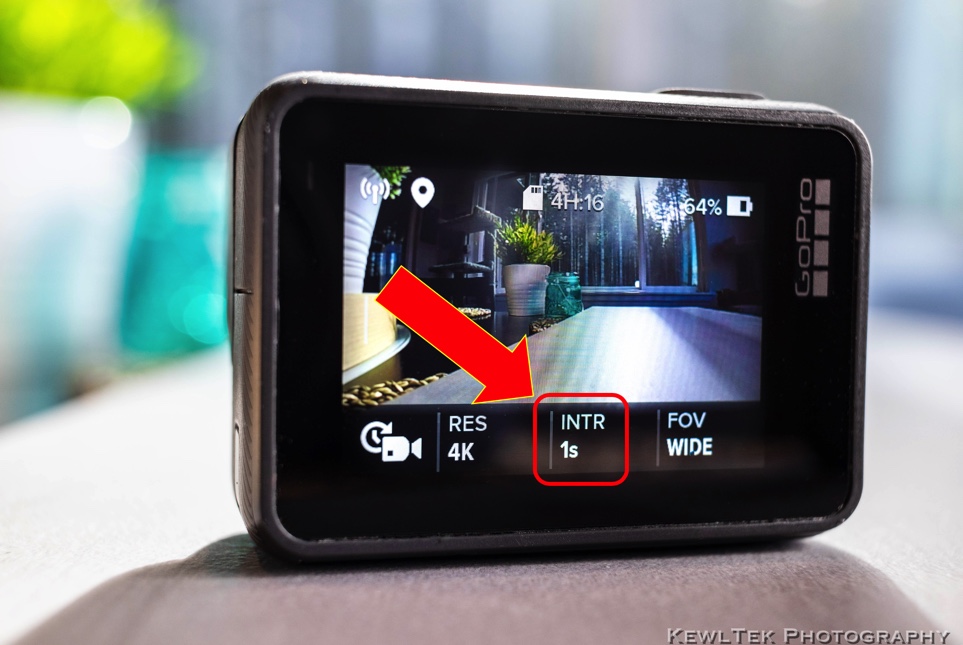
The interval (or “INTR” on the camera menu) lets you select the following intervals (in seconds) between captures: 60, 30, 10, 5, 2, 1, 0.5. The GoPro default is 1 second. So which interval should you use?
Shorter intervals give you “smoother” video. Adorama recommends the following:
- 1 Second
- Fast moving clouds
- Traffic
- 1 – 3 Seconds
- Sunsets
- Sunrises
- Slow moving clouds
- Crowds
- 15 – 30 Seconds
- Moving shadows
- Sun across sky (no clouds–wide angle)
- Construction projects
3. FOV (Field of View)
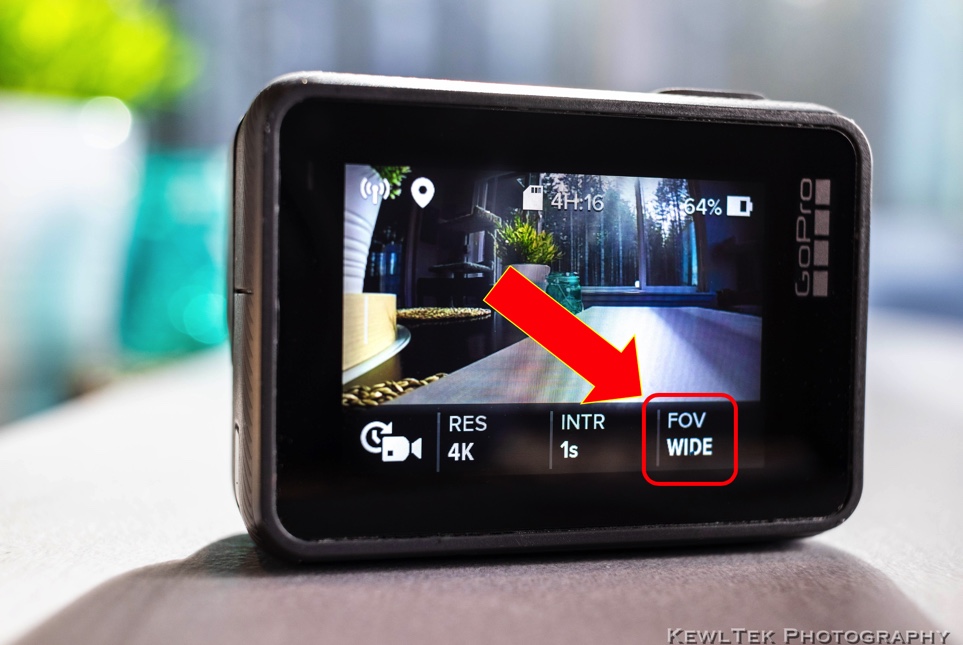
GoPro has several FOV angles like Superview (really wide), Wide, Medium, Linear, and Narrow. If you want a 4K or 2.7K (4:3) time-lapse video, you’re restricted to “WIDE”. To use the other FOV options, bump the resolution down to Full HD (1080p).
How long do you need to record?
Let’s say you want a 30 second time-lapse movie. If you use 5-second intervals, you need to record for 75 minutes. Here’s the break down:
- 30fps (frames per second), multiplied 30 seconds (the length of our video), gives you 900 frames
- Multiply 900 frames by 5 seconds (the interval)
- That’s 4500 seconds–when divided by 60, gives you 75 minutes
A 30 second time-lapse video with frames captured every 5 seconds, means you have to let your GoPro do its thing for 75 minutes (1 hour, 15 minutes).
Clouds and Rain Time-Lapse
Here’s another time-lapse I created simply by putting my GoPro in a window at home. The weather in the Pacific Northwest changes quickly, and I thought it would be fun to see in a time-lapse.
Earn Money With Your Time-Lapses
Do you have a small collection of time-lapse movies? Have you shared them on social media and gotten tons of “Likes”? Why not earn some money with them?
Here’s some time-lapse movies that people uploaded to Shutterstock, a stock photo website that sells photos, video clips, and time-lapses.
If you’ve got video clips on your hard drives, upload them to Shutterstock so they can earn money for you!
Conclusion
Now it’s your turn! Let me know what kind of camera you use to create your time-lapse movies in the description below! Or better yet–share links to your amazing time lapses in the comments! We’d love to see them!
What are you waiting for? Get out and create something! And remember to have fun!


![How to Photograph Waterfalls [And Get That “Misty” Look]](https://kewltekphotography.net/wp-content/uploads/2020/04/IMG_0388-1-768x512.jpg)