
15 Photography Composition Techniques (a beginners guide)
This post is a quick overview of 15 photography composition techniques, and the best part is, you don’t need a fancy camera to practice them! You can start using these tips today, no matter what kind of camera you have!
- Use The Rule of Thirds
- Add Breathing Room
- Have a Focal Point
- Simplify
- Change Your Point of View
- Show Scale
- Use Leading Lines
- Incorporate Patterns and Symmetry
- Find Frames Within Frames
- Create Depth
- Create Panoramas
- Remember Visual Weight and Compositional Balance
- Use Negative Space
- Remove Visual Distractions
- Tell a Story
Before composition can become truly useful for you, it helps to understand exposure, focus, and generally how your camera works. If you’re still new to those fundamentals, start with my 11 Essential Camera Settings Guide to learn how aperture, shutter speed, ISO, focus, and composition work together.
What is Composition?
Photography composition refers to everything that’s “in-frame” when you take a picture, including foreground elements, subject, and backgrounds. If it’s in your picture, it’s part of the composition.
When you “compose” a shot, you deliberately account for all those elements, and make conscious choices about how they’re arranged, either by moving them, or by moving you and your camera. A well-composed shot can evoke emotion, tell a story, or pull a viewer in and make them want to stay and discover the elements in your photo.
When you stop and think about all the in-frame elements before you click the shutter button, your results will speak for themselves.
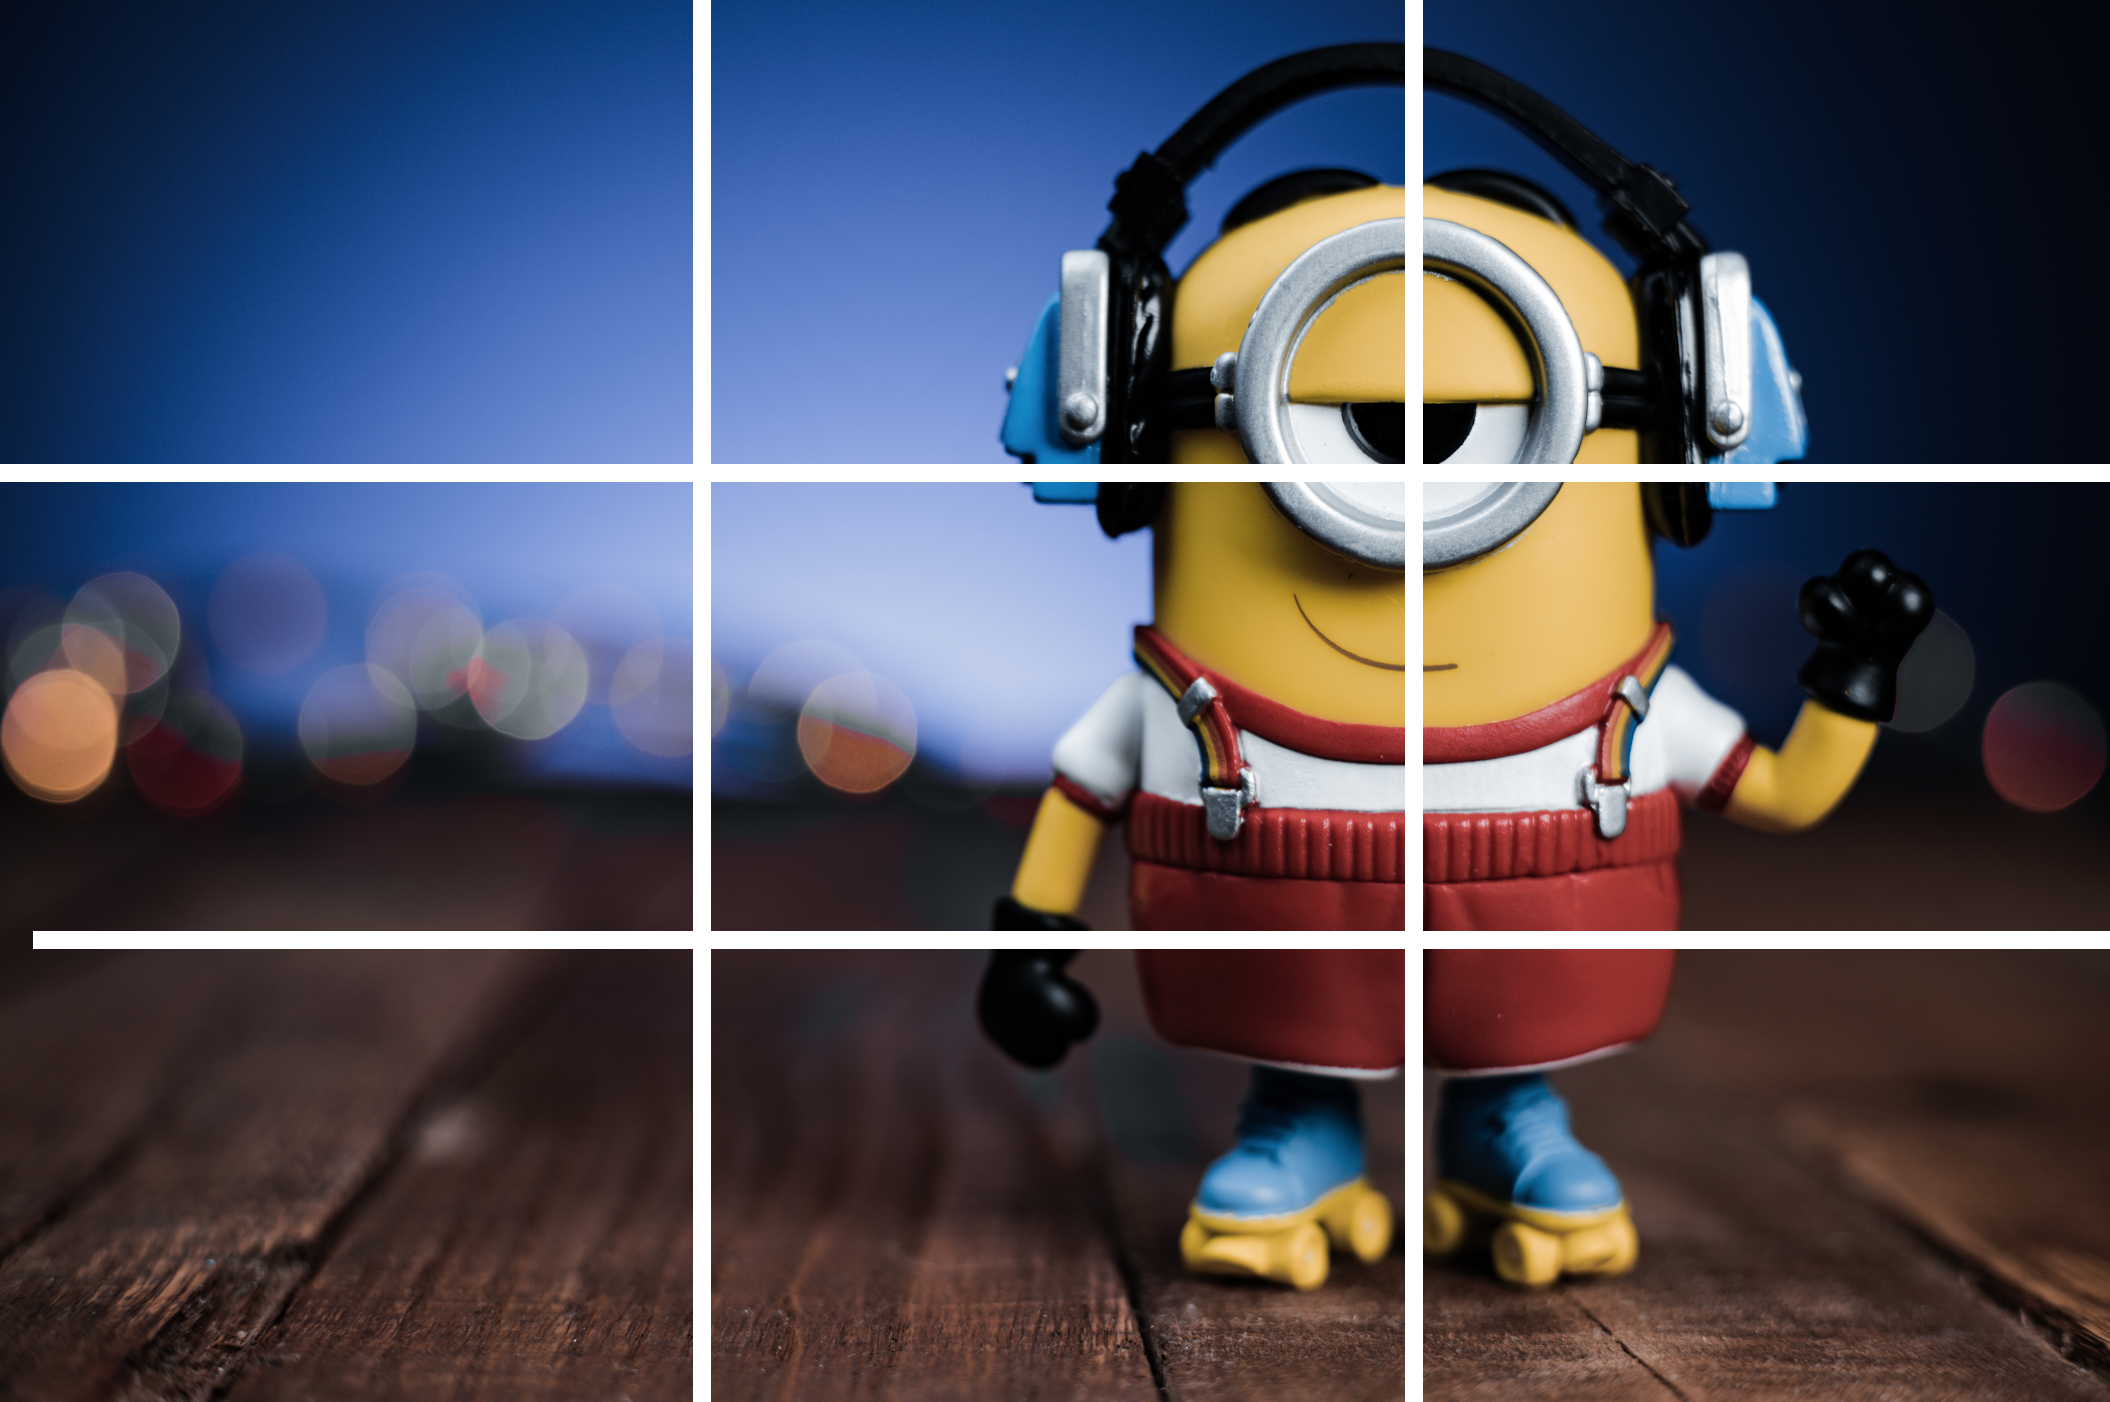
Use the Rule of Thirds
One of the first photography composition techniques people learn is the rule of thirds. Imagine a “tic-tac-toe” grid (two horizontal and two vertical lines) placed over your frame. Simply position your subject on one of the intersections of those lines.
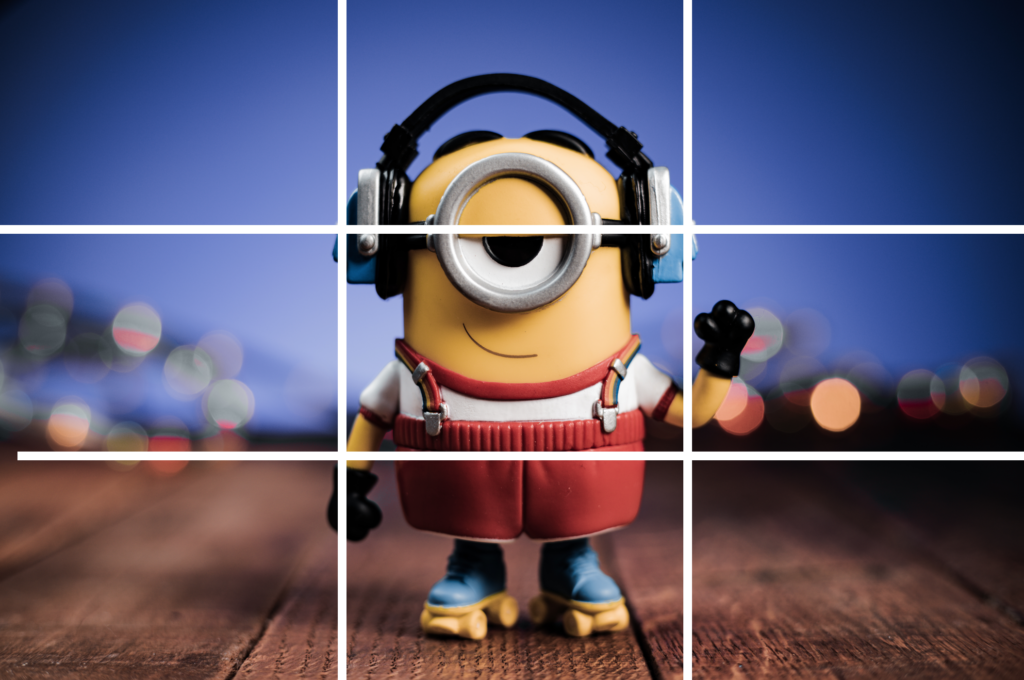
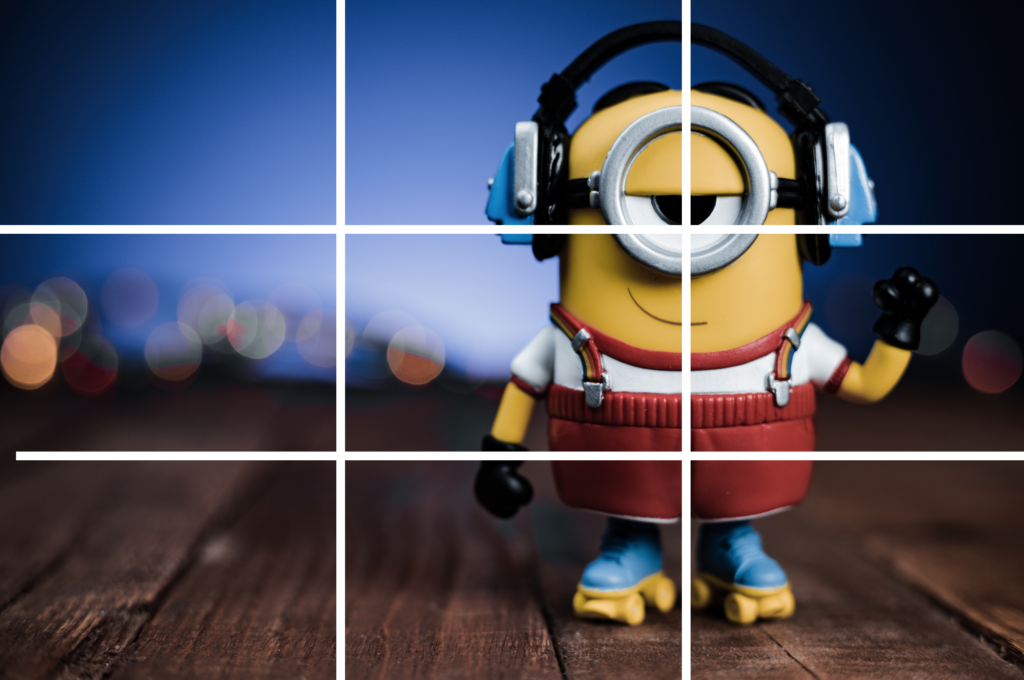
Most people start out taking snapshots of their subjects in the middle of the picture, like the photo of Stuart the Minion on the left. You’ll create more “artistic” images when you position subjects away from the center of the frame.
Add Breathing Room
When you follow the rule of thirds, your subject will usually be on the right or left of the frame. It’s important to leave some empty space in front of your subject to create a more balanced image.


If your subject looks to the right in your picture, make sure they’re positioned on the left-hand side of your frame. They’ll have “breathing room”, or empty space in front of them, within the frame. If they look right, and they’re on the right side of the frame, the photo will feel claustrophobic, and unbalanced.
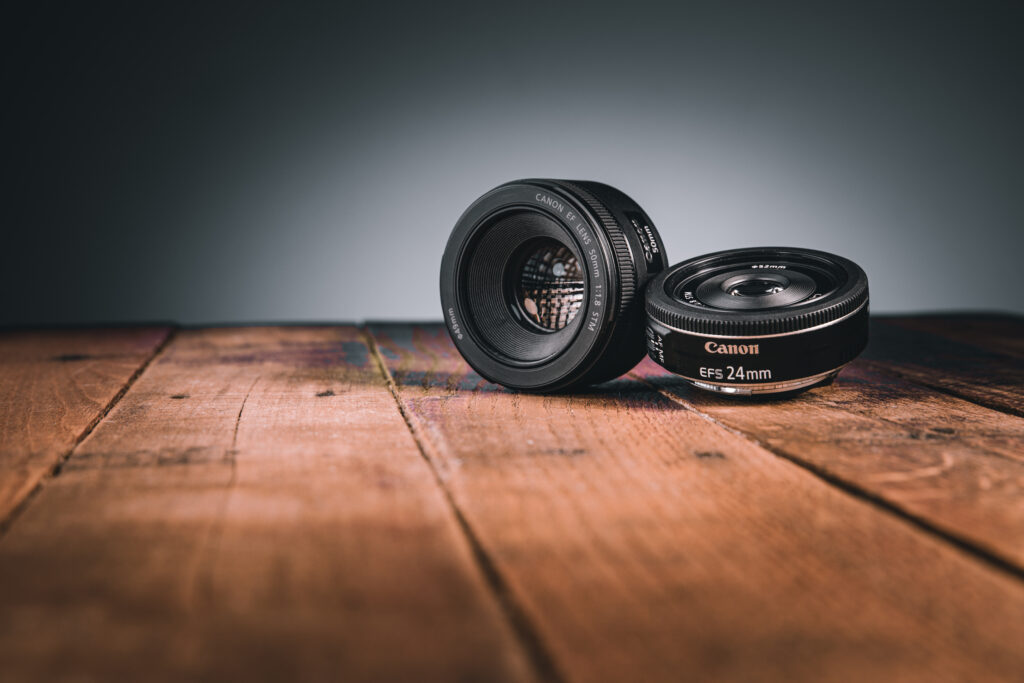
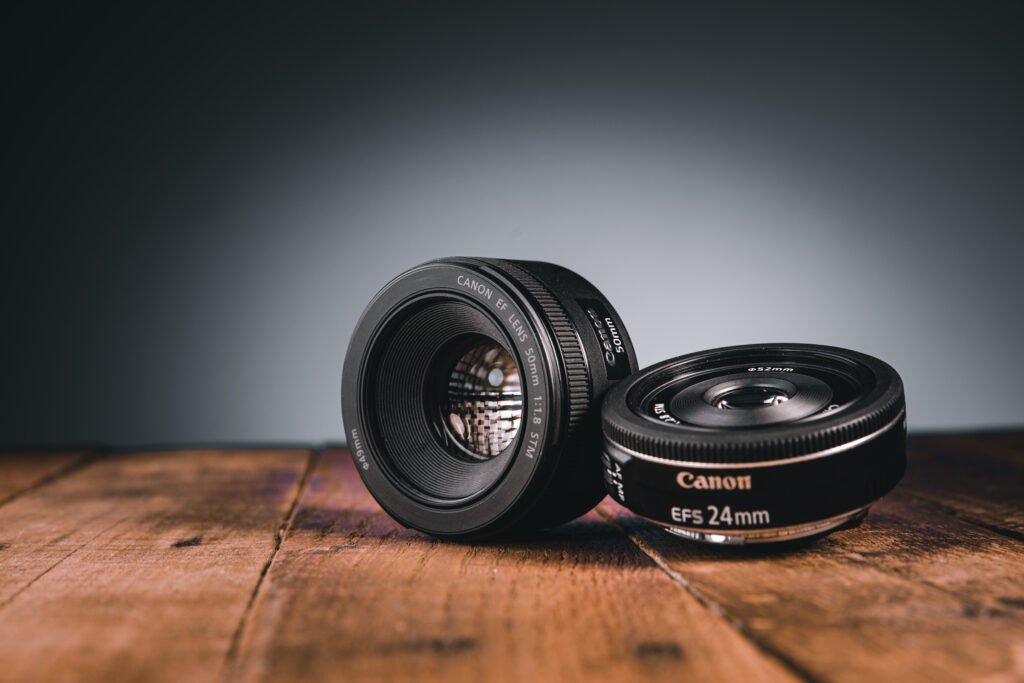
Have a Focal Point
An important photography composition technique is to have an obvious point of focus–or focal point. Depending on your scene, this can be straight forward, or difficult.
When you’re photographing a product in a controlled environment like a photo studio, the focal point will simply be the product. But when taking pictures of spectacular landscapes, it can be hard to see a specific point of focus.


The photo on the left is the Columbia River, taken from the Oregon side, looking over at Washington State. It’s “nice”, but nothing really jumps out and yells, “Look at me!”. The photo on the right is of Mt. Baker in Washington State, and taken from Cattle Point, in Victoria, BC, Canada. It’s similar to the river picture, but Mt. Baker is front and center, and is the obvious focal point of the image.
Make sure there’s something in your photo that draws the eye. Otherwise your eye might just disregard the scene as “background”.
A focal point can be something as simple as a flower, person, or structure. The trick is to include a point of focus that increases the visual interest in your composition.
Simplify
You’ve probably heard the saying, “Less is More“. In photography that saying holds true. As humans, we automatically try and make sense of things we see–to find patterns, or visualize a story.
When you photograph something, make sure there’s not a bunch of “visual clutter” around your subject. Lots of busy elements in your photo can cause confusion, and make you viewers ask, “What’s this a picture of?” Let your subject be the point of focus. When you simplify your photos, your viewers will “see” what you want to convey.

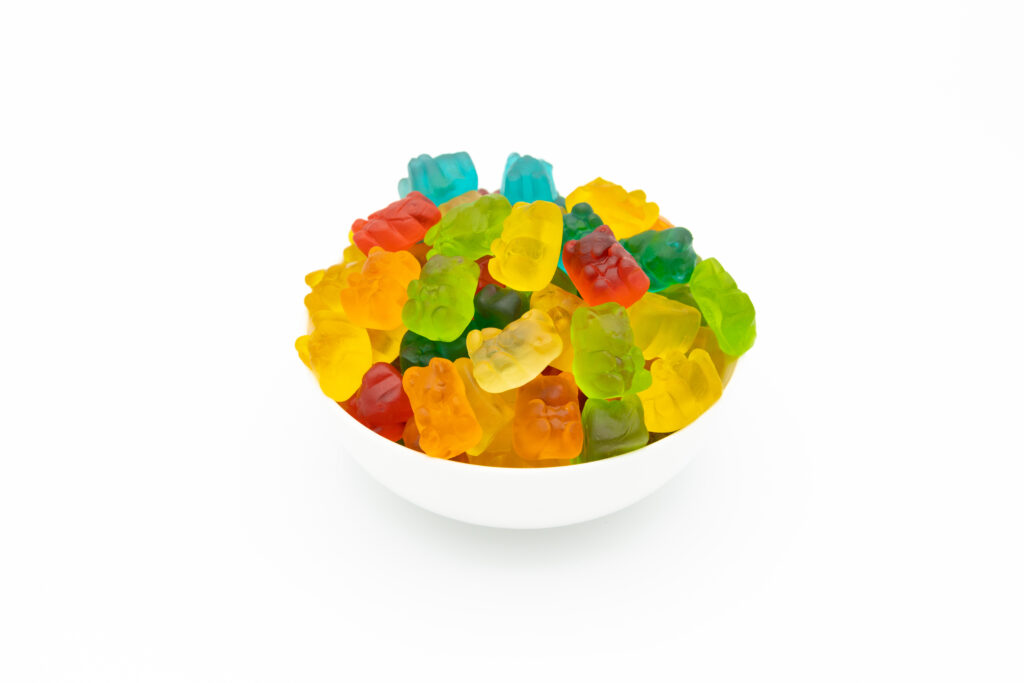
Here are two different images of the same subject. A froyo (frozen yogurt) shop owner needed pictures of toppings for his website. He wanted to showcase the toppings–not the tongs, containers, and other toppings. So, we simplified.
You can simplify your compositions a number of ways. Move your subject, or yourself to eliminate visual distractions from the frame. You can also remove literal “clutter” from around your subject to help simplify things.
Change Your Point of View
One way to improve your photos is to change your point of view. A quick way to do that is simply to zoom in. Your subject fills the frame, and distracting elements around them end up outside of the frame.
If you don’t have a zoom lens, then zoom with your feet; move closer to your subject, or have them move closer to you.
If the area around your subject is too visually distracting no matter how you move or zoom, then get closer to the ground, and look up at your subject. The sky makes for a cool background, and from a low angle, your subject will appear heroic and larger than life.
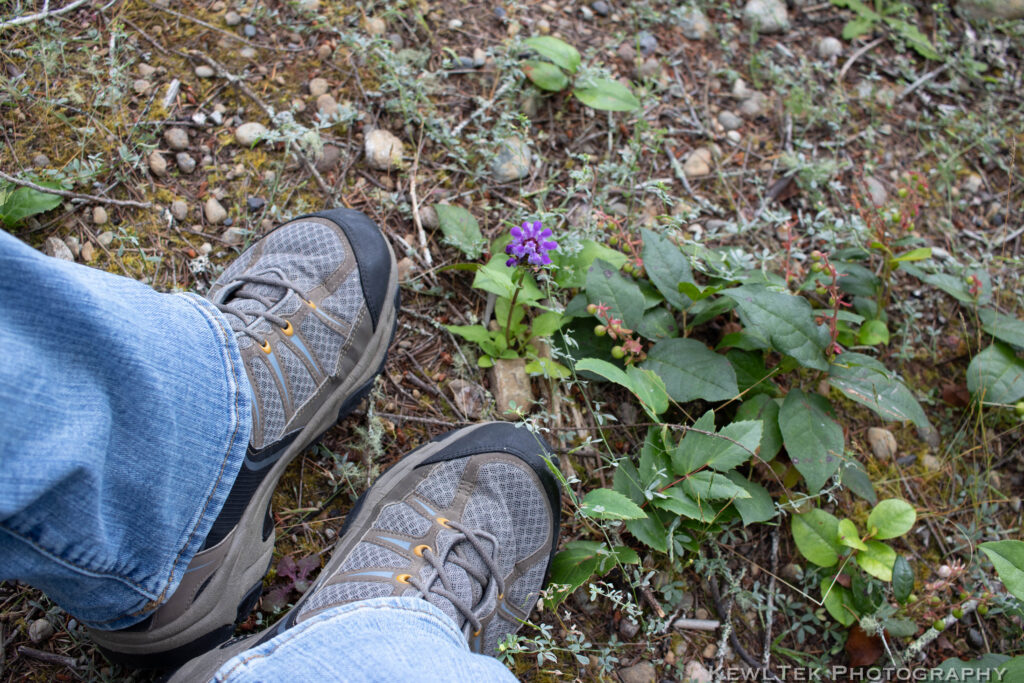
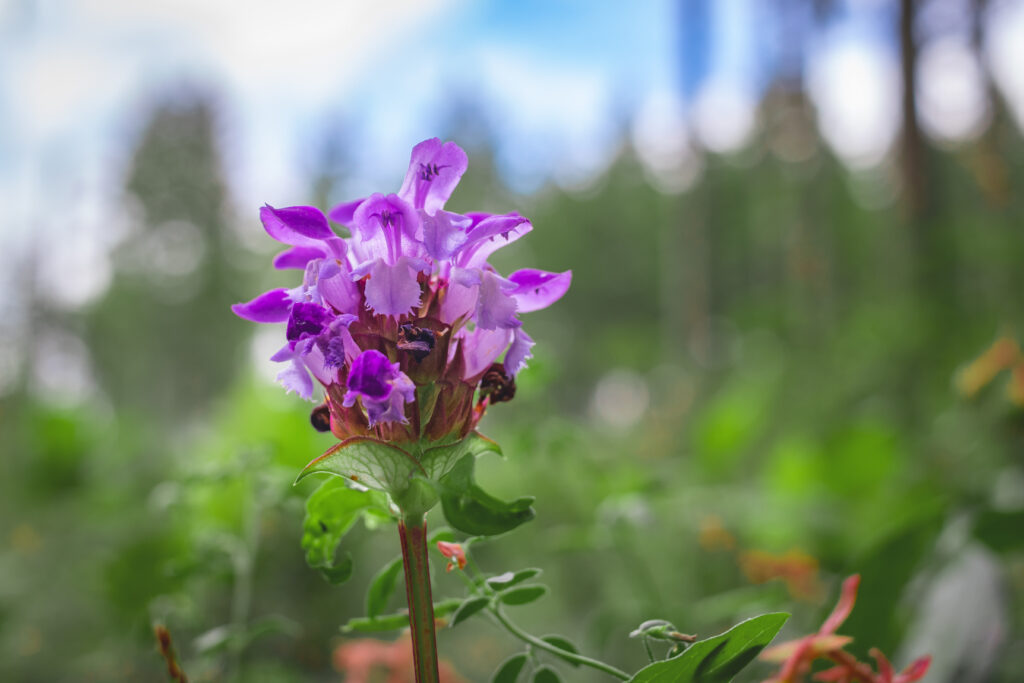
In this example, I saw a tiny Carpenters Herb flower during a walk in the woods. In the first photo, you can barely see it. But notice what happened when I positioned my camera near the ground, and changed my perspective!
When you change your perspective and point of view, you can control your background.
Show Scale
When the size of your subject is the point of the photo, such as a small object, or epic view of a vast mountain range, try to include something or someone in the frame of a known size.
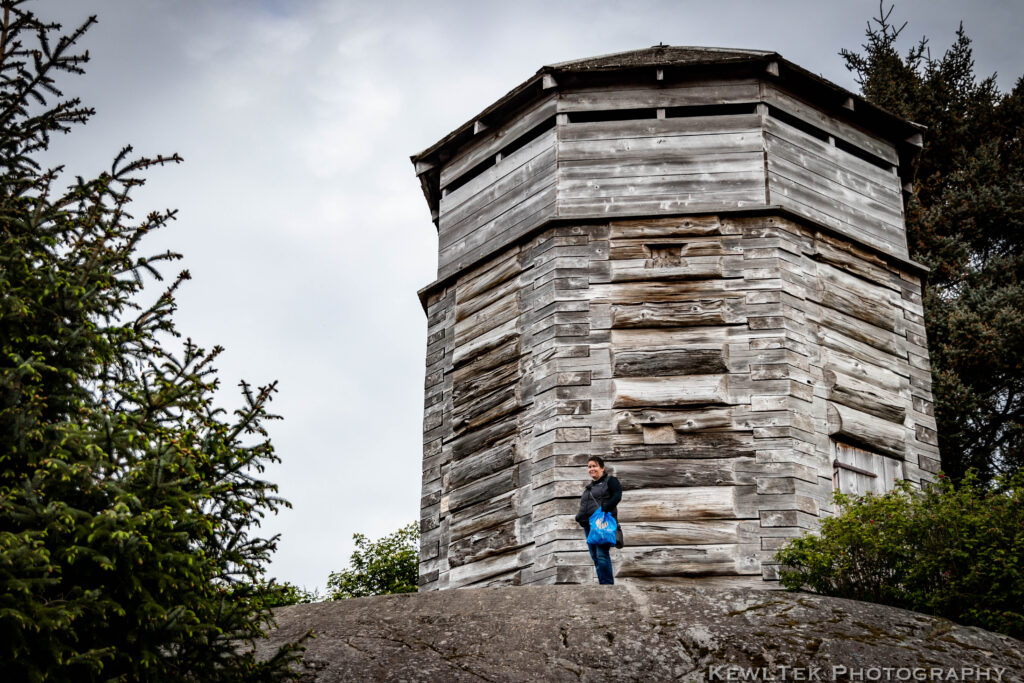
When photographing small objects, place other objects of known size nearby. On the other hand, if you’re taking photos of something big, (like this historic Russian blockhouse), have someone stand next to it, so your viewers can get a feel for how big it really is.
Familiar objects in the frame help your viewers “see” just how big, or small, your subject is in relation.
Use Leading Lines
Lines in photography are a major element of composition. Use lines in your images to lead your viewer’s eyes to the subject, create depth, or evoke emotion.
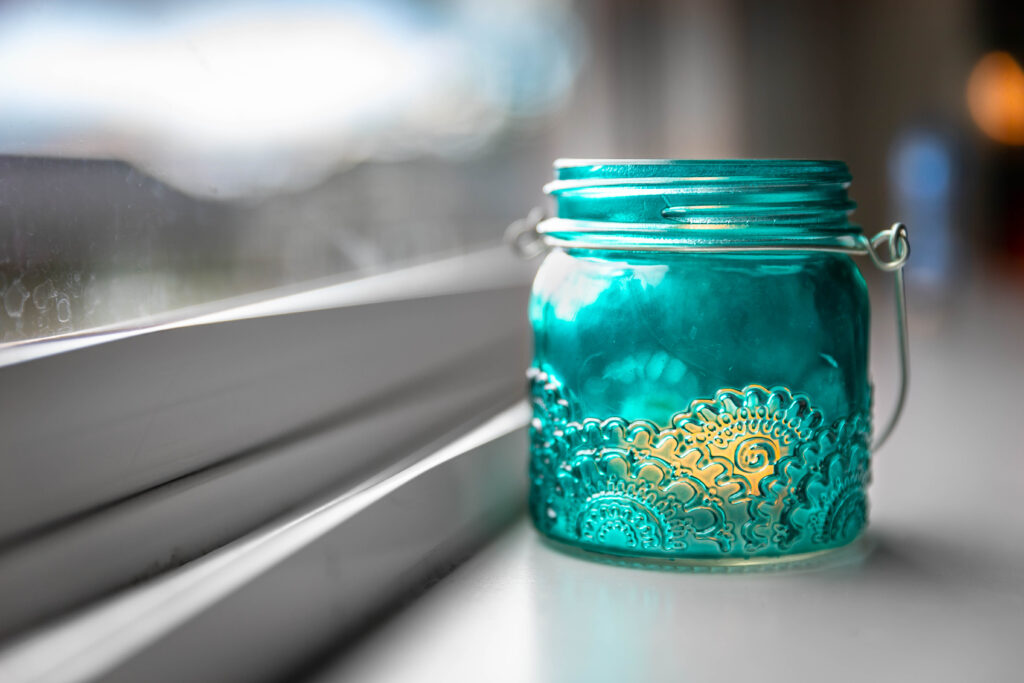
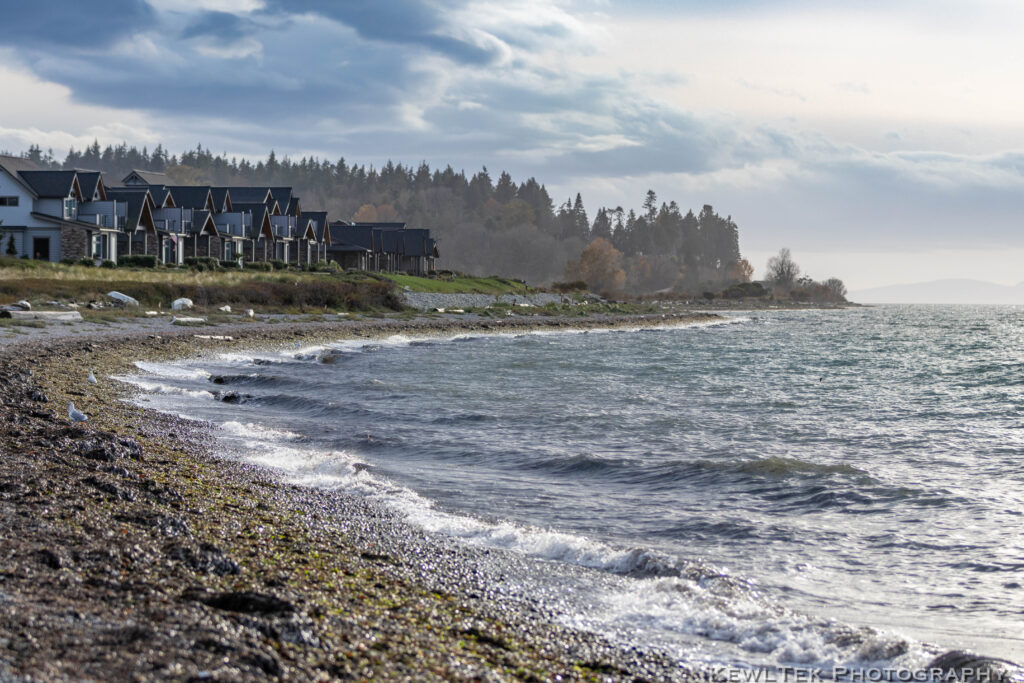
In the first image, the straight lines of the window frame lead your eye to the subject–a glass jar candle holder. In the second image, the shoreline creates a gentle S-curve that your eye follows off into the distance.
Here’s a list of different kinds of lines, and when to use them:
| Type of Lines | Reason To Use Them |
| Converging Parallel Lines | They create a “vanishing point”, and add a sense of depth to your image |
| Horizontal Lines | They provide a sense of “quiet”, and “peace” |
| Vertical Lines | They provide a sense of “growth” and “power” |
| Diagonal Lines | They add a dynamic sense of “movement” and “change” |
| Curved Lines | S-Curves add movement, grace, and flow, and can create a sense of depth |
Incorporate Patterns and Symmetry
Humans are always (subconsciously) on the lookout for patterns and things that make visual sense. A well thought out composition includes geometric shapes and patterns. Patterns can be subtle, and don’t have to be “in your face”.
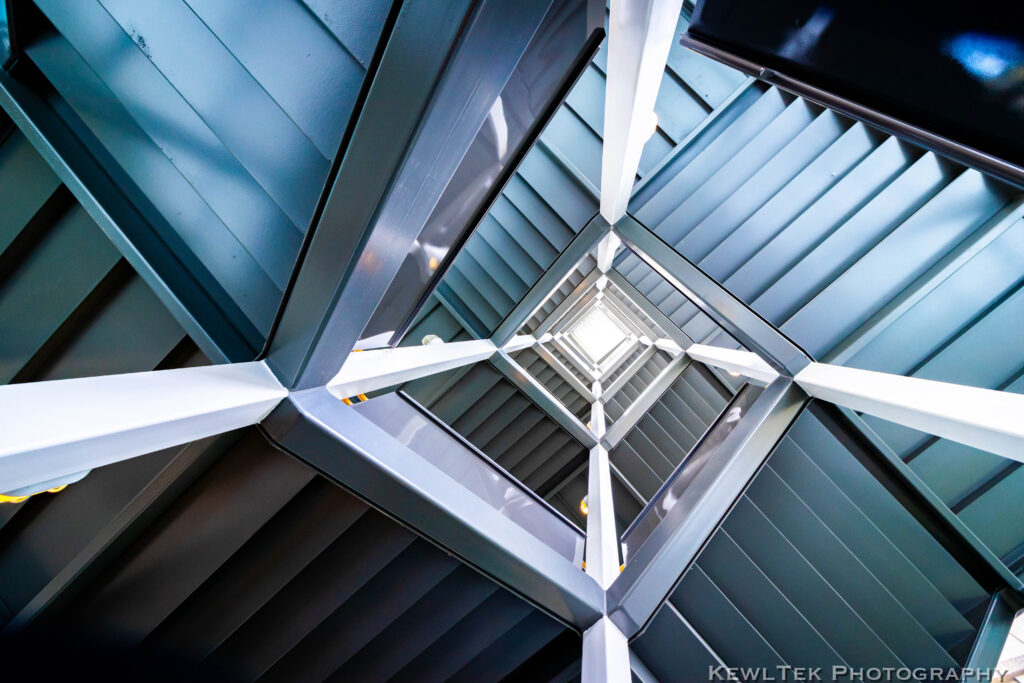

Experienced photographers visualize patterns and shapes, and incorporate them into compositions to accentuate and enhance images.

Patterns, shapes, and symmetry add a sense of balance and order to photos. But there is such thing as “too much of a good thing”. Too much symmetry can look almost “too” perfect–creating a sense of unease.
Find Frames within Frames
One creative way to build interesting compositions is to look for ways to create a frame within your frame. Taking pictures “through” other elements in your frame can add a lot of visual interest, and is simple to do.


The first picture was taken from an observation deck on a cruise ship. Notice how the railing and ceiling create a “frame”. The second picture is of a car speedometer, framed by the steering wheel.
Create Depth
Dynamic and interesting photos pull your viewers in, and make them want to stay a while to discover the details in your scene. We’ve touched on this already with leading lines–but a powerful way to pull your viewers in is through the use of “depth”. At first, that might sound unreasonable, given that a photo is two dimensional. But that’s the trick.

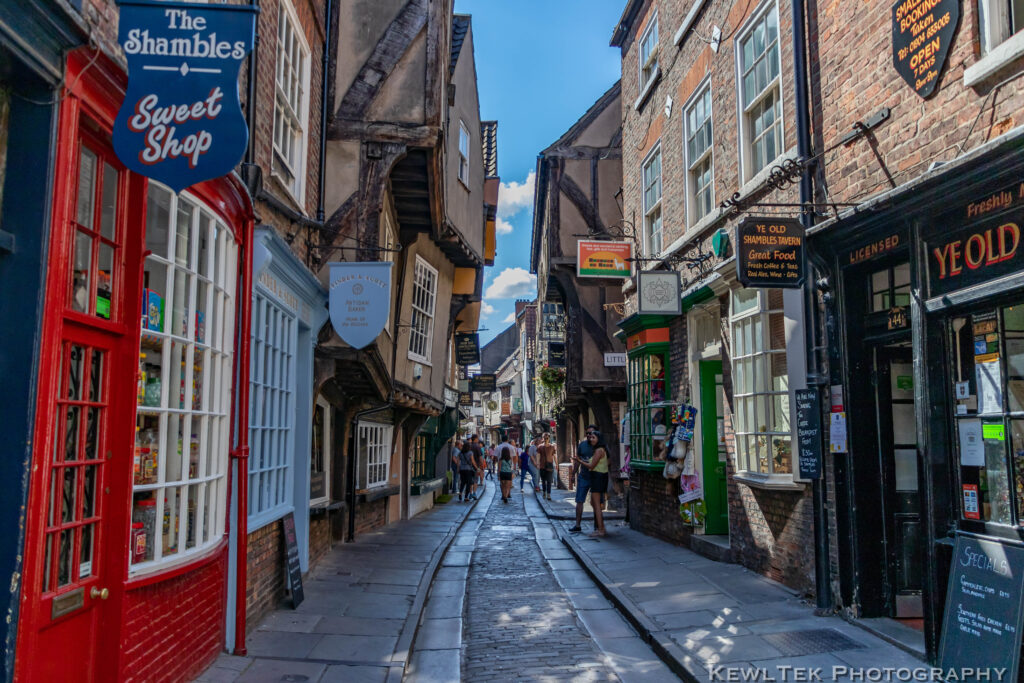
When you compose your shots, try think of ways to add a sense of depth to them. Use leading lines. Instead of pointing your camera head-on at a wall, move off to the side so the wall fades off in the distance. Incorporate elements in front of, and behind your subject to add a little bit of “story”. Foreground and background elements not only provide context around your subject, they also create a sense of depth–showing your viewer a piece of the larger world around them.
Create Panoramas
In the olden days before smartphones had this feature, photographers used to have to take multiple exposures of a scene and stitch them together in post-production to create wide-view, panoramic photographs.

These days, digital cameras and smartphones produce amazing panoramic shots in mere seconds. In fact you can even use fun “hacks” to make your subject to appear in multiple locations throughout your panorama.

Panoramas are cool, and they have their place. Just don’t overdo them.
Remember Visual Weight and Compositional Balance
Believe it or not, the elements in your photos have “visual weight”. If elements aren’t evenly distributed within the frame, your photo will feel unbalanced.
Photographic elements aren’t just physical things in your photos. They can also consist of shapes and colors.
The takeaway here is to remember that darker tones and colors tend to be “heavier” than lighter ones.
Use Negative Space
One photography composition technique is the intentional use of negative space, or the area in your frame that isn’t occupied by very much of anything. Advertisers love images with negative space where they can place “copy” (advertising text).
Negative space is similar to breathing room, in that it’s an area in your frame where your subject isn’t.
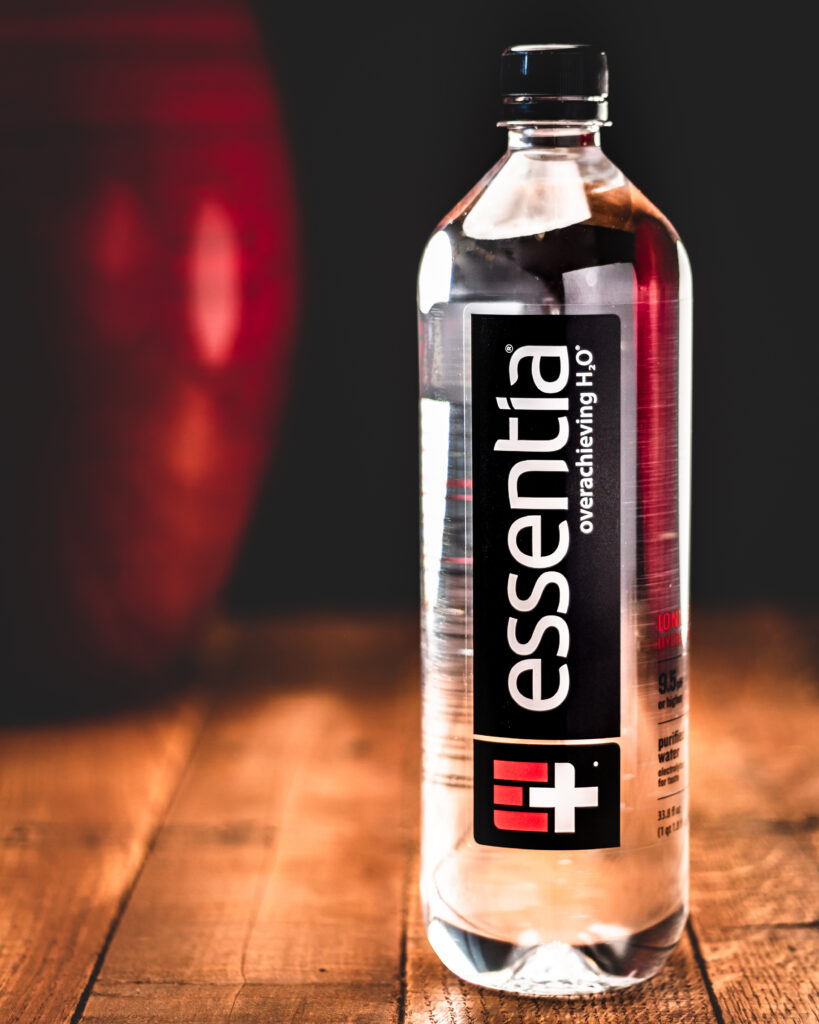

An image with a bunch of negative space can feel unbalanced. But if you plan to fill the negative space with copy, then it’s invaluable.
Remove Visual Distractions
A “visual distraction” is an element (or several) in your photo that aren’t your subject, but are so prominent, that they pull your viewer’s attention away from your subject–thereby distracting your viewer.
When you compose your shots, think about the elements in your frame, and how they might affect the overall “look” and “feel” of your image. Will a light pole sprouting out of your subject’s head look appealing? What about a big trash dumpster with garbage and trash all over the ground around it just to the left of your beautiful sports car?
One solution is to “Change Your Point of View”. Position your subject or yourself in a way that reduces or eliminates objects in your frame that will distract from your main subject.
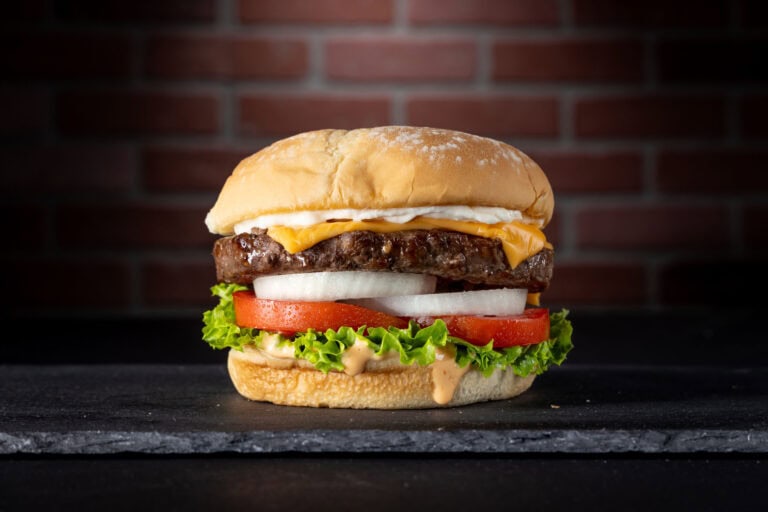
Tell a Story
Great photos tell a story. The elements around your subject should harmonize, and provide context. Telling a visual story is one of the most important photography composition techniques.
Think about how a recipe is put together. Chefs bring together all sorts of ingredients, seasonings, and tools to create their culinary masterpieces. Everything from the environment where the food is prepared, to individual ingredients–it all comes together in the final dish.

When you take pictures, try and think about elements that might add to your story. What will reinforce the idea you’re trying to convey? A photo of carrot cake cupcakes is a nice picture. But what if you photographed the cupcakes surrounded by some of the ingredients and tools that were used to prepare them?
Try to incorporate things in frame that when combined, work together to tell a visual story.
Conclusion
Now that you know all the rules, go out and break them! Photography is an art form, and can’t be constrained to a set of “rules”. If everyone created photos using formulaic recipes, everyone’s images would look roughly the same. Learn the “rules”, but grow and develop your own style as you go.
Now it’s your turn! Drop a comment below and let me know what your favorite compositional techniques are, and how you use them! Post a link to your social media page so we can see the awesome images you created!


Thank you
You’re welcome! I’m glad the article helped!