
How I Created This Floating Cookies Photo (With Kabob Sticks + Photoshop)

Simple DIY photo magic you can do at home — no fancy rigs required.

Most people see a shot like this — perfectly suspended chocolate chip cookies mid-air — and assume it was done with expensive equipment, elaborate rigs, or high-end compositing tools.
But the truth?
This entire photo was created in under an hour using:
- a plate
- a $5 pack of kabob sticks
- a blue poster board
- a flash/strobe/light source
- …and some Photoshop layer magic
Yep. That’s it.
And you can absolutely recreate this at home.
This tutorial breaks down every step, including setup, lighting, how I photographed each cookie, and how the final composite was built.
1. Concept: Make Gravity Optional
Levitation photography looks complicated — which is why it performs so well on blogs, Pinterest, and Instagram.
But the concept is incredibly simple:
Photograph each cookie separately, supported by something that can be edited out later — then combine the images into one seamless scene.
The secret isn’t exotic gear.
It’s control, neat lighting, and attention to variation.
2. The Gear I Used
 The Gear I Used For This Shot:
- Camera: Canon EOS R [Amazon] [Adorama (Used; All conditions)]
- Lens: Canon 24-105mm f/4 [Amazon] [Adorama]
- Tripod: Benro A2573FS6PRO [Amazon] [Adorama]
- Tripod Head: Manfrotto 3-Way Geared Head [Amazon] [Adorama]
- Lighting: Godox AD600Pro (x1)
- Accessories: Blue Poster Board, White Foam Core Board, Marble Print Contact Paper, Wooden Skewers
(My daughter made the cookies).
Software
- Adobe Photoshop (or anything with layers + masks)
3. Build the Set (Super Simple)
Here’s the basic setup:
- Place your surface (marble slab, kitchen counter, or fake surface) on your table.
- My “surface” was just a piece of white foam core, with some marble print contact paper stuck to it. Super simple and cheap–and it looks like a marble countertop!
- Add a plate, then position a small foam wedge under a couple of cookies to lift them visually.
- Clamp or tape the blue poster board behind your surface so it fills the background.
- Position your light source to camera-left, angled slightly down.
How can you tell the light position?
- Look at the plate’s shadow on the surface.
- Look at the bright highlight on the upper-left of the poster board.
- Look at the gentle gradient darkening toward the lower right.
This shot is basically a lighting class disguised as cookies.
4. Photograph the “Base Plate”
Before you photograph any floating cookies, photograph the clean scene:
- plate
- background
- static cookies
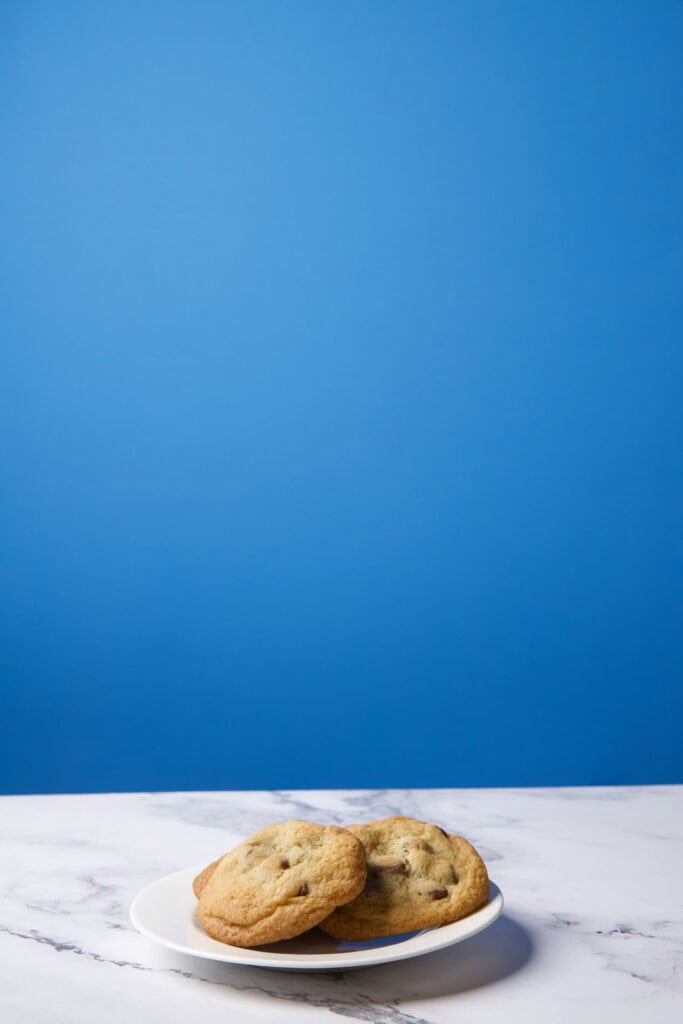
This becomes your foundational layer in Photoshop.
5. Skewer Those Cookies (The Part Everyone Loves)
This is where the magic happens.
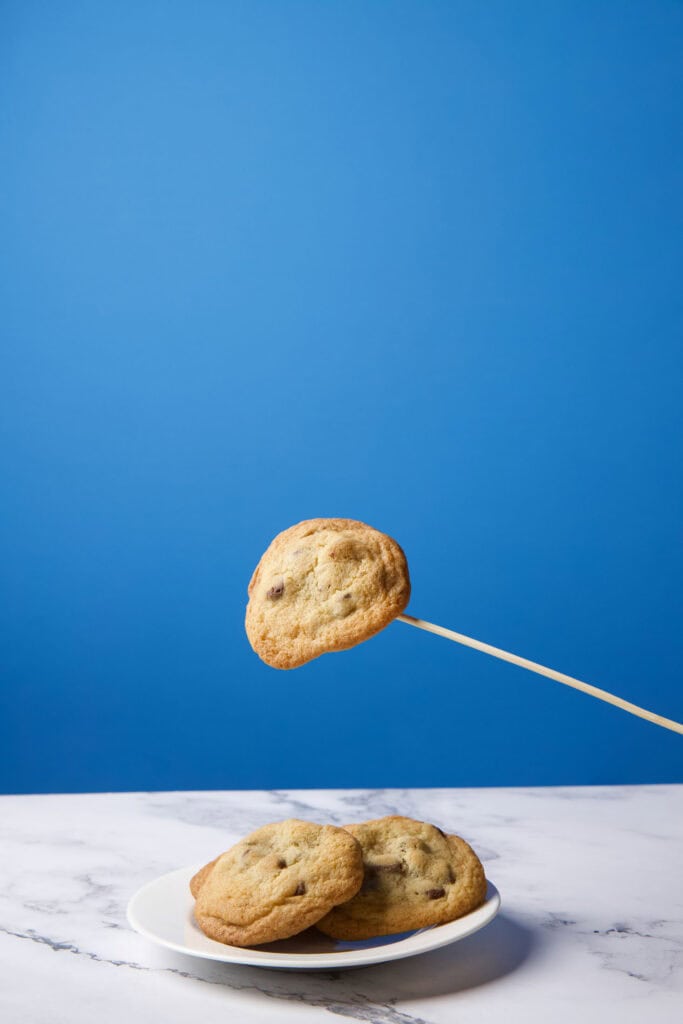
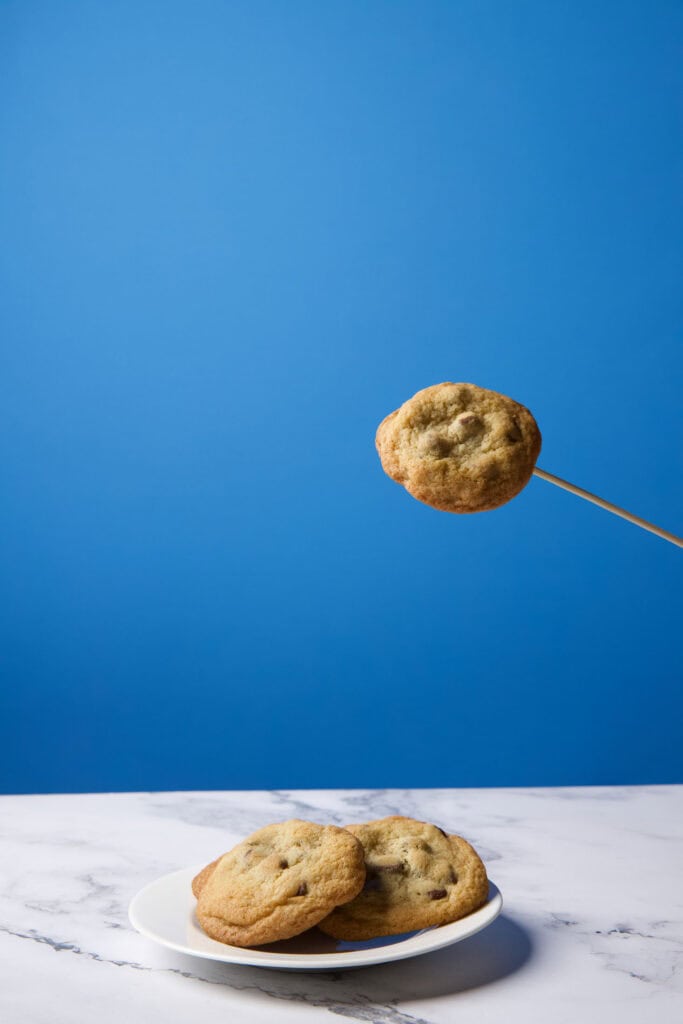

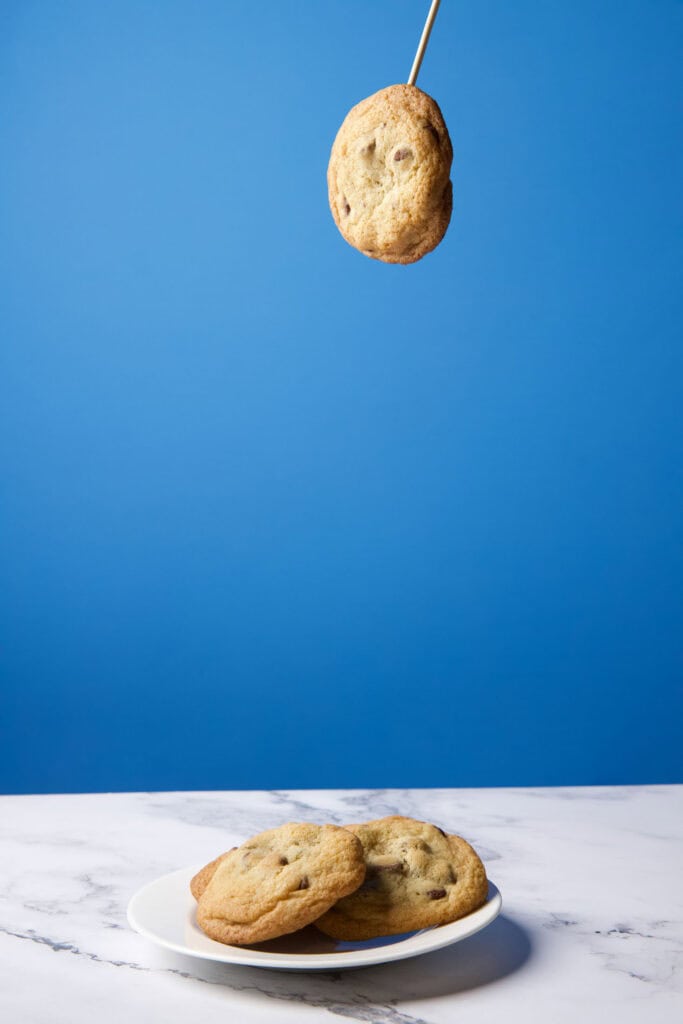
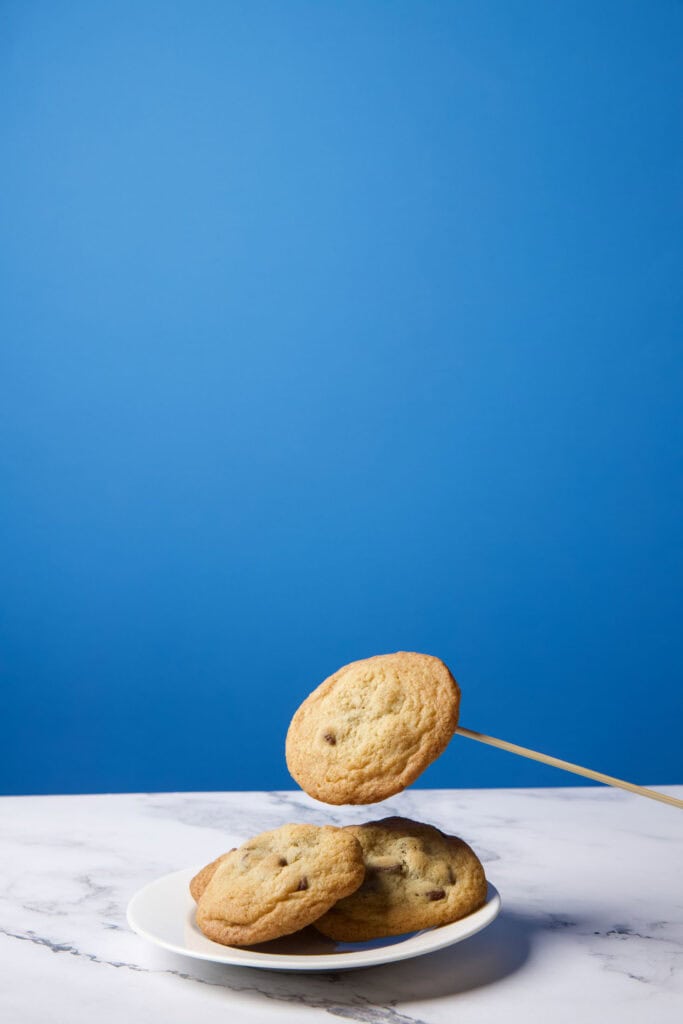

Take a wooden kabob stick and:
- Skewer a cookie.
- Hold it above the plate at a believable height.
- Take a photo.
- Change angle.
- Take a photo again.
IMPORTANT:
Don’t be lazy and reuse the same cookie 10 times. People subconsciously notice repetition.
Using different cookies for different positions makes the final composite look organic instead of “pasted.” Repeat until you’ve photographed enough floating cookies to build your scene.
I captured about 9 frames of “floating cookies” in different positions. In the end, I only used 6 of them.
6. Bring Everything Into Photoshop
Here’s the workflow:
A. Start with your base plate
Drop the static plate shot at the bottom of your layer stack.
B. Add each cookie as its own layer
Import your cookie shots one by one.
C. Mask out the kabob stick and your hand
Quick Selection
→ Layer Mask
→ Soft brush to refine
Boom. Floating cookie.
D. Move each cookie into position
Rotate.
Scale.
Arrange.
Make sure:
- no two cookies have identical shadows
- shapes vary
- spacing feels natural
E. Feather edges slightly
A 1–2 px feather often blends edges perfectly without looking fake.
F. Add a subtle shadow if needed
A soft, low-opacity brush under the cookies ties them into the scene.
You’re not painting realism — you’re painting believability.
7. Build a Composition With Rhythm
Good levitation shots follow visual flow:
- A tall vertical “stack” of cookies
- A cluster at the bottom
- Diagonal or arc-shaped motion
Your final image should feel like you caught the moment right before the cookies land.
That sense of motion frozen in time is what makes this shot pop.
8. Final Color/Tone Polish
A few small touches finish it off:
- slight contrast boost
- gentle vignette (optional)
- warm or cool color correction
- sharpening on the cookies’ edges
And just like that — you’ve created a commercial-style floating cookie photo from nothing more than some simple props.
9. What Makes This Shot Work So Well
Here’s why people LOVE this technique:
✔ It looks impossible
Suspended cookies are inherently eye-catching.
✔ It’s incredibly easy
No special gear. No studio. No money.
✔ The Photoshop work is satisfying
Removing kabob sticks = magic trick reveal dopamine.
✔ It’s repeatable
Anyone can do this.
✔ It uses high-value photography concepts
- lighting
- depth
- compositing
- variation
- visual flow
10. Final Thoughts
This entire project — setup, photo captures, and editing — took less than an hour.
I created this post because this is the kind of tutorial I personally wish existed online years ago. Photos like this are the type of content that’s fun and satisfying to create.
It’s simple.
It’s clever.
It’s photogenic.
And it’s fun.


![How to Photograph Waterfalls [And Get That “Misty” Look]](https://kewltekphotography.net/wp-content/uploads/2020/04/IMG_0388-1-768x512.jpg)