Your first step towards mastering the technical and creative aspects of photography starts with learning the basic settings and functions on your camera. Getting to know your Canon camera is important, because button and dial layouts vary between different Canon EOS models. Canon’s advanced cameras have controls that aren’t on basic models, but their layout is very similar. Let’s look at what you need to know.
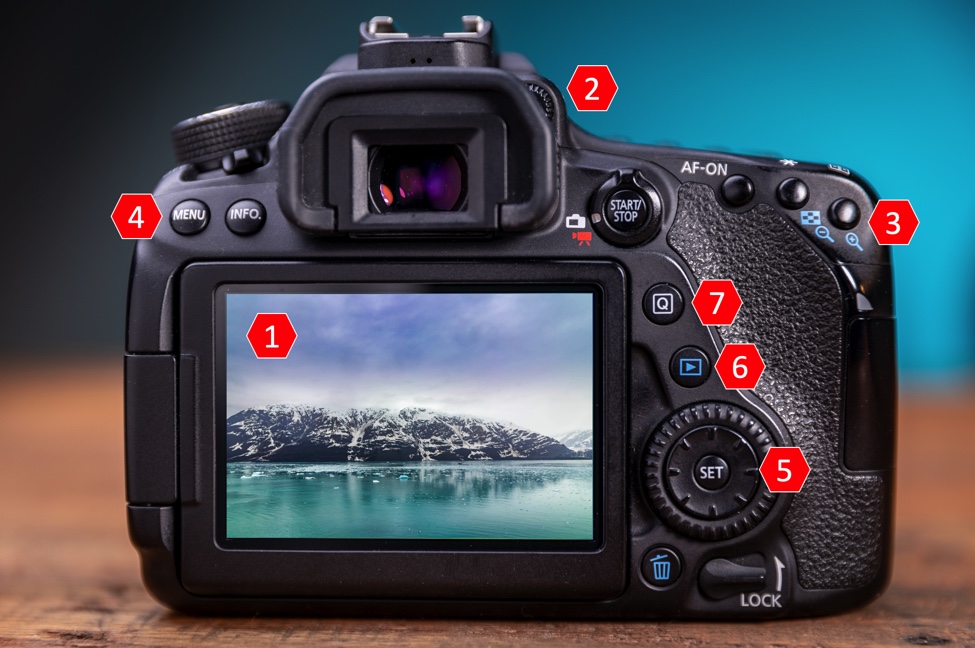
1 – LCD Screen
The LCD screen is extremely useful and can be used to compose shots, review photos, navigate menus, and view/change settings. Many Canon DSLRs have touchscreen and articulating LCD screens.
2 – Diopter Adjustment
If you wear glasses, but don’t want to when shooting, use this control to adjust the viewfinder for your vision. First, use autofocus to focus on a subject, then rotate the diopter wheel until your subject is sharp in the viewfinder.
3 – Zoom Buttons
These buttons are either next to the LCD screen or near the thumbplate on the back of your camera, depending on the model. Use them to zoom in and out of images during playback and Live View.
4 – Menu Button
Canon cameras offer a wide range of settings, features, and customization options. Press the Menu button to see the main menu options on your rear LCD. Explore the sub-menus to find the settings you need.
5 – Cross keys / D-pad
Depending on your camera model, you’ll either have cross keys or a D-pad. Use them to navigate menus and settings if your camera doesn’t have a touchscreen LCD. Some cameras also have a thumbwheel.
6 – Playback Button
Press this button when you want to review the images you’ve captured. Your photos will be displayed on the rear LCD screen. Use the cross keys, D-pad or touchscreen LCD to scroll through your images.
7 – Quick Menu
Canon cameras have a “Q” button (short for “Quick Menu”). Like the name implies, you can access your most commonly used settings very quickly with this control. Use it to change settings without wading through the main menu and sub-menus.
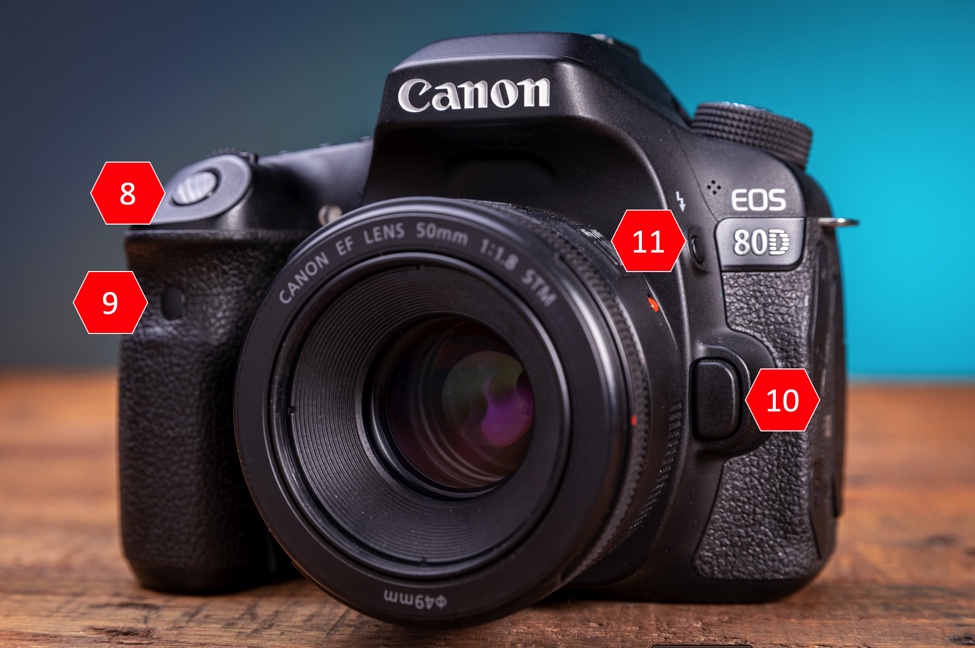
8 – Shutter Button
The shutter button releases the shutter and takes pictures. Half-press the button to activate autofocus, and fully press to take the photo.
9 – Infrared Sensor
The IR sensor on the front of your Canon DSLR lets you take pictures or start and stop video recordings using an infrared remote. You can also take pictures with a cable remote that plugs into a port on the side.
10- Lens release button
When you attach a lens to a camera, it stays locked in place so it doesn’t fall off. Pressing the lens release button unlocks your lens so you can twist and remove it.
11 – Flash button
Press the flash button to activate the pop-up flash. The button is on the top of some cameras, and on others, it’s to the left of the viewfinder just below the flash.
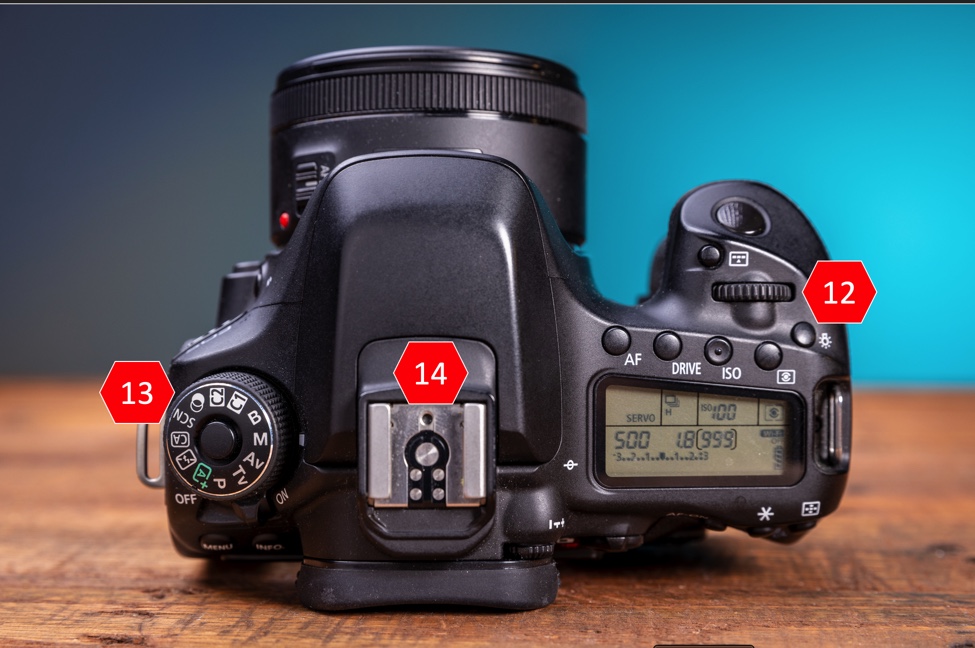
12 – Main dial
Use this dial to adjust settings like shutter speed and aperture while you’re shooting. The settings you change with the main dial depend on what “mode” your camera is in.
13 – Mode dial
Use the Mode dial to select different shooting modes. Modes range from fully automatic and semi-automatic (where you control 95% of settings), to manual mode, where you control everything. You can read more about camera modes here: 10 Canon Camera Modes (and why you need them).
14 – Hotshoe
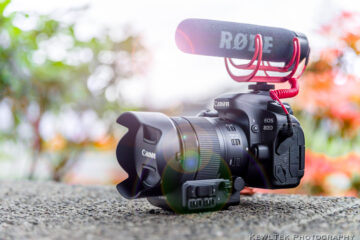
The hotshoe (or “hot shoe”) is a mounting point on top of your camera. You use the hotshoe to attach accessories like wireless flash triggers, speedlights, flash guns, microphones, etc., to your camera.
Conclusion
Take some time and get to know your Canon camera. Your confidence will improve once you understand what the buttons and dials are for. Plus, you’ll know how to access different settings when you need them.
What kind of Canon camera do you have? Are the buttons and dials laid out like mine? Let me know in the comments!

0 Comments